Media | Articles
The mouse-infested truck, Part 2: Warning … This is disgusting
Last week, I described closing on the truck deal of the century: For $2000, I snagged the work truck from my former engineering job—a 2008 Chevy Silverado 3500HD dually with the Duramax diesel engine and Allison six-speed automatic transmission. And, to wrap it in a really sounds-too-good-to-be-true bow, it had 28,000 miles on it.
But there was, as they say, “a catch,” and it was a pretty big one—the truck was a stinking hive of mouse-infested filth so strong that the aroma could stun a maggot at 300 feet. You could see stink waves emanating from it like from Pepe Le Pew’s tail in those old Warner Brothers cartoons. Opening it, getting in it, and driving it was an act of serious intestinal fortitude.
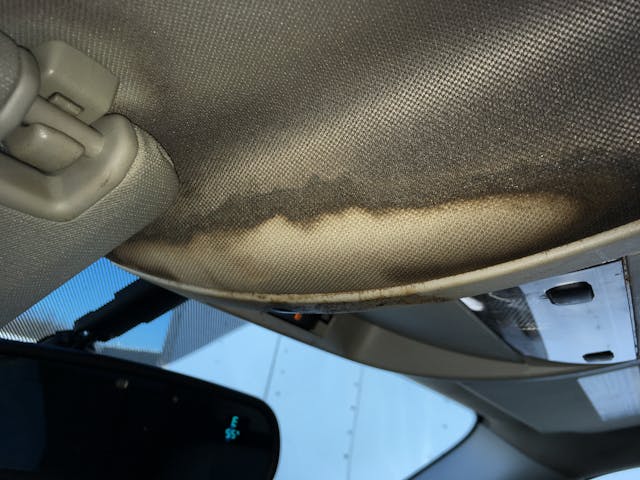
Although mouse contamination is like rust, in that what you see is likely only the tip of the iceberg, it was obvious that the mother lodes were in two primary locations. The first was the headliner, which was not only stained but literally had brown liquid oozing from it. The second was the heater box, from which mouse nesting materials and an odor that would gag a vulture would fly when the fan was turned on.
But, hey, two grand, right? Come on. You’d totally roll the dice on this too, wouldn’t you? Plus, the truck was running and had been regularly exercised, and the contamination, particularly the concentration in the headliner, had ramped up relatively quickly. So it was my hope that the problem really was largely isolated to those two locations and not pervasive like you’d find in a vehicle that had been sitting in a barn or a field for decades.
My basic strategy was this:
Marketplace
Buy and sell classics with confidence
- Remove the mother lodes of contamination.
- Clean or replace anything they touched with enzyme-based cleaner.
- Follow up with treatment of the entire interior, using a consumer-quality ozone generator.
- Keep the expectations realistic and the scope manageable.
I attacked the headliner first.
WARNING: What follows are photos that are genuinely disgusting. Don’t read this within two hours of a meal. You have been warned. (Yo, Rob. That cover photo. They’re already running for the exits.)
From the uneven staining of the headliner, it was likely that there were pockets of mouse deposits above it, and that the unspeakably disgusting ones from which brown goo was running were the ones with the highest concentrations. That turned out to be true, and maybe that academic description will help prevent one of you from going into shock if you ever need to do this, but it doesn’t really fully describe the horror of what I saw.

First, let me say that before venturing into the headliner removal, I read up on Hantavirus (a rodent-borne virus that can cause Hantavirus Pulmonary Syndrome, or HPS, in humans) and learned that there was only one documented case in Massachusetts … in 1992, likely contracted in another state. So, yes, I wore a mask and gloves, I didn’t feel it required a full Level A hazmat suit.
While this work was gross, from a technical standpoint it was pretty easy. Removing the truck’s headliner was nearly trivial. It’s not upholstered in place as headliners are on many vintage cars; it’s just a big form-fitted fiberglass, foam, and cloth assembly held in place by the visors, grab handles, shoulder harness hangers, map lights, and a few snap-in clips. Undo the things holding it in, and then pull it out. Done.
I began by undoing the dome light panel above the rear seat. As it happened, this eased me into the filth of the repair, and photo-wise, it’ll do the same thing for you. (Why am I reminded of that old awful vaudeville joke, “Your mother’s on the roof?” that Henny Youngman used to tell?).
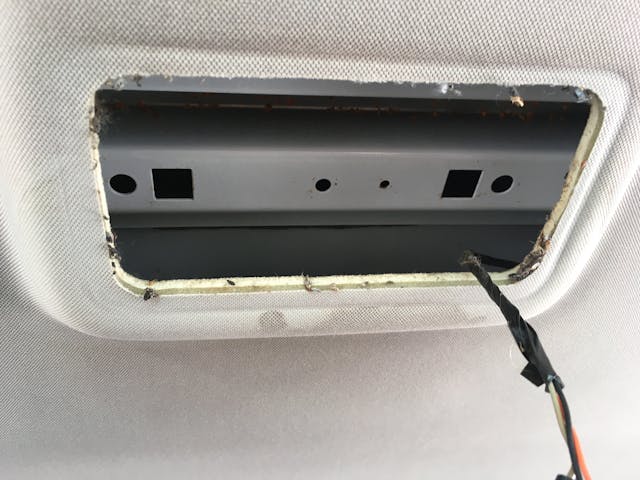
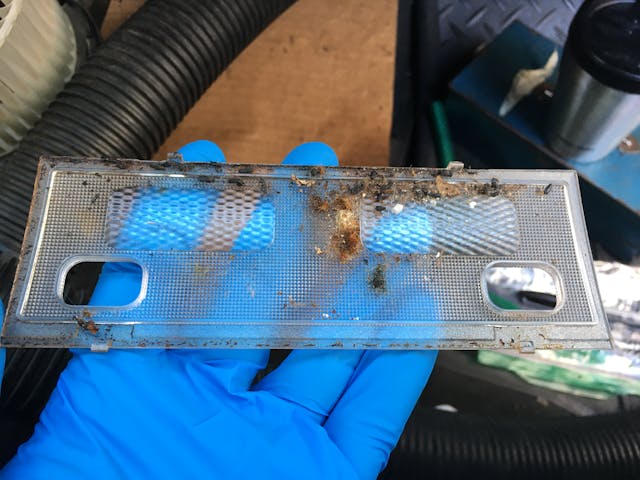
OK. You ready? I wasn’t.
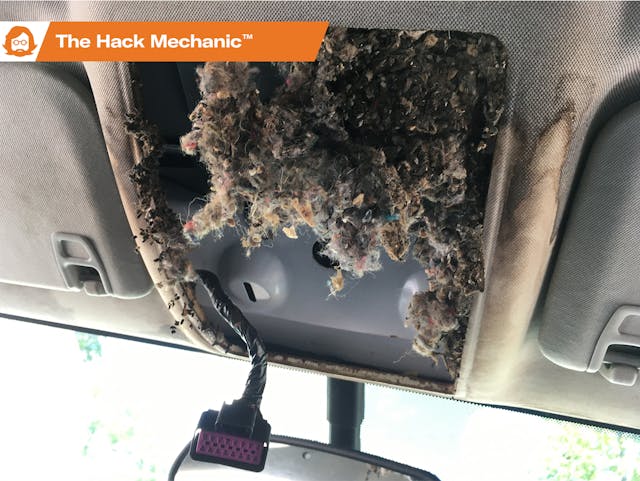
I undid the front map light panel, and what dropped down was so thick that, at first, I thought it was rock wool insulation you find in old houses. I literally thought, boy, what an odd choice of insulating material for a modern truck.
It wasn’t, of course, insulating material.
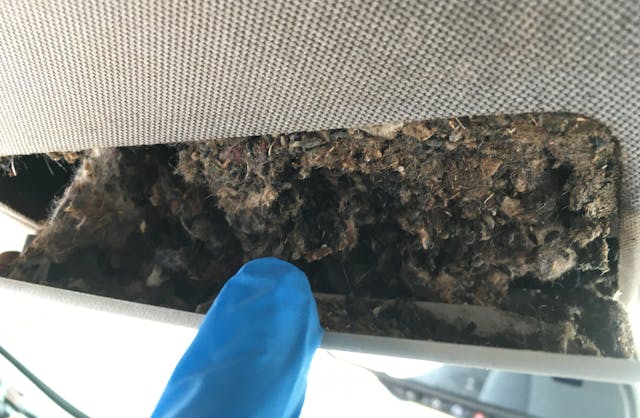
It was, of course, a mouse nest. And turds.

As I removed other headliner attachments, the realization set in that I was going to find piles of mouse turds above every single place there was a stain, as well as inside every plastic piece I unbolted.
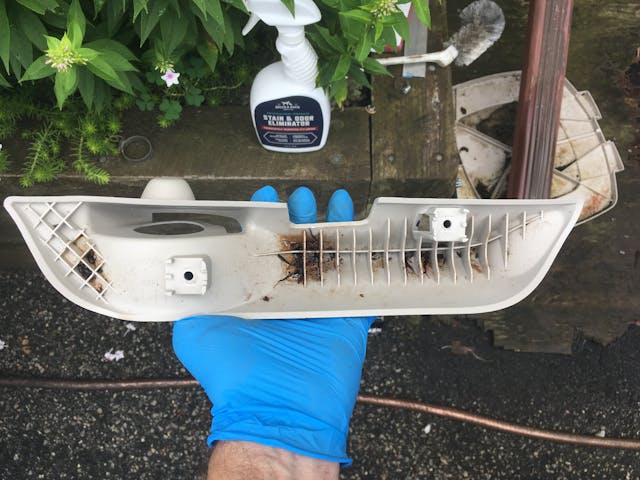
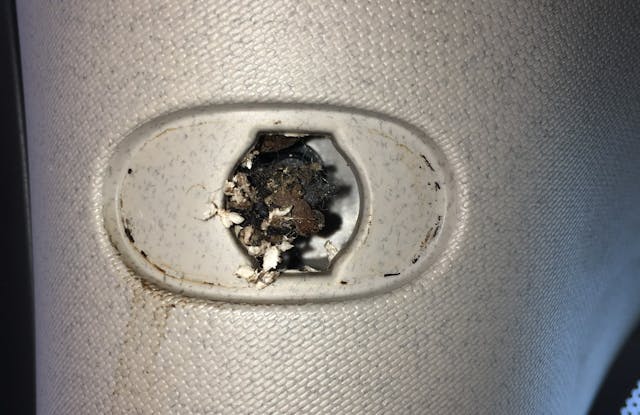
With all the headliner’s attachment points undone, I gently pulled it down from the ceiling. The wires that run above it are hot-glued in place, so they needed to be carefully pried off to fully drop the headliner. With it resting on the headrests, I could finally look at what was above my head.
As Dan Aykroyd said in the remake of The Twilight Zone, “Wanna see something really scary?”
CAUTION! SECOND WARNING! Send the squeamish out of the house!
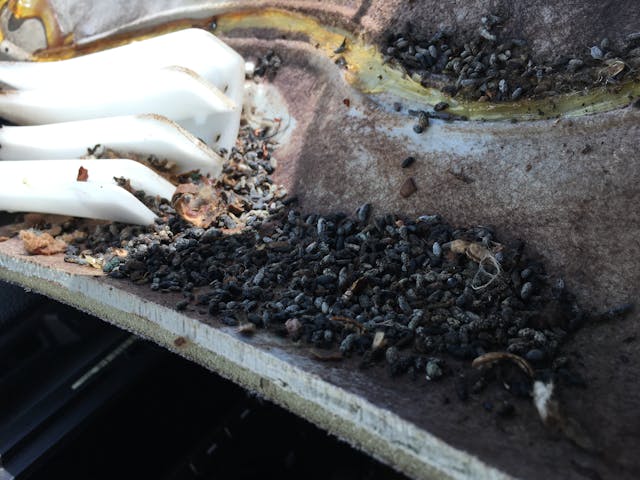
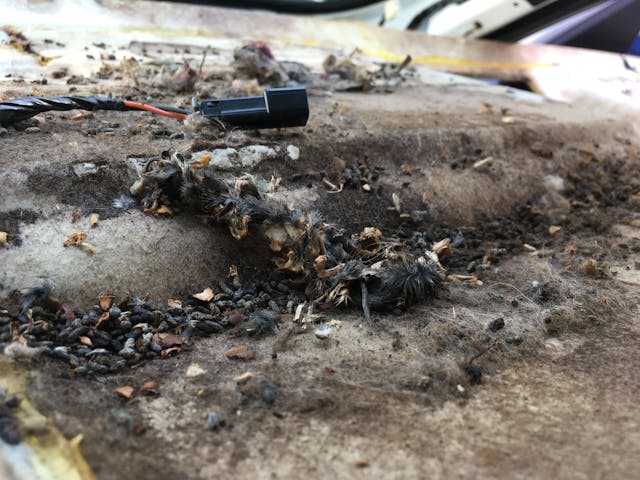
Not wanting to dump all that filth into the cabin of the truck, I took the shop vac and sucked out what I could before carefully extracting the headliner from the cab.
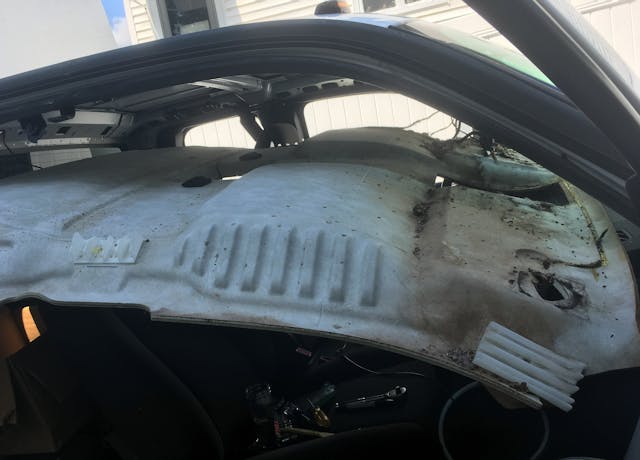


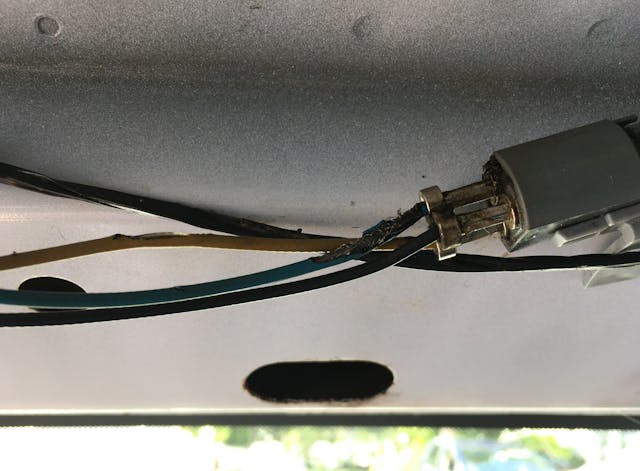
Yes, it was one of the more revolting auto-related repairs I’ve ever done, but a) it was actually pretty easy, maybe a couple of hours work, and b) in spite of mice’s reputation for chewing on wires and wreaking electrical havoc, I only found a single instance of gnawed-on insulation—on one of the wires connecting the satellite radio antenna.
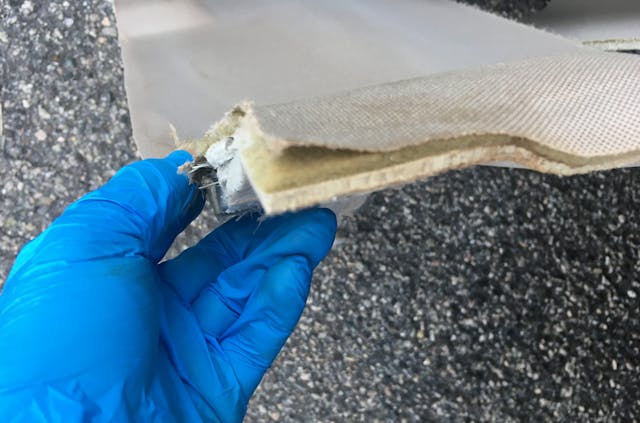
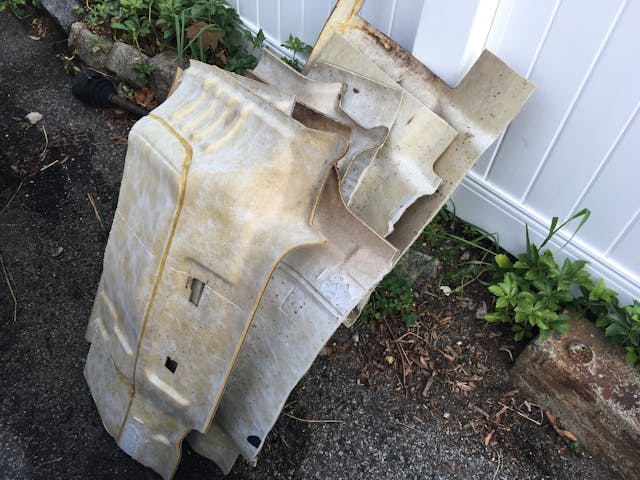
With the headliner out, and with the stains having soaked clear through the fiberglass, padding, and cloth, there was no way I was going to attempt to clean it. So I set about finding a replacement.
As you probably know, I’m mainly a BMW guy, so I know how to look up new BMW part numbers fairly easily. This is one of those skills we have that we don’t even realize is a skill until we need to do it with a different make. I’m not at all familiar with the Chevy parts catalog or the database that accesses it, and that’s what you wind up interacting with when you search for “headliner 2008 Silverado 3500HD.” Although there was a part number listed on a label on the underside of the headliner, Googling it was nonproductive. Neither was entering my VIN into one of the parts database sites.

Unless I missed something, it turns out that you need to know that the headliner is specified by the combination of the door configuration (2-door, crew cab, or extended cab like mine) and the presence or absence of sunroof, entertainment system, rear climate control, and head airbags, which makes perfect sense once you think about it. You then need to scroll through the online parts catalog until you find that combination (it appears to be part number 19352360). The headliner is the same for 2007-2011 Chevy Silverados and GMC Sierras having those parameters. The list price is $759. Discounted list from this vendor was $515, but shipping was quoted at nearly 2/3 that (it is the size of the cab).
So I began looking at junkyards, hoping I could thread the needle and find a used one locally. The website www.car-part.com accesses a database used by many auto recyclers (the kinder, gentler term for junkyard). I don’t use car-part often, but it was a godsend here. I entered the truck’s year, make, and model, specified “headliner,” and—taDA!—up popped compatible headliners, their cost, and their distance from my zip code. I think I audibly yelled “BOOYA!” when I saw that there was one for $150 down in Woonsocket, Rhode Island, about 45 minutes south of me.
I called the junkyard, and a woman asked for my interior code to make certain the headliner matched. That led me down an evening-long rabbit hole of GM interior codes—they actually don’t appear to specify the headliner color; GM appears to have used “cashmere” (beige) and light grey (which is what the label on mine says) headliners in the Silverado, but the two colors are so close that the trim panel around the map light console on both of them is cashmere. Since the colors are so similar, since this was the only compatible headliner within 200 miles, and since anything would be better than the mouse-stained headliner I just removed, I decided not to dot the i on the question of color. Instead, I quizzed the woman on the headliner’s condition (e.g., stains and tears). She assured me she wouldn’t sell me anything substandard. I gave her my credit card number, and she said she’d call me when it was pulled.
While I was waiting, I began cleaning the inside of the roof and all those plastic trim pieces that had mice droppings in them. I stuck the hose of the shop vac anywhere it would reach, then taped a short cut-off section of garden hose to it and shoved that in places too small for the big hose. On the basis of Amazon reviews, I selected Rocco & Roxie Professional Strength Stain and Odor Eliminator, an enzyme-based cleaner that neutralizes the stench of organic matter. I used it on the entirety of the inside metal roof, any exposed pillars, and all the wiring, and sprayed and wiped multiple times on any remaining visible mouse evidence. On the trim pieces, I plucked off individual droppings with tweezers, soaked the plastic with enzyme cleaner, blasted them clean with a garden hose nozzle, and repeated as necessary.
Many of you are probably wondering how the heck the mice got up in the headliner in the first place. Do you watch the animated television show Futurama? Do you know the opening credits that show people commuting to work by shooting through tubes? The mice appeared to have used the truck’s A-pillars just like that.
Having said that, it’s not unreasonable to ask that time-worn slippery slope question: Where do you stop? When you find mouse droppings in not only the A-pillars but also in the curled-over sections of the door seals, how do you not tear the entire interior out, pressure-wash the bare metal, and apply enzyme-based cleaner to every square inch?
My answer is this: I’m simply not going to do that. This isn’t a ’63 Series I Jaguar E-Type or another vintage car that I want to bring back to its former glory. It’s a truck. It’s never going to be an enthusiast vehicle, a pleasure vehicle, a daily driver, or even something I’m going to use often. And my wife, she of the hyper-sensitive sense of smell, is unlikely to ever ride in it.
Look, I am, above most things, a very practical person. Any car that’s sat for months probably has some degree of mouse contamination. The only question is whether it’s bad enough for you to know about it. I still catch a whiff of rodent in my sat-for-40-years-and-thoroughly-cleaned Lotus Europa. If, at the end of all this work on the Silverado I come out of it with a truck I can occasionally use to tow cars, and when I do, roll up the windows and turn the A/C or heat on without gagging, that will be success.
After the weekend, the woman at the junkyard called me saying that the headliner had been pulled. I drove down in my little Winnebago Rialta to pick it up. It had a few small stains and scuffs, but no tears. As with the enzyme-based cleaner, I used Amazon reviews to select Chemical Guys Lightning Fast Carpet and Upholstery Stain Cleaner. A spray-on, a bit of action with a stiff brush, washing off with a hose and a nozzle, and voila, clean headliner.
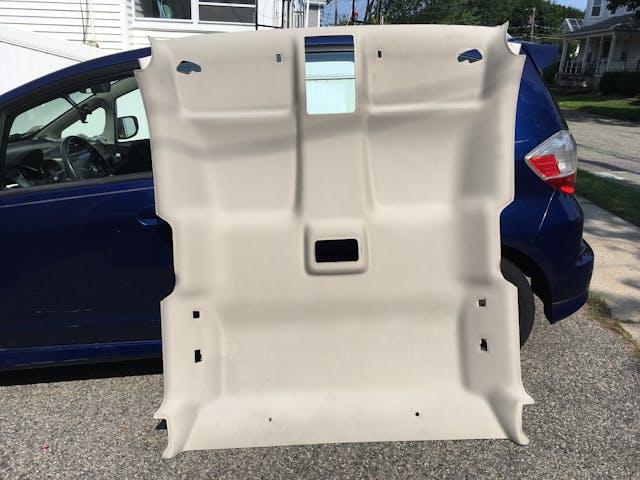
In it went. It looks great.
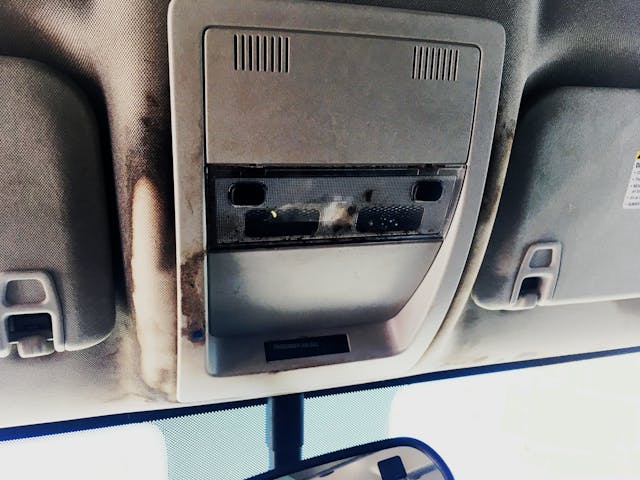
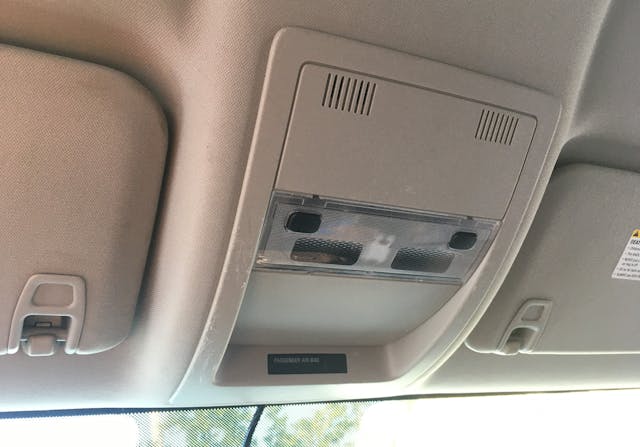
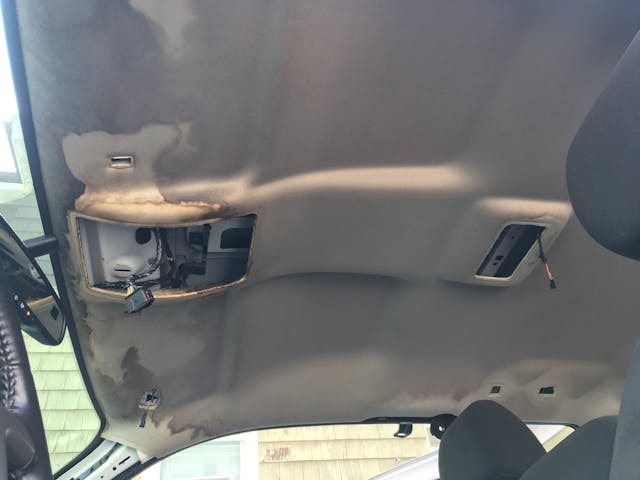

With the headliner replaced, I was able to open up the doors of the truck and get in it without being knocked over by the stench.
This was good. Very good. I celebrated by cutting up the old headliner and stuffing it in the garbage.
But what remained was the mouse contamination in the heater box. Unlike the headliner, this was spatially contained, out of sight, and not threatening to drip on you. However, it was also much more difficult to access.
(Next week: As the Stomach Turns.)
***
Rob Siegel’s new book, The Best Of The Hack MechanicTM: 35 years of hacks, kluges, and assorted automotive mayhem, is available on Amazon. His other seven books are available here, or you can order personally-inscribed copies through his website, www.robsiegel.com.


