Media | Articles
Prepping for that first drive is an annual rite of spring

Last week, I talked about clocking through a few spring sort-out projects. One of them was dealing with fluid leaks in my ’74 Lotus Europa Twin Cam Special. The car was leaking coolant out the heater control valve and dripping oil down the back of the head. I replaced the control valve with a new part. The oil leak was a bit more pernicious, but I managed to beat it back to the point where it’s no worse than your average 47-year-old British car. (Hey, do electric cars leak sunshine?)
With that, I took the impossibly low Lotus for its first spring spin. Any of you who own vintage cars knows how this usually goes. The first hundred or so yards are blissful, reminding you of why you own and so adore your vintage steed. But then you hit a stretch of rough pavement, the car rattles like, well, like a vintage car, the bubble bursts, and you wonder if it was always this bad, if some shock absorber or bushing deteriorated over the winter, or if gremlins snuck into the garage and hid a few wrenches inside the frame rails. This was totally the case with the spring drive in the Lotus. I thought, “I’d remember it if it was this bad last fall, so either something changed, or I’m getting awfully forgetful.”
A few years ago, I wrote a couple of pieces describing my approach for de-rattling a car. I’d previously done some of this with the Lotus, but as a fragile fiberglass-bodied Brit, it is likely never going to feel as solid as a conventional steel-bodied car. However, the culprits for its current thunks and clunks were easy to find.
I bounced the front of the car—which seemed, in fact, surprisingly easy to shove up and down—and immediately heard clunking. This was surprising, since I’d rebuilt the front end two winters ago. The noise, however, seemed to be coming from nearer the center, not from near the wheels. I opened up the hood (remember that the engine is in the middle, so the “frunk” is a storage compartment) and laughed when I saw that the horn had fallen off its bracket and was just bouncing around on the fiberglass frunk floor. Well, that explains a lot. I located the missing nut, reattached the horn, and smiled at my good fortune.
I then bounced the back of the car, or at least tried to, and found that I could barely move it. Two years ago, in a classic me-saving-money move, I’d installed a used set of likely 30-year-old Spax adjustable front and rear shocks that I’d bought on eBay for a very good price. Had I been penny wise and pound foolish? Had the rears seized up?
Marketplace
Buy and sell classics with confidence
Then I remembered. One of the last projects I did on the Lotus last fall was adjusting its rear alignment. This is one of those bizarre Lotus-Colin-Chapman-simplify-then-add-lightness designs that you’d swear was concocted in someone’s peyote-soaked dreams except that the car handles so well that you have to check off the “guess it must be genius” box. Long “radius arms” (what would be called a rear trailing arm on most other cars) are attached to a radius bushing in the car’s steel frame, allowing the arms to pivot and the rear wheels to move up and down. Other than the arms’ length and lightness (flimsiness is such a negative word), that’s all somewhat conventional.
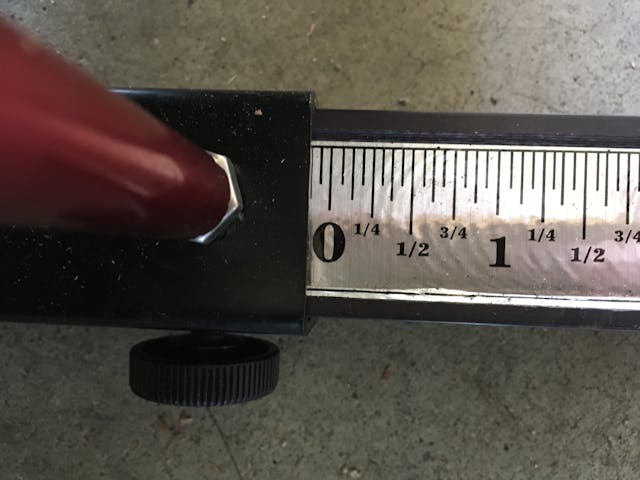
But the Lotus-specific weirdness is that the rear wheel toe-in is adjusted with the use of spacers—nothing more than washers, really—between the bushings and the radius arms. The more washers there are, the more it forces the front of the radius arms outward, which decreases toe-in. You need to measure the alignment (in the link above, I describe using a pointer bar, also called a trammel bar, and how its tire-based measurement relates to the toe-in spec which is measured at the wheel, not the tire), and then either add or subtract washers to bring the toe into spec.

This process isn’t brain surgery, but it’s a little tedious. You need to undo the nut from the end of the bolt holding the radius arm to the bushing, partially pull the bolt back, and slide the radius arm over until the bolt clears the hole in the arm. If you’re not careful when you do this, you withdraw the bolt too far and all the washers fall on the garage floor and roll off into greasy oblivion. You also need to support the arm from below, so you don’t put stress on the rubber brake line that connects to a metal line on the frame. And when you reassemble, the holes in the arm and the bushing no longer line up, so you need to somehow cajole the whole big long mess back into hole-to-hole alignment to slide the bolt back in. Then, as is the case with most trailing arm bushings, before you torque the nut to spec, you have to set the car down on the suspension so the tightened bushing itself provides some stiffness, keeping the car at its ride height. But with the car down on the ground, reaching the nut with a torque wrench is fairly challenging. And, of course, you need to do all this on both sides.
One of the reasons for my aligning the car last fall was that I noticed that high-speed lane changes seemed hyper-fast. The spec for the Europa Twin Cam’s rear toe calls for a surprisingly large amount of toe-in (1/8 to 1/4 inch for each wheel, meaning 1/4 to 1/2 inch total). When I measured it, my jaw dropped when I found almost 5/16 of toe-out. No wonder it felt twitchy. I removed the two washers that were on each side, but the toe still remained outward. I eventually figured out that when I rebuilt the rear suspension as part of the car’s resurrection, I’d misinterpreted a service bulletin I read in a forum and had installed the radius bushings on the wrong side of the frame, which essentially made the bushings themselves act like extra alignment washers. After confirming all this on a Lotus forum, I installed the bushings correctly and set the toe-in at about the middle of the spec.
I drove it that way last fall and immediately disliked the way it handled. It was fine around town, but when changing lanes at speed on the highway, it felt weird, like the tail was lagging behind the nose. The twitchy feeling it previously had was gone, but this was way too far in the other direction; it felt like the nose would move, and then the rear end would follow it in a separate maneuver. I readjusted the toe to the lower end of the range, but it didn’t seem to make much difference.
What does this have to do with the stiff rear shocks and the soft front ones, you’re asking? Well, at some point last fall, since I was convinced that I had the rear toe-in correct, I played around with other factors such as shock adjustment. At one point, I must’ve set the front shocks at their softest possible setting and the rears at their hardest, because that’s how they now were (I’m terrible about writing this sort of stuff down). I worked the adjustment screws to find their full extent, counted turns, set all four shocks in the middle as a baseline (and no I didn’t write it down because shut up), and drove the car again on the embarrassingly potholed roads of my tony suburb of Newton, Massachusetts.
It was as blissfully quiet as one can expect a fragile 47-year-old fiberglass-bodied British thing that someone simplified, then added lightness to, to be. (Hey, don’t blame me that Colin Chapman wrote a sentence onto the end of which you need to add a preposition.)
Then I drove it at speed on the highway.
Yuck. Oh. Right. The issue of the correct rear alignment feeling “laggy” was never solved. Grrrrrrr.
I took an alignment measurement, added two washers to both sides to bring the toe-in closer to zero, measured it again, and drove the car. The following/lagging was perceptibly better. I then used the alignment measurements and the thickness of the washers to figure out the linear relationship between the number of washers and the resulting alignment measurement on the trammel bar. I determined that adding two more washers to each side should approximately zero it, and added them in.

By this time, what had previously taken me an hour per side was down closer to 20 minutes. I was no longer dropping washers. And I rigged something up with a 2×4 and a ratchet strap that made aligning the bushing and radius rod holes a trivial 15-second process instead of something that felt like I was damaging my rotator cuff. I also remembered that, with the car on the mid-rise lift, I could set the rear wheels on ramps and gently lower the car onto them until the springs were compressed to where they’d be at ride height, enabling me to easily crawl under it and correctly torque the bushing bolts.


My estimate was pretty good. With the additional washers, I’d gotten the rear alignment very close to zero. I drove the car at speed again. It was challenging to objectively compare it with how it was before. It’s not like flipping the switch on dashboard-adjustable shocks from “comfort” to “sport” and comparing them back-to-back; you’re relying on a memory of how something felt that was highly subjective in the first place. But to me, it seemed much better. If the rear was still “lagging” the nose on rapid lane-changes, I’m not sure it was doing it enough that I would’ve noticed it.
I later did some digging on Lotus forums and read some posts which said that earlier S2 Europas had a rear toe spec of zero to 3/16-inch, and postulated that the surprisingly large amount of rear toe-in specified on Europa Twin Cams was a reaction to Ralph Nader’s Unsafe At Any Speed take-down of the Corvair’s oversteer. So, at zero toe, mine is now within the pre-Nader limit. I don’t routinely try to slide the car around entrance ramps (being surrounded by naught but fiberglass makes me circumspect about such things), but I’ll carefully explore if the new settings do anything odd to lift-in-corner oversteer.
But for now, it’s spring and all is right with the Lotus. I mean, it looks happy, right?

***
Rob Siegel has been writing a column (The Hack Mechanic™) for BMW CCA Roundel magazine for 34 years and is the author of seven automotive books. His new book, The Lotus Chronicles: One man’s sordid tale of passion and madness resurrecting a 40-year-dead Lotus Europa Twin Cam Special, is now available on Amazon (as are his other books), or you can order personally-inscribed copies from Rob’s website, robsiegel.com.


