Media | Articles
Broken Bolts and Unrealistic Expectations

There’s a classic Monty Python routine called “How to Do It” where they issue laughably simplified explanations on how to do very complex things (“Today we’re going to learn how to build box-girder bridges. But first, here’s Jackie to tell you how to play the flute: ‘Well, you blow here, and move your fingers up and down there.'”) I come back to this time and time again because it tracks with just about anything that requires expertise someone else has that you don’t.
Witness broken bolts. I’m not sure there’s any aphorism truer than the one that says, “every 15-minute repair is one broken bolt away from being a three-day job.” Yet there are—reportedly—tricks to removing them that put you back on track.
Allow me to digress for a moment. In a recent issue of Hagerty Drivers Club magazine, Matthew Crawford—author of Shop Class as Soulcraft: An Inquiry into the Value of Work—wrote a piece commemorating the 50th anniversary of Robert Pirsig’s Zen and the Art of Motorcycle Maintenance: An Inquiry Into Values. I’ll freely admit that I read ZATAOMM when I was in college, and that I re-read it (and read Matt Crawford’s book) while I was writing Memoirs of a Hack Mechanic 12 years ago. I’ve never met Matt, but he and I (and many of you) are clearly cut from the same cloth where we enjoy working on cars because we find it fun, because it saves money, and as Crawford says, because it makes us “master of our own stuff.”
Where was I? Oh. Broken bolts. Right. One of the reasons I re-read ZATAOMM was that I recalled a chapter titled “Stuckness,” and wanted to reference it in a chapter of my book where I enumerated several techniques for removing seized bolts. Imagine my disappointment when I found that the, uh, nut of Robert Pirsig’s chapter on “Stuckness” was this useless train wreck of words:
“Stuckness shouldn’t be avoided. It’s the psychic predecessor of all real understanding. An egoless acceptance of stuckness is a key to an understanding of all Quality, in mechanical work as in other endeavors. It’s this understanding of Quality as revealed by stuckness which so often makes self-taught mechanics so superior to institute-trained men who have learned how to handle everything except a new situation.”
Marketplace
Buy and sell classics with confidence


Right… so tell me how to get the broken stud out.
“What your actual solution is is unimportant as long as it has Quality. Thoughts about the screw as combined rigidness and adhesiveness and about its special helical interlock might lead naturally to solutions of impaction and use of solvents. That is one kind of Quality track. Another track may be to go to the library and look through a catalog of mechanic’s tools, in which you might come across a screw extractor that would do the job. Or to call a friend who knows something about mechanical work. Or just to drill the screw out, or just burn it out with a torch. Or you might just, as a result of your meditative attention to the screw, come up with some new way of extracting it that has never been thought of before and that beats all the rest and is patentable and makes you a millionaire five years from now. There’s no predicting what’s on that Quality track. The solutions all are simple…after you have arrived at them. But they’re simple only when you know already what they are.”
Okay, so pretty much useless.
Why am I on about this?
Well, guess who had to deal with a snapped-off bolt?
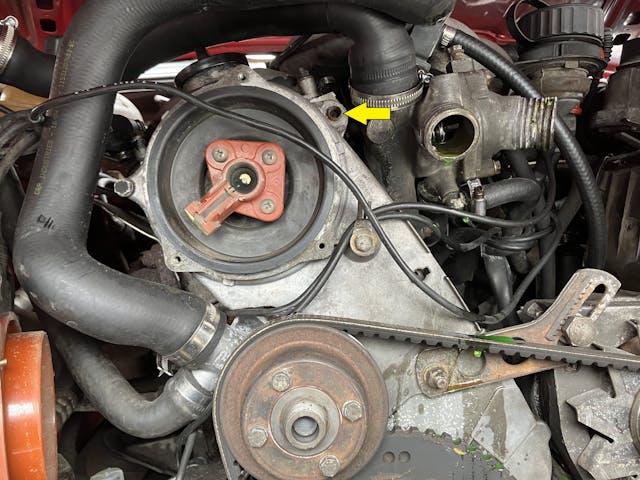
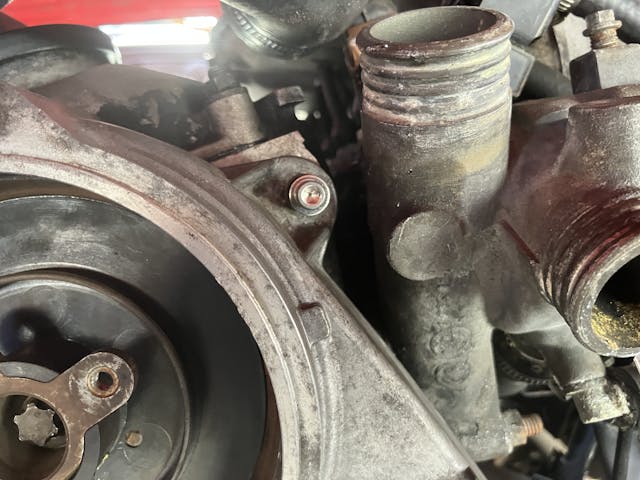
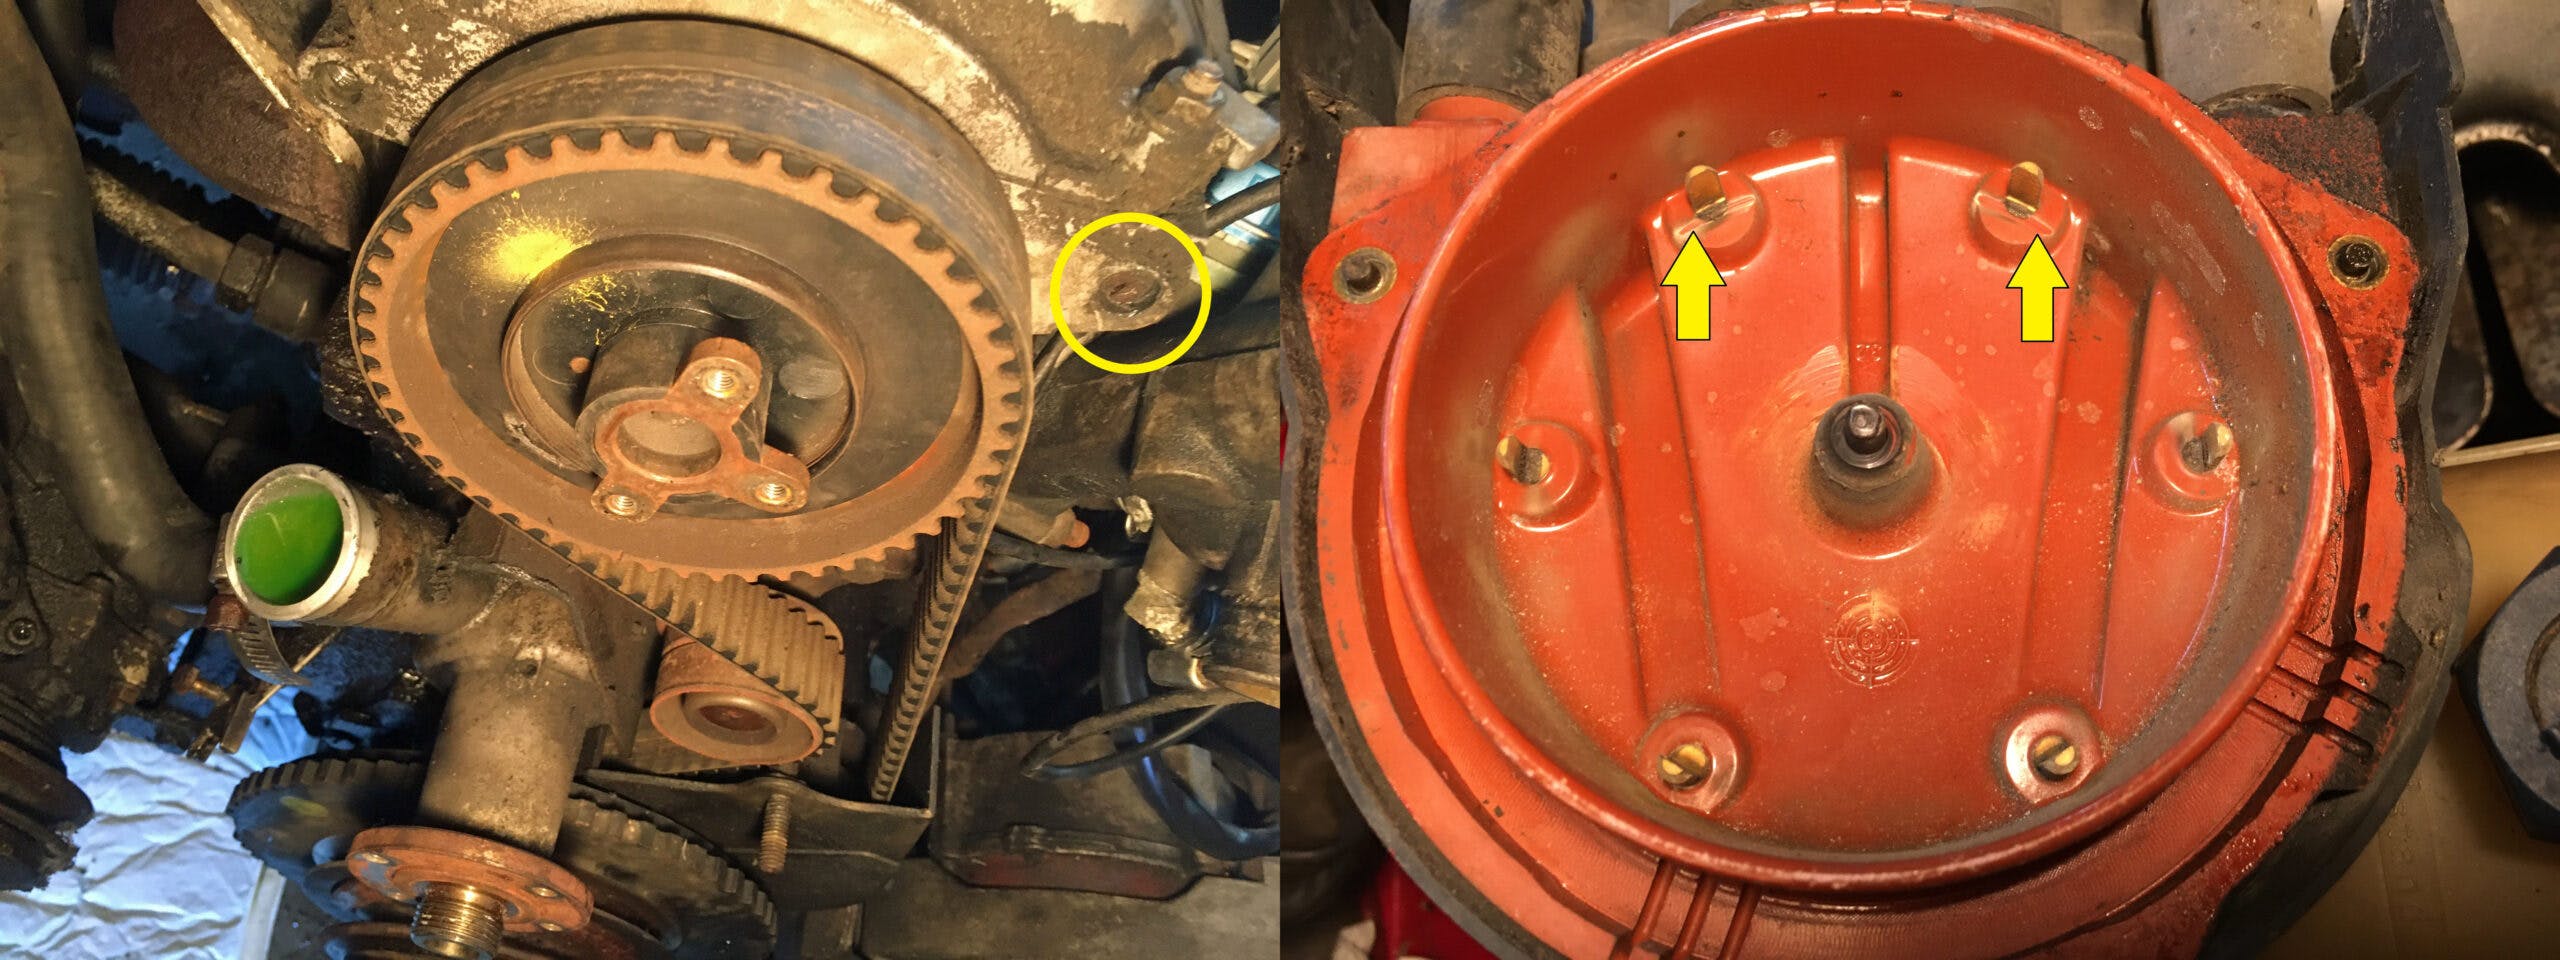
As the weather in Boston warmed, I returned to resurrecting the air conditioning in the FrankenThirty, my salvage-titled 1988 BMW E30 325is. I pulled the rusty original serpentine-flow condenser out of the nose and was about to swap it for a new parallel-flow condenser when I remembered something: I’d encountered a snapped-off bolt last August when I bought the car and was resurrecting it. It was one of the bolts holding the upper timing cover. Because this car has a timing belt and not a chain, the timing cover is really just a dust cover, so the missing bolt wasn’t part of an oil seal or anything, but it not being there had an unusual consequence. The distributor cap (well, there’s no actual distributor because the spark advance is computer-controlled, but there’s still a cap and a rotor) is bolted to the upper timing cover, so the fact that the cover was unsecured at one corner created a misalignment that was allowing the spinning rotor to wear a groove in the cap.

Now, if a bolt is stuck but hasn’t yet snapped off, I detail a number of techniques for removing it in my book (all of them are basically heat, grip, and the right amount of leverage so you don’t snap it). But if the bolt head has snapped off and left nothing to grab onto with Vise Grips or an external-gripping stud extractor, I’m only aware of two real choices: Drill out the bolt, or weld a nut to it.
Let me set something straight right now. There’s a widely-held misconception that the purpose of drilling out a bolt is so you can put an EZ-Out in it, turn it counter-clockwise, and back the bolt out. If you want to do that, knock yourself out, but know that the experience of yours truly as well as thousands who have gone before you is that if the bolt’s threads are so seized in the hole that the head of the bolt snapped off, the odds of it suddenly saying “Oh crap this guy’s got an EZ-Out I’d better high-tail it out of this hole where I’ve been living since the Eisenhower Administration” is vanishingly small. In fact, the odds are that what’ll happen is that the hardened-steel EZ-Out will snap off in the hole, in which case you are truly, magnificently, and completely boned. In general, the best thing you can do with EZ-Outs is to go to your toolbox right now, find them all, and throw them all away, thus removing the temptation that this time they’ll help you instead of pulling the football out from Charlie Brown.
(A few people in the cheap seats are grumbling that you can use left-handed bits to drill the hole, and maybe, if The Automotive Powers That be are smiling on you, the heat and the left-handedness of the drilling will loosen the bolt so that the EZ-Out will in fact back the bolt out. I’ve had it happen. Once. In nearly 50 years of wrenching. It’s not a bet I’d make in a situation where, if EZ-Out snaps, you’re screwed.)
So, you’re not going to use an EZ-Out, why drill out a bolt? Because, most of the time, what you’re trying to do is remove as much of the bolt as possible. If you drill exactly in the center of the bolt and use progressively larger and larger bits, you can then re-thread the hole by using a tap. Or sometimes, if you’re lucky, once you’ve removed enough material, you can start to peel off the remnants of the old bolt using a pick, sort of like peeling an orange from the inside. Or if the bolt isn’t really supporting a big load, you can cheat and tap a smaller hole for a smaller bolt (shhhhh, don’t tell anyone I told you). But whichever of these options you use, it’s slow-going work, and it’s trickier to do on a blind hole (one where the drill bit never emerges from the back).
So you can imagine the attraction of the weld-a-nut-to-it method. There are dozens of videos on YouTube showing this being done, sometimes in a matter of seconds. If the surrounding metal is steel, you put a washer around the threads so the weld will stick only to the bolt (whereas if the bolt is snapped off in aluminum, it doesn’t really matter, as the MIG wire won’t stick to aluminum). If the bolt is snapped off below the surface of the threads, you need to build up a pool of melted wire on top of it. Then you weld the nut to the mound and/or washer. The beauty of the technique is that, in addition to creating something you can twist, the act of welding to the broken bolt—of putting a crap-ton of amperage through it—directly heats up the bolt, which, just like applying a torch or an induction heater, can help to break the bond of corrosion in the threads. At least in theory. (As they say in physics, in theory, theory and practice are the same, but in practice, they’re not.)
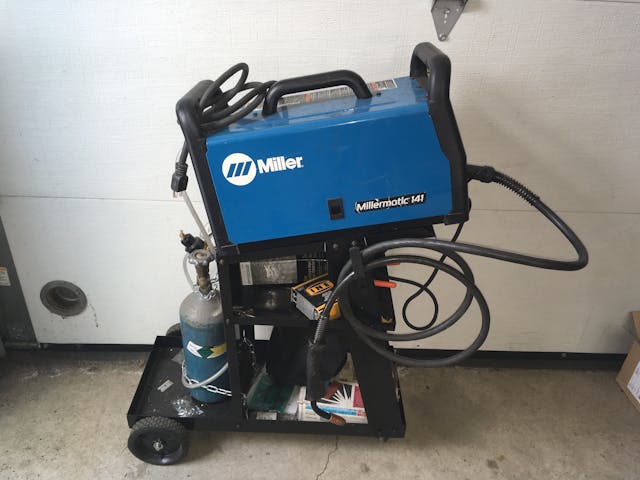
Now, I do own a welder, a Millermatic 141 that I bought about ten years ago when I had dreams of teaching myself how to weld and doing my own bodywork. That never happened, but I have used it a couple of times to do the weld-the-nut-on trick. Both times were on snapped-off exhaust studs on heads that I’d already removed, so I had them on a milk crate on the garage floor, and the surface I was attacking was horizontal. This time, I was about to try removing the FrankenThirty’s snapped bolt with the engine in situ.
So, back to the present. The FrankenThirty was sitting in the driveway with the grilles, condenser, and radiator out, and as I looked through the nose at the front of the engine, I remembered the snapped-off bolt, and thought “It’ll never be easier to deal with than right now, and if you don’t, you’re going to worry about that distributor cap cocking just enough to cause the car to die on the George Washington bridge. Do it now.”
I rolled the welder out into the driveway, and… long story short, I couldn’t get the technique to work.
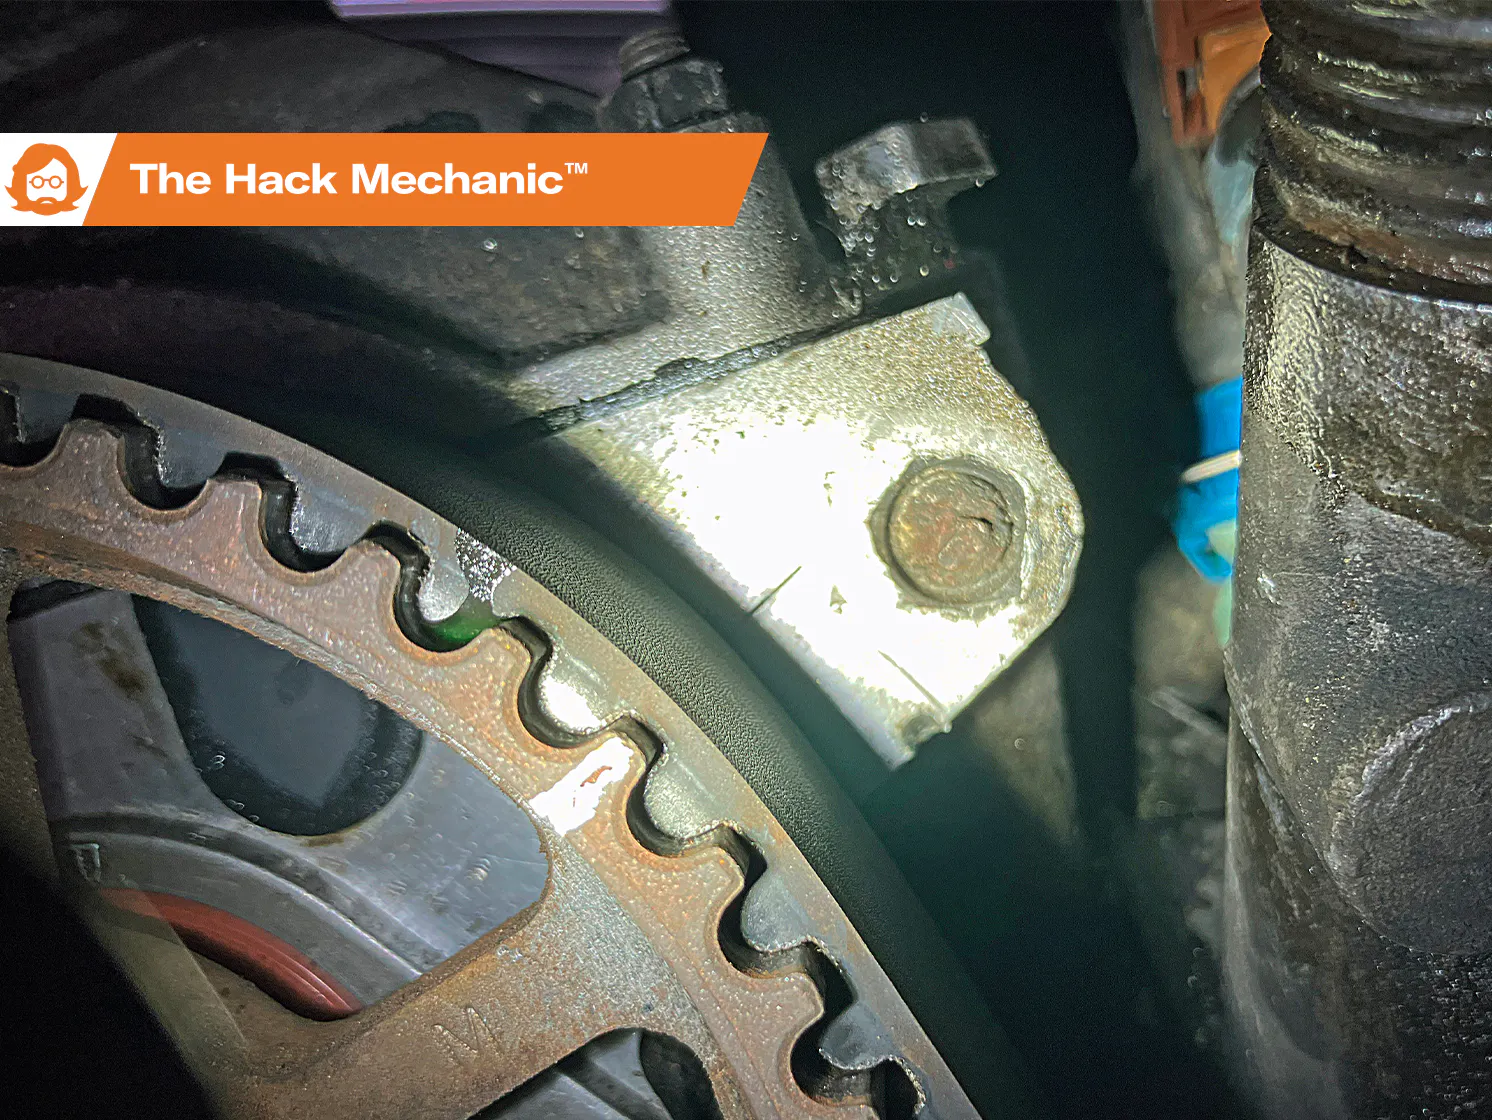
It seemed to start off well, though. I cleaned the broken surface of the bolt with a Dremel tool. I shielded the car’s rubber timing belt first with aluminum foil, later with a cut-up disposable roasting pan. I built up a nice mound on top of the snapped-off bolt, though it drooped due to gravity.

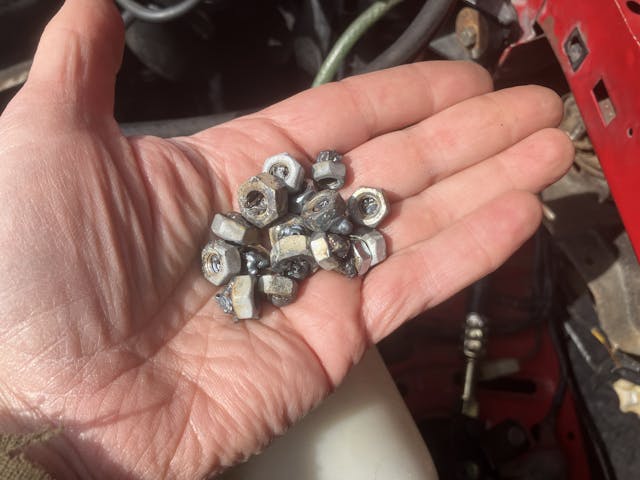
But whenever I tried welding a nut onto the mound, I got very little adhesion. I tried holding the nut in place with needle-nose Vise Grips. I tried pounding it on with a hammer so I had a clear shot at it with the welder. I varied the amperage and the wire speed. I read in GarageJournal that you may need to try this multiple times before the nut sticks. Of the 17 (yes, 17) nuts I tried, only three of them stuck enough to even begin to put any torque on the bolt.

In frustration, I called a good friend of mine, a professional wrench who welds in his sleep. I explained what I was doing and what kept going wrong. His reply was the last thing I ever expected him to say:
“Yeah, I’ve tried the weld-a-nut-on trick. I’ve tried it with and without the washer. I’ve only ever gotten it to work once. I always wind up falling back to drilling the damn thing out. The only thing I can recommend is that new nuts almost always come with a coating. You might try drilling out the threads and belt-sanding the faces.”
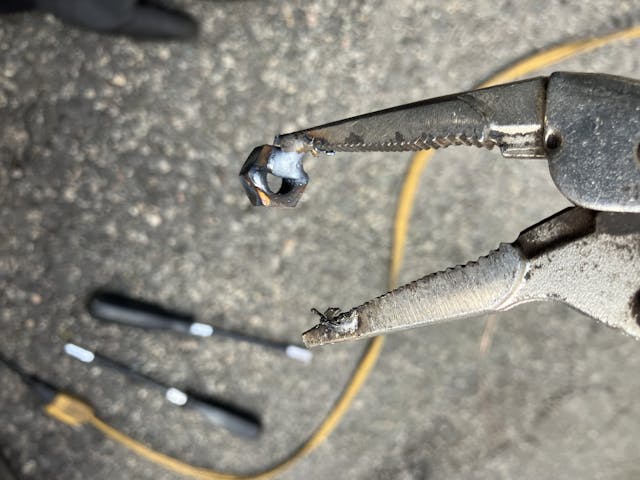
So I did. No difference. I’m not sure what the problem was. Maybe lack of good electrical contact between the nut and the head for everything to heat up together and the melted welding wire to adhere to both. I gave one last try by abandoning the nut and trying to build up a weld mound (as that seemed to work fine) that I could grab onto with needle-nosed Vise Grips. I did succeed in getting enough of a grip to convince myself that, no, the broken bolt wasn’t simply going to unscrew if I could get something on it to twist it. It reached the point that I worried about risking damage to the head, as well as to the rubber timing belt I was trying to shield with a cut-up roasting pan.
So my future clearly involved a drill. I found that my left and right-handed bits were too dull to be functional. I read up on and watched a few videos on the best bits to use to drill out bolts, and one fellow swore by Bosch glass and tile bits. I ordered a set, ground off the welded mound I’d created, center-punched the face of the bolt as best I could (which wasn’t very accurate at all), and used the smallest (1/8”) bit. I wouldn’t say it cut through it like butter, but there was progress. I then moved up to the 3/16” bit. In about 15 minutes, I’d drilled myself a decent hole.

The original bolt was a metric M8 with a 13mm head, but it originally held not only the timing cover but also an engine hoist bracket. Since all I needed to do was secure the corner of the timing cover so the distributor cap didn’t wander around, I thought I’d use a smaller M6 bolt with a 10mm head. To my surprise, though, I couldn’t find my M6 tap anywhere. I did, however, find a 10-24 tap, and by coincidence, the hole I’d already drilled seemed to be the right size to receive it. A quick trip to my local Ace Hardware store revealed another surprise—they didn’t have 10-24 cap head bolts that short. They did, however, have an Allen-head bolt just the right length. A washer, a lock washer, a bit of blue Loctite, and done.
So. If you snap off a bolt and leave nothing to grab onto, if you have a friend who has a welder and swore he’s done this a dozen times, take him or her up on the offer. Maybe they actually know “how to do it.”
But don’t look in Zen and the Art of Motorcycle Maintenance. The only Zen about stuck bolts is being calm enough not to commit hara-kiri with an EZ-Out.
***
Rob’s latest book, The Best Of The Hack Mechanic™: 35 years of hacks, kluges, and assorted automotive mayhem, is available on Amazon here. His other seven books are available here on Amazon, or you can order personally inscribed copies from Rob’s website, www.robsiegel.com.


Find more values
Search for prices of other cars, trucks, vans and motorcycles


Tried every method over the decades until I bought a liquid cooled induction heater.
Never had a problem since.
Cleaner, quicker and cheaper once the I paid off my credit card.
I find myself thinking about “Zen” and the various impediments to quality with some regularity. There is a passage in that book that describes an old guy welding a chain guard. If you have the book, try to find it, it manages to summarize the book in a couple of paragraphs. I enjoy the challenge of removing a busted fastener for about 15 minutes before I turn to a professional.
I’ve successfully welded to broken bolts by 1) matching the metals best I can, 2) managing heat for the metal (soft Chinese metals and harder bolts from old American Iron don’t mix well), and 3) oil the bolt after welding. I haven’t had to drill a bolt out in years (knock on wood), for which I am grateful because I am usually working on soft aluminum cases or heads with steel bolts.
I’ve also found that if I can ground the welder “inline” with stuck bolt, I get better results. In one of your pictures the ground cable appears to be on an ear of the timing cover that seems to be adjacent to the bolt. If you can ground to a part of the engine behind the bolt you may have better results. Electricity wants to take the shortest path, the least so try to make it so that it goes through the thing you are trying to weld as much as possible.
And it’s beyond my knowledge of welding, but apparently switching the polarity of your welder may have an effect. Waiting for my son to get to that part of his welding classes so I can learn from him.
I hate drilling this much. I’d much rather play with the welder for the same amount of time 🙂
The one tool that’s guaranteed to work (when used proficiently) is an EDM, or Electrical Discharge Machine. It can even remove the bolt threads from the hole’s threads. Unfortunately, it’s stationary equipment so the part with the broken bolt has to be brought to it. And another unfortunately, pocket change won’t pay for this type work, either.
I won’t bother giving the successful processes I’ve used – there’s plenty of good and better tips here. But I will say, I will NOT install the same type bolt. That’s if the broken bolt was not treated. Zinc or similar plating helps reduce, but not necessarily eliminate, a repeat issue. Steel against steel or cast iron aside, steel against aluminum is, surprisingly, a good recipe for corrosion. Now, when I’m working with a special, not-off-the-shelf bolt, I’ll soak it or at least spray its threaded hole with a penetrating fluid. Some permeation is possible and could help with the next time it’s removed. Exhaust manifold bolts/studs are an exception since they are (or should be) treated for the application.
I would ALWAYS break at least some of the small bolts when removing the top shroud from a Corvair engine with cyl heads for a 140 or 145 ci engine. I’d swear they were made of lead!
I was the off shift EDM guy at Polaroid for years. Easy to be a hero to the production line burning out broken taps with that equipment but not too helpful to us home-based DIYers.
Most nuts, washers and bolts are plated making them difficult to get a good clean weld to stick. My solution to this is to dangle them from a wire into a bath of muratic acid and water. About a 50/50 mix. This will take the plating off in short order. If you have several nuts etc… on the wire jiggle them while in the mixture and the sound will go from a dull ringing to a very sharp ringing letting you know they are clean. Usually in 30 seconds or so.
When welding a washer and nut on after getting the center of the nut filled with weld I keep piling the weld up on top of the nut just to put extra heat into the stuck bolt.
Let it cool down well before backing out the bolt.
Has worked very well for me.
And yes it may take several attempts.
Yeah, have actually seen the welded nut trick work once with several caveats, the broken piece-actually the threaded end of a cylinder rod-was a pretty good size diameter and the nut had to be welded back on repeatedly, at least a half dozen times, the piece would back out, bind, then the nut would snap off.
I enjoy reading Hack Mechanic every week. Very useful stories and entertaining.
In this week’s article on removing a broken off bolt, I think you misspelled “Eisenhower” in your reference to the former President’s term as an Administration.
Thanks for this (and to others who mentioned it). I have fixed the typo.
Retired Master Recertified Tech that has removed plenty of broken bolts and studs using various methods, like some people mentioned a broken easy out or tap for that matter can be super frustrating especially if you were working on commission like I was the majority of the my mechanic life. You just to need to know when to stop turning the easy out or tap when there is too much resistance. But I digress, if somebody has cross threaded the bolt and then broke it off you better be able to drill it in the center or you will be creating more damage and heart ache than can be imagined!
I have a stuck Brass sump bolt in a aluminium sump. Any ideas?
Al expends more than brass when heated, but cannot just heat the brass bolt. Will dry dry ice on bolt
I will never ever get rid of my EZ-Outs! I don’t use them but clean and nicely organized along with the taps adds a precision look as though I know what I’m doing. Or at least enough to fool myself that’s the case and get to work.
Ah, yes. On welders, I too bought a little Italian made mig back in the 80s. Used it a lot, so I figured I’d move up to a nice tig setup. I’ve used it maybe 3 times in 10 years. My original welder I bought in the 70s is a Montgomery Ward (remember them?) 240 stick welder that I use almost exclusively. I’ve welded sheet metal, cast iron manifolds, & countless project pieces. Can’t use it for alum or ss, but it works for everything else.
I would have been sore tempted to just stick another distributor cap in the glove box and pass on the epic battle altogether. Life is too short.
I’ve had good luck with Kroil, Kroil+time, Kroil+heat+time. I always give the stuck bolt the hardest rap I think I can get away with before starting to try to move it. When those fail I go to the drill. I never, ever get a perfect center punch, but then I don’t care that much. I use LH drills in the hopes of them doing the deed; slightly larger each time, I may need to go to RH drills at some point, until I get to the threads. Then I tap/turn/finagle, even use an “easy out”, and by then the remains of the offending bolt are too feeble to resist.
Rob, What’s the story with the teeth appearance on that timing belt in the lead photo? The broken bolt looks to me to be fortunate if it prompted an investigation of the belt.
This isn’t for removing a broken bolt but for getting it out in the first place without it breaking. My absolute go-to is a torch then immediately quenching with cold water. When I was 21 I bought a 67 Corvette with the big block engine sporting factory side exhaust that were rusted out. The 3 – 3/8″studs were rusted to the point of not having any threads except where the nut was. After heating the nut/stud cherry red I doused it with the garden hose. All 6 came off without breaking. Then I heated the stud itself and doused those as well. I was able to extract the studs from the cast iron manifold without them shearing off. Obviously care must be taken when heating near cast iron since this will most likely crack if cooled too fast. I also used this method to disassemble a bicycle from the teens(1900’s) that had been left outside for a part of it’s life without breaking the small bolts that held the fenders on to the frame. The paint was already completely roached so it didn’t matter that the heat burned it off.