Media | Articles
How to succeed in your next project without trying
Earlier this year, I declared I would not buy any more motorcycles. Now I’m stuck in a deep debate over how many parts can be purchased for a project before they qualify as the purchase of a project. It’s not going well.
New Year’s resolutions are hard. I bet my failure rate is right around the national average of 91 percent. (And yes, I actually looked that up.)
My lust to store one more motorcycle in an already hardworking shop grew so strong that I began to creatively interpret my own rulebook. My desire to build a flat-track racer trumped my resolution to focus on the projects I already have. The compromise is going to be how the project gets done and where I source the pieces. Two simple rules: It’s gotta be cheap and it’s gotta be available.
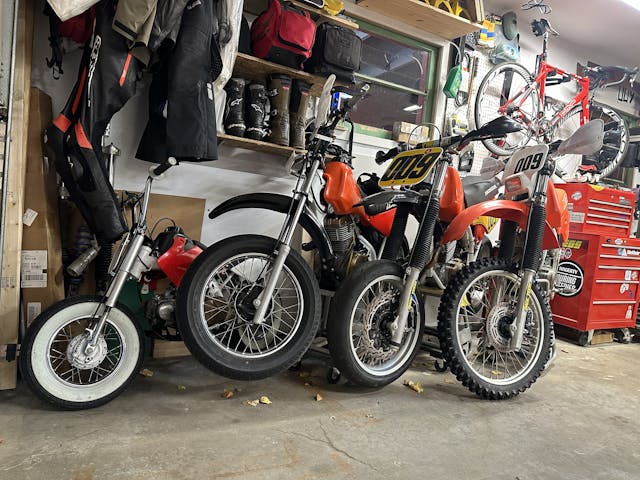
Each fall I try to go through my storage shelf and mentally catalog exactly what junk is holding my floor to the ground. I don’t have enough storage space to keep everything, and sorting through keeps me from stashing things that truly have zero value.
Several Honda XR250Rs of the late 1980s have come through my garage in the last few years. Three were parts bikes that got broken down and boxed to serve as spares during my first year of racing. Somewhere in there, I accumulated enough spares to build a second race bike. Another dredge through the shelf brought forth a bounty that persuaded me to build a flat-track race bike rather than to sell some of the parts. This type of logic never fails to entertain, does it?
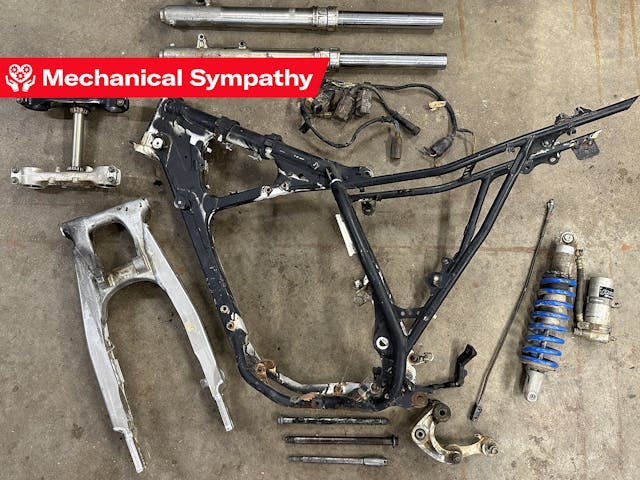
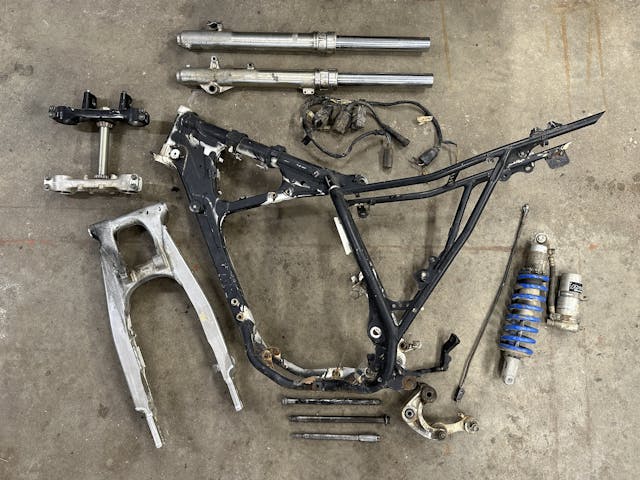
After talking to a few dirt-track racers and looking through spec sheets for aftermarket frames, I realized that the 1986 model year XR250R frame sitting outside next to my scrap pile actually had good enough geometry to be fun to ride and to be competitive in the right venues and classes. The swingarm was under one workbench, along with the triple trees. Forks were leaning in the corner under the coat rack. Rear shock, in a bin on the shelf. That was the bones. Now I just needed … everything else.
The deck could be stacked, though, and for me that meant doing a lot of the mental work up front. Much of it I had already done, because the idea of building a flat-track bike, disc-brake conversion and all, has been rattling around in my head for years. I have drawings and scribbled lists dating back a decade.
Building what I wanted started with defining what I wanted: A racer that fit into a vintage class, had decent parts support, and also allowed me to get creative when building it. A CRF250 or 450 is what I should own, on paper. All the parts I need are a credit-card swipe away. However, my credit card has had a water-cooled kinda last three months, and if building parts and doing things creatively is my goal, then why start with a bolt-together project? No fun in that.
Marketplace
Buy and sell classics with confidence
Of course, I started with one of my XR250R frames. Sadly, I only have two on hand and they are both chassis with drum rear brakes. While the drum-brake path is familiar, it’s not ideal for this project. So I am planning a disc-brake conversion, and will use a modern rear wheel for cheaper gearing and rotor options. I can also use take-off calipers and master cylinders, as the pure-bred race stuff is overkill for my skills. I’m not about to say I’m building this bike on a budget, because things will get out of hand at some point, but I’m taking budget into heavy consideration.
The first big sticking point was wheels. For the race tires that I should be running, 19-inch rims are all but necessary. Buying hoops and spokes and lacing my own wheels is not out of the question, but a fellow racer mentioned that building spacers for a modern motocross bike wheel is almost easier than building up a stock hub. Even better, that option would give me a strong wheel with non-custom spokes, as a fair number of modern bikes ship from the factory with 19-inch rear wheels.
I nabbed a CRF450 wheel from eBay for $125. It needs a few spokes and a good cleaning, but it was still hundreds cheaper than the alternative. The front was even cheaper: Adventures with the 1983 Goldwing that haunted my driveway for a few years reminded me that the cast front wheels—known as Comstars—are fairly light and use a 17mm axle diameter, the same as a stock XR250 front axle. I don’t even need to source special bearings, just spend some time on the lathe.

The prospects are exciting, mainly because there are so many parts of this project and plan that I have never tackled before. It is a path that will require me to learn new things. For instance, more complex lathe projects. I know enough to be dangerous, but only enough, so when I realized a lathe project was the first step to getting an idea of how much I would need to lower the suspension, I was a little intimidated. The swing arm pivot is two needle roller bearings pressed in on each side. This put me in the middle of a catch-22. It really makes no sense to install a set of new bearings just to have to pull them out to blast and finish the swing arm, but blasting and finishing the swing arm now is a fool’s errand as fabrication needs to be done on and around the swing arm that would likely ruin the finish anyway. What to do?
Chuck up some aluminum in the lathe, that’s what. Getting the newer rear wheel and older front wheel to fit requires new spacers to properly center the wheels and also adapt the larger 22mm rear wheel bearings to fit the 17mm axle. To learn the process I would need for the wheel spacers, I chose to turn down some spacers that will take the place of the needle bearings in the swing arm. I don’t need smoothly pivoting suspension right now, I just need a bike in roughly one piece. That compromise allowed me to do my first solo project on the lathe, which taught me the basic process and primed me for the next step: building the precision wheel spacers.
Each step of this coming build is a problem I am excited to solve, and that alone all but guarantees my success, because my goal is not to have a fast race bike but to know how to build things. Experience is far more valuable to me than another motorcycle in the garage. That’s how I know this project will get done. Didn’t even need a resolution to know that.
***
Check out the Hagerty Media homepage so you don’t miss a single story, or better yet, bookmark it. To get our best stories delivered right to your inbox, subscribe to our newsletters.




I’m not really a bike person, but I do like that front rim.
This is an interesting build, I like that you are committing thought-process to print.
Should be an interesting project. I am also interested in the different wheel on the front.
If I’m not mistaken, Comstar wheels are stamped, not cast.
I believe Honda had issues with late 70’s Comstars coming apart. I would imagine by 1983 if
they put them on a Goldwing they had that sorted. Might be worth checking anyway.
I believe the Comstar wheels are both. – cast rim, stamped center (the ‘star’) that is riveted to the rim.
I am curious about the mounting tabs for the axle to the front of the forks and not centered, either drilled through or mounted at the bottom. I looked up some photos of different brands from the ’70s, seems like that was started with the XRs, then later copied by others. Any thoughts on the accuracy of my observations and comments to how this affects geometry for handling?
Cool winter project, Kyle. Looking forward to seeing finished bike.