Media | Articles
Finding leaks in an A/C system by pressure-testing
In my book Just Needs a Recharge: The Hack Mechanic™ Guide to Vintage Air Conditioning, I make the case that those “A/C recharge $79.95” signs you see at service stations are perilously close to fraud. If a system needs to be recharged, it’s because the refrigerant has leaked out, so the leak first needs to be found, then needs to be fixed. The time for all that, plus the recharge itself, is always going to make the bill more than $79.95.
The best-case situation of the leak being caused by a bad o-ring—quickly found and easily replaced—is about as likely as a loose gas cap being the cause of your check engine light. Occasionally, however, you get lucky.
In the book, I describe using nitrogen to pressure-test an empty air conditioning system in order to find leaks. I’ve long been surprised that this is not a widely used technique. Most of what you read online says either: A) You find leaks with a vacuum pump during the evacuation phase; B) If you previously filled the system with oil with dye in it, and it worked for a while but now is leaking, you find leaks by using an ultra-violet light to look for the dye; or C) You find leaks by using a chemical sniffer on a system that still has refrigerant in it.
While sniffers are highly effective in finding small leaks in charged systems, there are problems with the first two methods. To be clear, using a vacuum pump to evacuate the system is a necessary step that you must perform prior to recharging in order to boil off and remove any moisture that might be inside. You can and should pull a vacuum, look at the reading on the manifold gauge set, let it sit for some amount of time (overnight is best), and see if the vacuum reading drops, because if it does, there’s a leak somewhere. But the vacuum itself is really almost no help in finding the leak. Regarding dye, I know that people swear by it, and certainly there’s no reason not to use refrigerant oil with dye in it when you’re servicing an A/C system, but I’ve never found it to be the panacea that other folks do. Sometimes leaks are small enough that the amount of visible dye is miniscule, and old dye left over from other work can confuse things.
In pressure-testing, you use a moisture-free inert gas to pressurize the A/C system. I got into the habit of using nitrogen, because I had a tank of it left over from a dune buggy project decades ago that used nitrogen-filled shocks, but you can use CO2 or other inert welding gases. You need an adapter like this one available on Amazon to connect the yellow hose on the manifold gauge set to the gas bottle.
Marketplace
Buy and sell classics with confidence
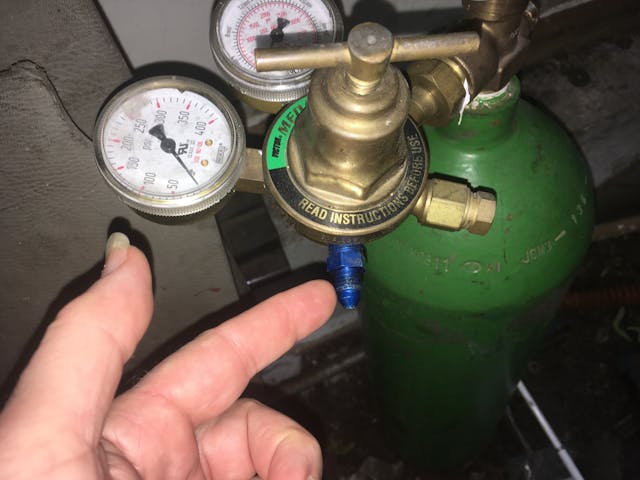
You close the valves on the manifold gauge set, connect the red and blue hoses to the A/C service ports as you need to do for any A/C work, unscrew the regulator on the gas bottle all the way to zero pressure, open the gauge valves, slowly turn the regulator handle to introduce the gas until the manifold gauge set registers about 100 psi of pressure, and then close the manifold valves and shut off the gas valve. Then you watch the gauges and listen.
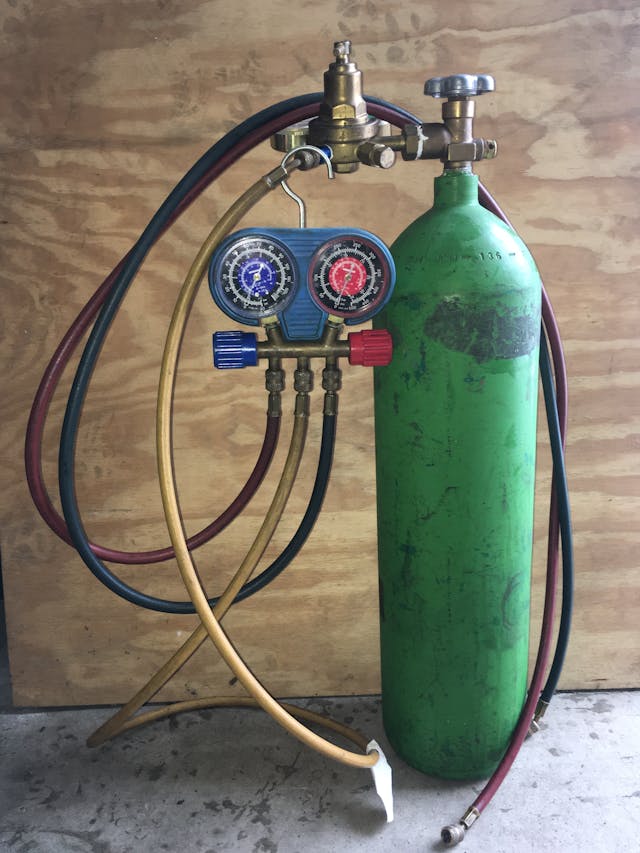
If a leak is large, the pressure readings on the gauges will drop immediately and you’ll hear the pressurized gas escaping. When this happens, you can usually isolate where it’s coming from by simply turning the gas back on, opening the manifold gauge valves, and laying your hands all over the system components to feel the escaping air and localize it—or putting a piece of a garden hose to your ear and moving the other end around. If the leak is smaller and the pressure drops over minutes or hours, you use an engineered soap solution such as “Big Blu” and look for bubbles. For the tiniest leaks, using a gas mix of CO2 and Argon is better than nitrogen, as you can then use a chemical sniffer to detect the argon.
The wonderful utility of pressurization was displayed in a repair I just did. A buddy of mine contacted me, saying that the A/C in his 1976 BMW 2002 was working fine until he saw a puff of white smoke from under the hood and the A/C quit working. The car has a Clardy A/C system in it, the rarest and coldest of the three dealer-installed options for this car when it was new. I’d resurrected the A/C in this car about five years back and was so impressed with how well it worked that I searched in vain for years until I found a Clardy system to install in one of my own 2002s.

He brought the car by the house, and I connected the manifold gauge set to the charging fittings on the back of the compressor. They showed zero pressure, so all of the refrigerant had indeed leaked out, corroborating his observation of the white smoke. I wheeled over the nitrogen bottle, connected it, pressurized the system, and immediately heard hissing from low in the engine compartment. I felt with my hands and isolated it to the inlet (suction) hose fitting on the compressor itself.
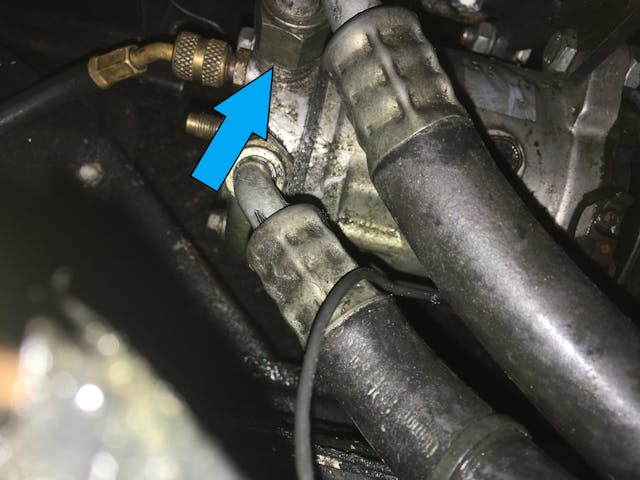
I put a wrench on the fitting and found that it was very loose. A-ha! I tightened it up, re-pressurized the system, and watched the pressure gauges for a few minutes. It didn’t take long to see the pressure drop by about 1 psi per minute.
The next step would normally be to spray soap solution and look for bubbles, but because the suction fitting had been loose, I checked there first. I undid the fitting to examine the o-ring under it and was astonished to find that the o-ring was missing. Holy moly. I installed a new o-ring and for good measure removed the discharge fitting and replaced its o-ring (which was present) with a new one as well. I re-pressurized the system, and it held.
I then thought about it and realized that the odds that the system had been working for all these years with a missing o-ring were zero. I carefully hunted around beneath the compressor on the engine mount and on the top of the subframe and found the smoking gun—a cut o-ring.
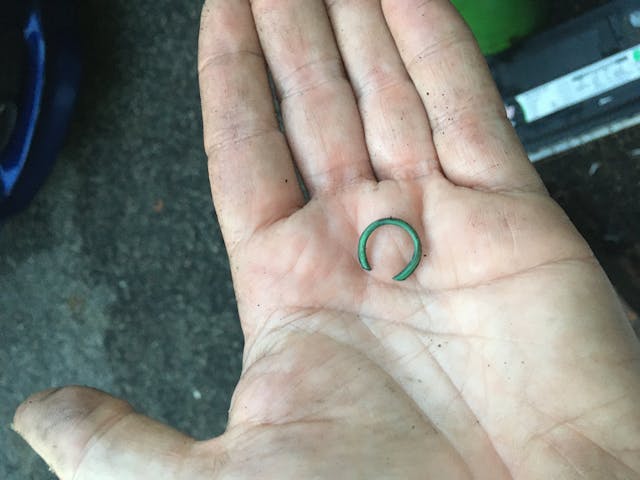
My friend had had the engine replaced in this car last spring, and it was almost certain that, as part of that work, the hoses had been disconnected from the compressor. When they were reconnected, it’s likely that the o-ring had gotten pinched.
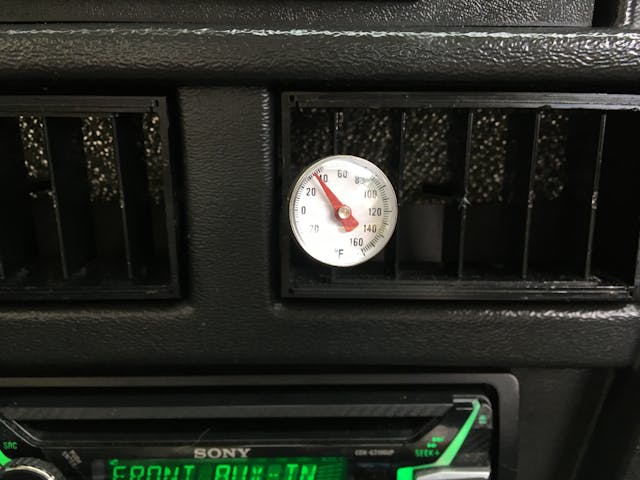
I pressurized the system, let it sit overnight, saw in the morning that the pressure hadn’t changed more than could be attributed to temperature, evacuated it, charged it up, and was very quickly greeted by a cold car.
So, even if it’s a bad o-ring, it’ll never cost you the advertised $79.95 at a service station. But that’s still the most minimal A/C repair possible, and if you do it yourself, you can find the leak quickly through pressure-testing, and it shouldn’t cost more than the o-ring and the R134a refrigerant. And the tools. But admit it, you were just itching to buy those anyway.
***
Rob Siegel has been writing the column The Hack Mechanic™ for BMW CCA Roundel magazine for 34 years and is the author of five automotive books. His new book, Resurrecting Bertha: Buying back our wedding car after 26 years in storage, is available on Amazon, as are his other books, like Ran When Parked. You can order personally inscribed copies here.




I know this is an old article, so my comment might not reach you, but here goes. Is it safe to use CO2 for leak testing the a/c system. I have been seeing articles about CO2 and oil becoming a fire hazard, or explosion. I am sure there is refrigeration oil still in the system. Thoughts? Thanks..
Tommy, I am neither a chemist nor a safety engineer, but carbon dioxide is not only not flammable, it’s used in a class of fire extinguishers. The only caveat I see is that Class B CO2 fire extinguishers shouldn’t be used to extinguish cooking oil or fat fires. And, of course, the fact that CO2 displaces oxygen and thus in high quantities can cause asphyxiation, so any use should be in an open garage. But in my non-professional opinion, I don’t see why pressurized CO2 couldn’t be used in the way I describe in the article.
Hi Tommy. Carbon dioxide should not be used for pressure testing. It is a large molocule gas that may not fit through small gaps and it liquifies at a lower pressure than dry nitrogen. One reason to use dry nitrogen is it is more stable in temperature changes than CO2 so it lessens the pressure variations in test pressure as well as it absorbs moisture readily. Some systems we install are required to have triple pressure / evac to ensure the systems are completely dry. Moisture kills AC oil. Having said that, most residental installs in Australia are performed cheaply by using the refrigerant to purge and pressure test the system.
Like Tommy, I know this is an old article but a very helpful one. I note that use of CO2+Argon is suggested to find tiny leaks and a chemical sniffer used to detect it. I have a car that leaks the gas out in under a month. I use Hychill-30 gas which doesn’t require a Refrigeration license to do so. I have worked on auto air con systems for about 40 years as a motor mechanic, now retired. I cannot find the leak with dye and UV light. Over time I have replaced every O ring, hi pressure hose, evaporator & compressor – no better or worse than before. When I found this topic a week ago I evacuated the system and filled it with Argon to 100ps, left it o-nite to find the pressure had dropped to about 82. A check over with UV light and halogen leak detector showed nothing in particular. Perhaps the pressure drop was due to o/nit temps. Question 1: will a halogen detector detect Argon? Question 2: what do I do next? TIA.
schrader valves possibly
Another thing to remember is the expansion of hoses under pressure can cause you to think you have a leak in a recently repaired system… dealing with commerical transport units we pressurize the system to 300psi and then provide that constant 300psi into the system for about 5-10 minutes to ensure the hoses have expanded enough to not show on your pressure gauges, then shut off the supply and monitor the decay.
Hi, I have not been able to find a shop to work on my old r12 system in my 1989 Dodge Van. All r12 is gone over the years.
My question is, should I go thru all the trouble to upgrade to R134a or is R12a a reasonable way to go?
I am concerned with compressor oil issues, I understand I will have mineral oil in the compressor now, and if I go to R134a I will need to completely change that to PAG oil. With R12a I should not have to do that…
I have no access to inert compressed gas. I got a manafold cheap so ready there. I also scavenged a fridge compressor that I plan to solder a connector to so that I can vacume out the system. Should I add a little more mineral oil? How can I know how much is too much oil… Hard to get specs on this old system…
1989 B350 with dealer added Dodge manufactured A/C kit but it is not factory A/C
Thanx to anyone who answers 🙂
This set up didn’t work for the yellow hose threads for the AC gauge set. The 1,1/4 threads are too small to fit the hose threads. Delayed yet again…
Great information. My vehicle’s clearly losing freon over time, and yet it seems to hold 30-in of vacuum for a long time, after I pump it down. Anyway, I’m ready to get into the next round of testing and, since I’ve got welding gas around, I’m going to use the provided instructions to pressurize and test. Thanks, Mr. Siegel!
Great read. Never knew inert gases could be used for the purpose of leak testing. And repair shops thrive on their customers lack of knowledge. Thank you Sir for the insight.