Media | Articles
Wrenchin’ Wednesday: A quick, accurate depth-gauge hack for your drill press

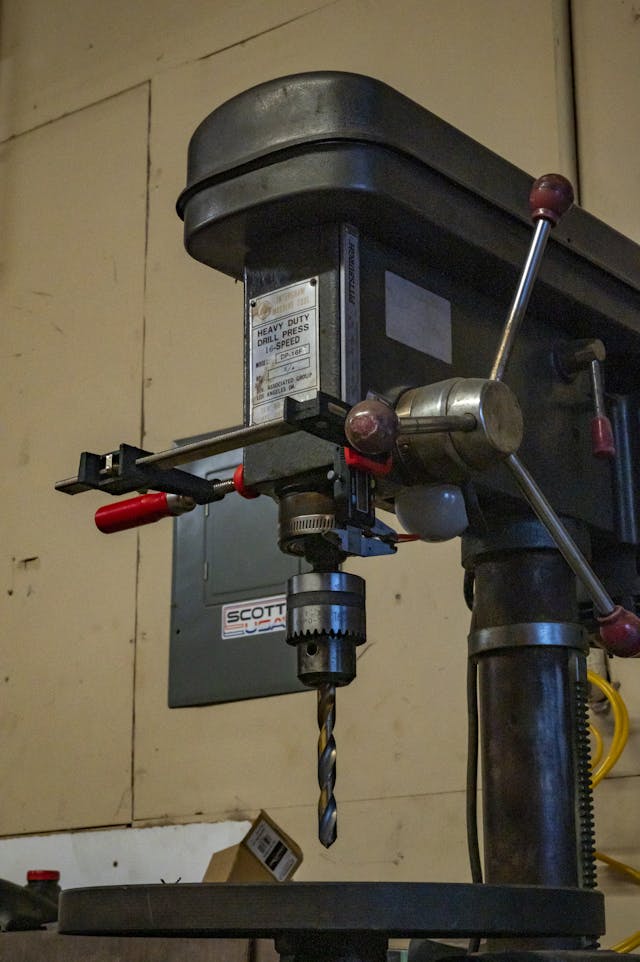
Drill presses are absolute workhorse machines, each one piling through miles of material over its lifespan. Usually you’re through-drilling the material, but occasionally you’ll need to make a dead hole, and even when your machine has its own scale for measuring depth, there’s a trick way to set up a cheap digital caliper as a read-out of the chuck’s travel. This allows you to do spot-on work and create trickier parts with a drill press. Of course, there’s the old trick of using tape to mark the drill bit, and you can do some decent work with the on-machine scales, but they’ll never have the accuracy of even a $5 set of calipers.
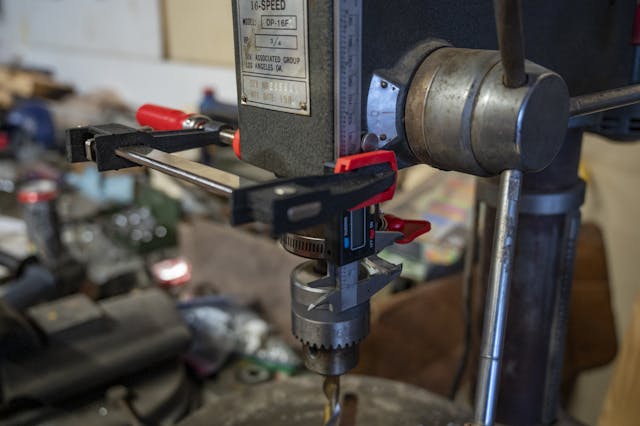
We need to figure out a simple fixture to hold and open the caliper. With that, a quick part needs to be made that will pull the jaw open as the chuck is lowered while keeping the body of the clamp held to the machine.
The main body of the caliper will be clamped to the machine, so that it can still be used in other projects when absolute accuracy is not important on the drill press.
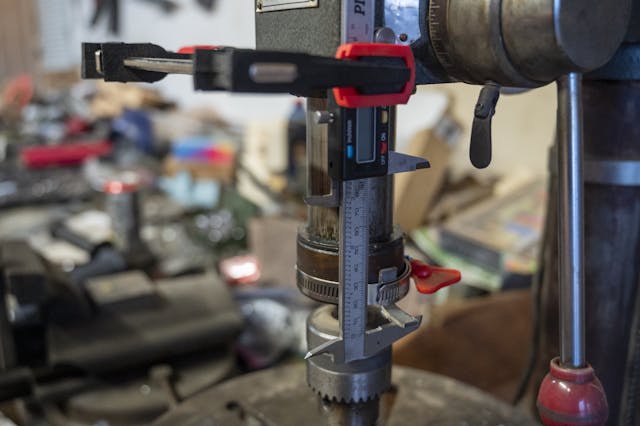
On the chuck, I cut a tab out of a spare piece of angle iron and simply hose-clamped it into place. If this were a more permanent fixture, I’d probably still use hose clamps I’d look into finding a way to drill and tap the chuck, but this serves the purpose just fine.
The tab should grab the sliding jaw of the caliper, so that the caliper measures the distance traveled. One thing to check is that the tab does not crash into the other caliper jaw when the chuck retracts back into the machine—a small gap is preferred. To measure depth, lower the bit until it’s touching the surface of a part, zero out the caliper, and begin your drill.
Marketplace
Buy and sell classics with confidence


Thanks Phillip. I really like your setup : precise, simple, quick, cheap, non-permanent and no dammage to any of the tools.