Media | Articles
Prepping a 1917 Willys-Overland for duty is a bygone, rewarding ritual
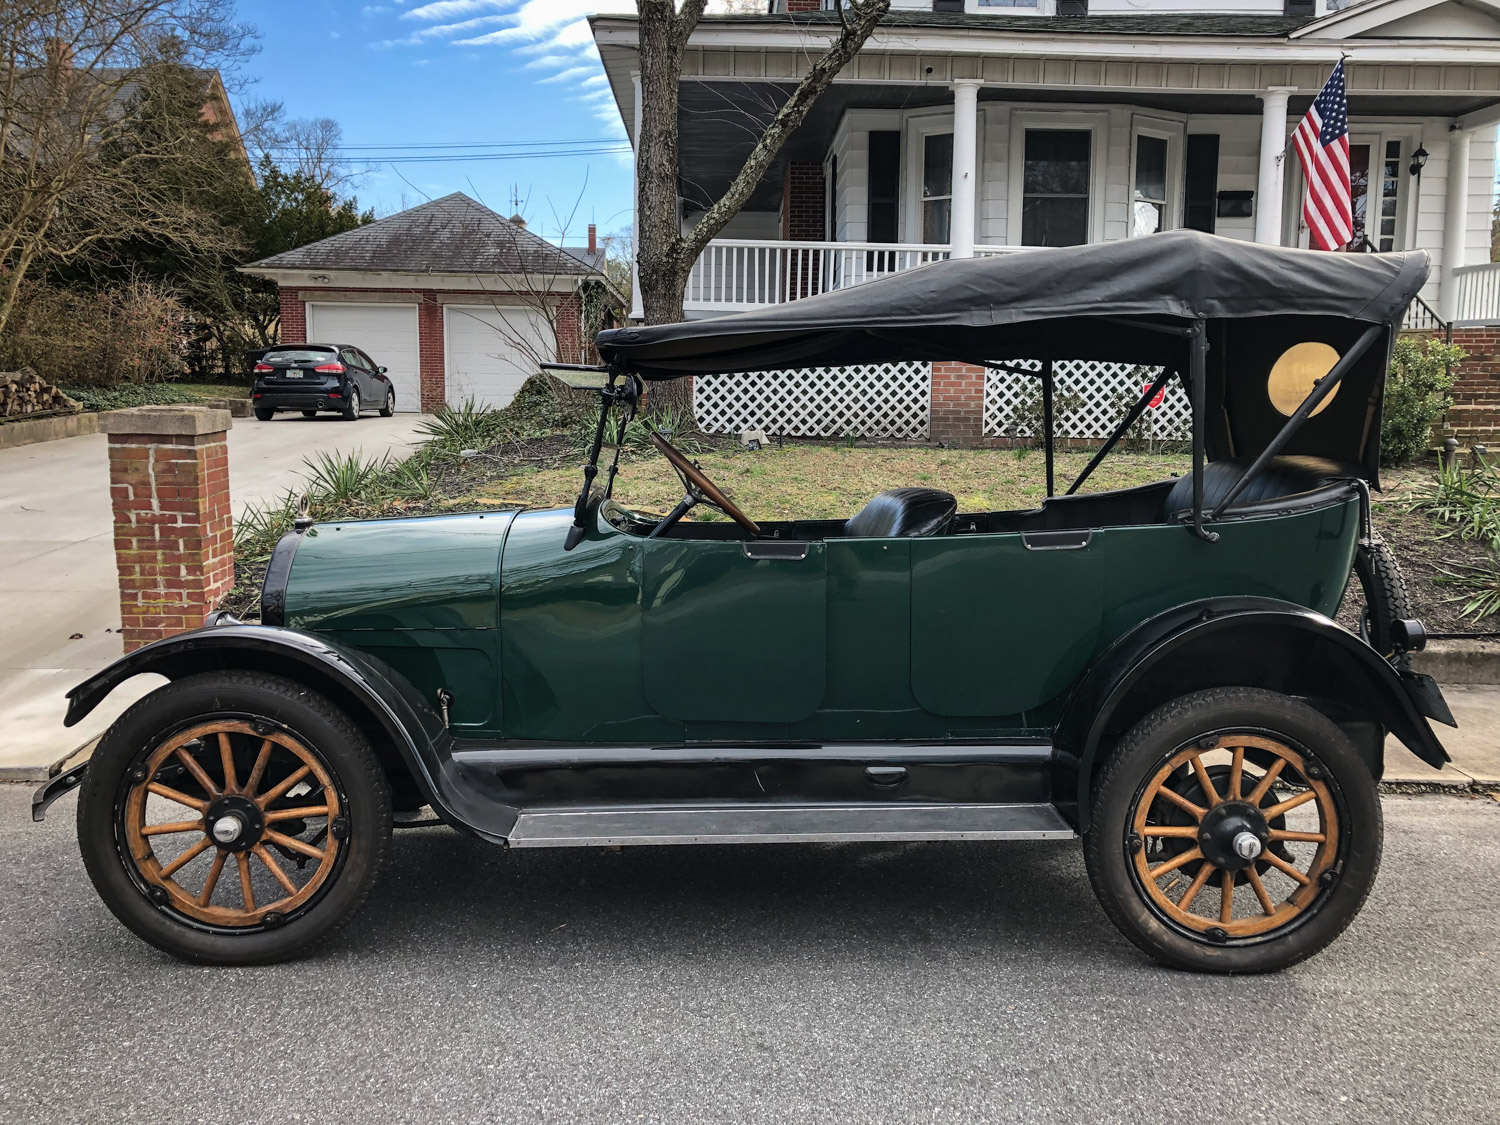
One of the funky old cars in the garage right now is my 1917 Willys-Overland touring car. I love it. The experience of a truly vintage car is much different than something from, say, the cars of the ’60s, which is where the bulk of my automotive experience lies.
Automatic timing advance in the distributor? Nope. There is a control lever on the steering wheel column that lets you advance and retard the spark based on driving conditions, as well as a hand throttle to set the idle where you need it. Creaky wooden wheels make you want to keep a careful eye on the road ahead, too. Synchromesh gears? Get serious. This is a three-speed crash box, and you’d better be pretty good at double-clutching if you think you’re going to downshift it while moving. Even upshifting takes persistence and patience, with a nice long pause and a little throttle blip in between each gear.
I take the car out now and again, usually for taking the dog and the kids out for some air around the neighborhood, and it always draws smiles and thumbs-up from folks who see it. I really hadn’t driven the car any distance since last season, before tucking it away for the winter.
I’d committed to driving it in our annual St. Patrick’s Day parade here in Ocean City, Maryland, so I figured I’d better give it a once-over to get it back in shape and share the experience with you. Ready? Here we go!
Marketplace
Buy and sell classics with confidence

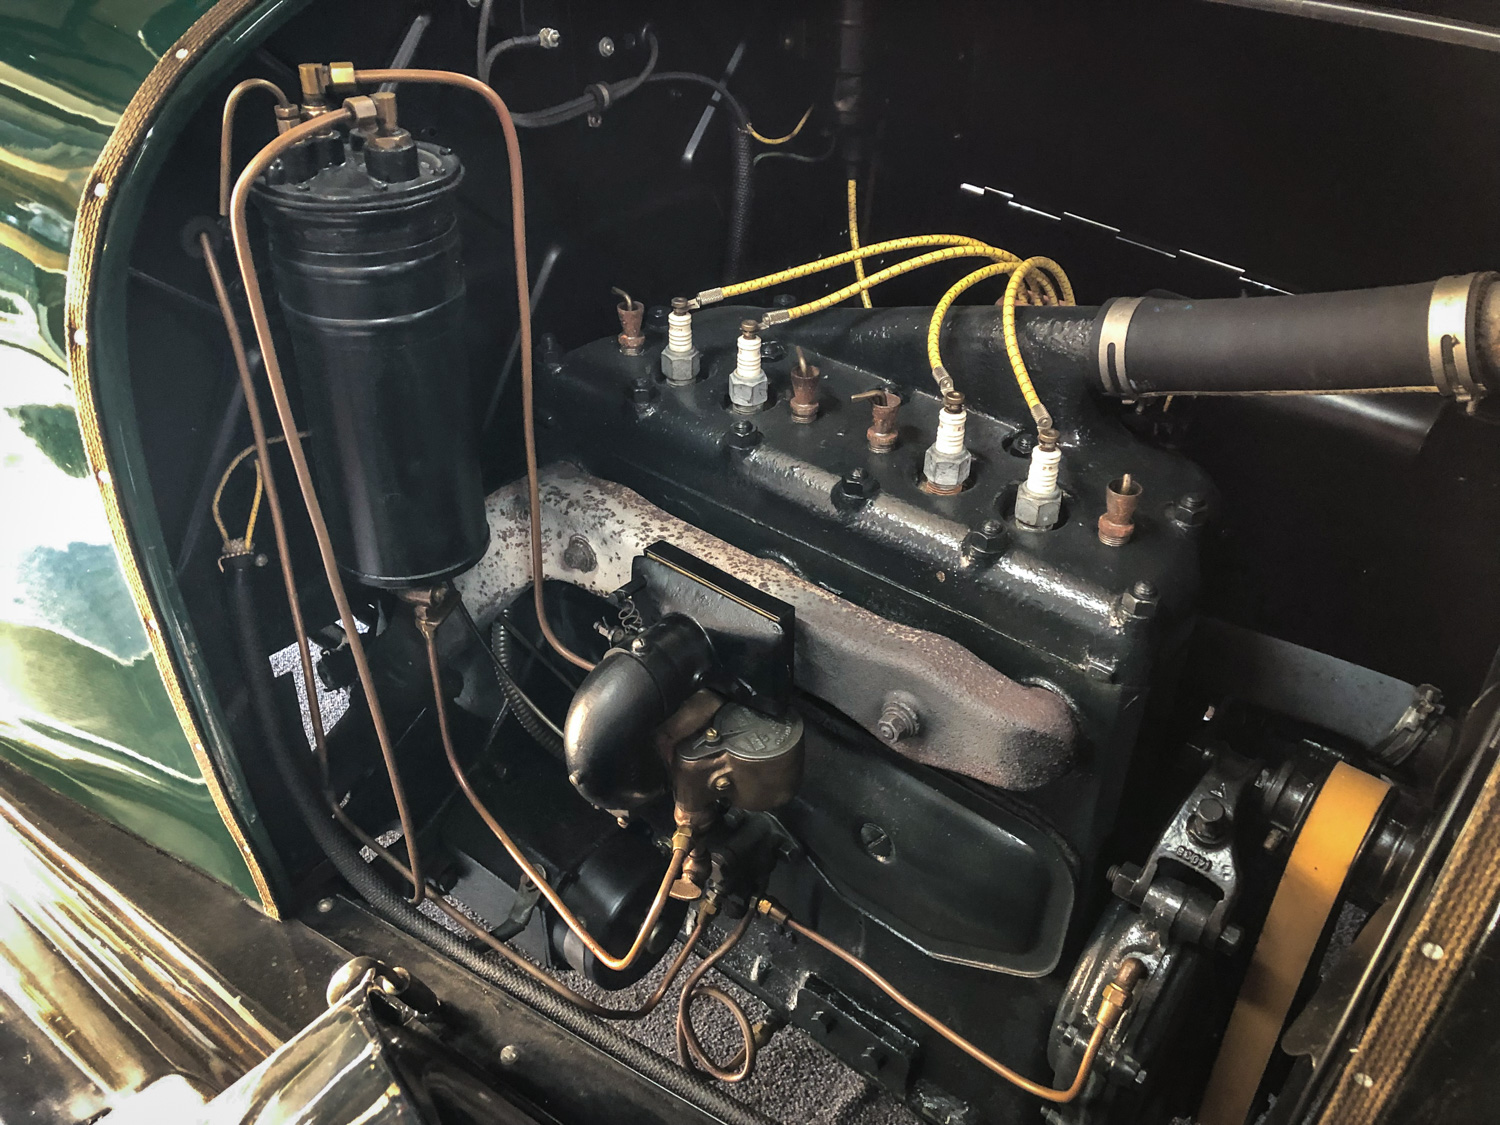
What’s neat about this 102-year-old relic is it still has most of the original bits that made it run 100 years ago. Somewhere along the line it got a more modern 6-volt coil, but otherwise I’m still dealing with a vacuum fuel pump, a reed valve carburetor, and a 180-cubic inch four-cylinder with about 32 horsepower at 2000 rpm. Everything comes apart pretty easily, and really, I just wanted to make sure nothing had deteriorated during the winter. The engine bay opens up to you quite easily, too. Just lift the flap!

I tend to go stem-to-stern on my “first drive of the season” inspection, starting at the 14-gallon fuel tank. Everything seemed OK after topping off with a jug of 89 octane non-ethanol fuel. (I’m pretty sure it would run on 100-proof whiskey, maybe I’ll try that one day!) I didn’t notice any leaks, so I figured all was OK. A little opening in the fuel cap vents the system. Hold it up to the light and you can see if it’s clogged with anything. Nope. Nothing there. So far, so good.
Next to check is the Stewart vacuum fuel pump bolted to the firewall. As the engine runs, engine vacuum draws fuel from the tank at the rear of the car into the storage reservoir. As the tank fills, it automatically closes the valve until it needs more fuel. Pretty simple. I had this tank rebuilt a few years ago—the parts are, surprisingly, still available, and I love using it instead of a modern electric pump. A little valve at the bottom of the tank keeps the accumulated fuel from draining into the carburetor. I keep it shut off when I’m not driving the car. Nothing appeared to be leaking there, either.

Next up is the original Tillotson reed valve carburetor. The lid of the fuel bowl comes off with one screw, letting you make a quick inspection of the float, needle and seat. It’s a gravity fed carburetor, so when the valve is the fuel reservoir I mentioned earlier opens, gas flows through the line into the bowl to be mixed by the carburetor. The fact it still works is a source of pride, as many cars of this vintage use Model T or A carburetors because the parts are easier to find. (And because they work better, but that’s beside the point.)

It only takes removing a few screws to pull the carburetor from the engine, and I wanted to do that to give it a good cleaning. The engine tends to run a little sooty (you will too, should you make it to 102), so I try to give it spit-shine a few times a year. Pulling another three screws lets you to remove the air horn and throttle plate assembly, exposing the carburetor throat, emulsion tube, and the thin metal “reeds” that mix the air and fuel properly. As I understand it, the greater the air velocity there, the more the reeds pull inward, allowing more fuel to enter. If someone can explain it better than that, I’m all ears.

With the carb throat open and the air horn and throttle plate assembly in my hand, it was time to get busy with the carb cleaner. I also cleaned the air cleaner assembly. I’ve adapted a marine fire suppressor type air filter to the job due to a fiery engine belch I experienced a few years ago. I cleaned all the sooty deposits and saw amiss. That done, it was time to test fuel flow into the bowl. You can do this with the top cover removed, and it makes a very satisfying gurgle as it fills. All good.
With the fuel system in good shape, I moved to the other side of the engine to check the oil. I changed it at the end of last season, filling it with maybe 5 quarts of 30-weight, so as long as the oil was still up to the mark, I planned to let it go at that. There’s no oil filter assembly on an engine like this, so it’s best to keep an eye on it through the sight gauge on the dash. There is a strainer in the oil pan to look at, and I’ll check it out next time. As you notice the oil go from the color of honey to the color of tar, drain the sump and refill it. The oil level is found on this little floating pin, as you can see in the photo. Nice to tell at a glance what’s going on there.

Last stop is ignition system spark plugs. I popped the distributor cap and checked the points and cap and rotor. I generally hit the rotor with fine sandpaper to shine it. The spark plugs are easy to get to, and I figured they might be a bit sooty after a season of driving. The plugs on this car are so much bigger, maybe three times more so, than what you see today that I actually remove them with an old adjustable plumber’s wrench. Yes indeed, they were pretty black. After hitting them with carburetor cleaner and sandpaper, they were ready to go again. I didn’t notice any electrode degradation or other signs that they needed replacing. Before screwing them back in, I sprayed a little upper cylinder lubricant into the cylinder bores.

Before moving on, I took a little jaunt down memory lane. I have the box of spare spark plugs that came with the car. It’s pretty cool. Inside you find about a dozen new old stock Edison and AMOCO spark plugs, still in their original boxes. One day, I’m going to be happy to have these!


All of this took about an hour, and I was happy not to find anything concerning. I added some air to the tires, tall, skinny bias-ply things that measure 30 x 3 1/2. With that, it was time to see if my old Willys would crank over. Retard the spark, put the hand throttle at about half way, and pull out the choke, which is just a strangler on the carburetor butterfly. This old car came with a foot-operated electric starter back in 1917, so I hit the button. It took a few cranks, but the car roared to life and settled into a clattering idle.
The next day it was off to Ocean City for the parade. I’m happy to report that several members of the Eastern Shore Ballet Theater Company got to enjoy a trouble-free ride down Coastal Highway by the Atlantic Ocean!


I own a 1917 willys overland car and I am having a problem with the carburetor float assembly, do you know where I can buy the float assembly and the gasket? I am selling the car soon and need these parts. Please call me at 843 523-6388 if possible. Thanks!