Media | Articles
How to make EFI work with an odd-fire V-6: Part 2
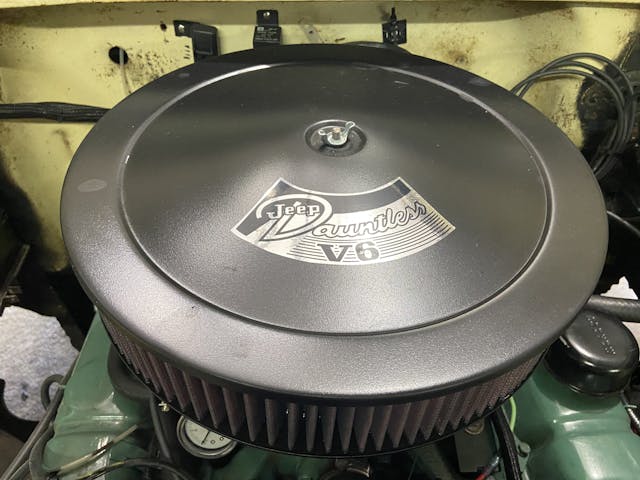
As I wrote about in the first installment of this story, I have a 1966 Jeep CJ-5. The engine is the 225-cu-in “Dauntless” V-6 that Jeep used from 1966 to 1972, prior to the development of its own inline-six cylinder engine. Jeep bought the engine and all its tooling from Buick in 1966, after Buick decided to forego V-6s entirely for a short period.
Buick later bought the engine back from Jeep during the 1970s fuel crisis and used them in compact and midsize cars like the Apollo, reworking the engine with an EVEN-FIRE setup. Why, you ask? To eliminate a lot of the, erm, issues I’m about to describe …
Odd EFI quirks for the odd-fire V-6
I spent an inordinate amount of time on the Early CJ5 Forum, one of the Holley Sniper EFI groups on Facebook, as well as the Jeep Dauntless 225 V-6 Facebook group. These forums are a wealth of information, but finding it sometimes requires wading through misinformation.
According to many forum posters, EFI doesn’t work at all with the odd-fire V-6. Given that I’d seen it work on several Jeeps with the same engine, I doubted this assertion. Many posts also professed that installing a Pertronix Ignitor (electronic ignition) was practically the key to happiness. At $75 the Pertronix was a cheap enough investment, but for me it netted zero improvement in the way the Jeep ran.

My next move was to upgrade to electronic ignition with a high-energy ignition (HEI) distributor. DUI makes a beautiful example here in the United States, but at over $400, I was a little hesitant to gamble on it. I opted instead for a cheaper imported example, from The Jeepster Man. He’s a trusted supplier to the Jeep Commando scene, and a lot of those vehicles run the same engine as my CJ-5. The upgraded distributor’s more reliable spark was appreciated, though it did nothing to solve my idle issues. I hoped that maybe installing a filter between the ECU and the tach output would smooth it out. No luck.
Marketplace
Buy and sell classics with confidence
Back to the drawing board. Painfully obvious was that something about how the Dauntless 225 V-6 fires was providing an inconsistent tach signal to the ECU. In turn, it was causing the idle air control (IAC) to go nuts.
On the Early CJ5 Forum, I found a post from a guy who had the same issue with his Howell EFI setup; he installed a crank trigger from a Corvette to get a more consistent signal. Try as I might, though, I had a hard time interpreting how it was installed, let alone how I’d wire it to my Holley setup.
Hall Effect to the rescue
Finally, on June 1, 2022, at 7:43 p.m., I got my answer. Curt Stechert, a member of the Jeep Dauntless 225 V-6 group, relayed his experience. Instead of the Rochester GC-style throttle body, he’d opted for a Motorcraft 2300-style, with an adapter provided by Brennan’s Garage. For a clean, consistent tach signal, he purchased a Holley 554-124 Hall Effect sensor. There are many cheaper sensors on the market that will do the same thing, but I opted to follow his example and buy this one for a couple of reasons: First, the instructions provided with the Hall Effect kit were helpful in wiring it to one of Holley’s other products. And second, the included connectors made wiring it a lot easier. That said, you can buy just about any Hall Effect sensor and figure out how to make it work.

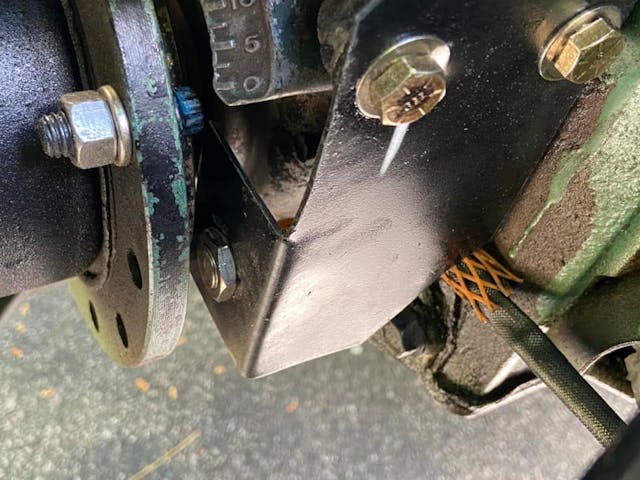
What is a Hall Effect sensor? Essentially an electromagnet. When it’s powered, every time some piece of magnetic material passes within .040 inch and .080 inch (the closer the better, according to the instructions), it sends a signal. I installed three 5/16-inch bolts through the harmonic balancer at 120-degrees apart to act as targets. I bent up a piece of sheetmetal, bolted it to the fuel pump blockoff plate, and installed the Hall Effect sensor through it. The Hall Effect sensor has three wires: One goes to keyed power. The second is a ground, and the third is the output, which I’d wire to the ECU.

The very important part: This setup meant I would no longer be using the tach output from the coil on the distributor. If you retain that functionality and also try to wire a crank trigger, you’re going to destroy the ECU. I unplugged the connection entirely and tied the yellow wire up and out of the way. The Holley Sniper ECU has a twisted set of green and purple wires which reads a crank signal from something like an MSD (Multiple Spark Discharge) box. The purple is positive and the green is negative. The Holley Sniper kit includes an additional purple wire that plugs right into this twisted harness. I wired that to the signal output of the Hall Effect sensor.
My EFI Eureka moment
The final step was to reinitialize the Holley Sniper using the Startup Wizard on the handheld unit. As you go through the process, you’ll be asked for the source of your tach signal. Instead of “COIL,” you’ll select “MSD box.” Once I’d saved the settings, I cycled the key, then turned it all the way to the START position.
Instantly, the engine fired to life. It settled into a steady idle in seconds. The hunting from the IAC was completely gone. I let it warm up to operating temperature and checked to see where the IAC was reading. Ideally, it’s in the 8 to 12 range—exactly where it sat.
On the road, the stalling behavior I experienced weeks before was completely gone. Zero bogging, zero stalling, effortless acceleration and easy starts. Success!
Over the last week, I’ve driven the Jeep farther and farther from home. Yesterday, I drove it out to Clapham’s Transmissions about 25 miles from home, where I was having a slipping clutch addressed. With the newfound power that the Dauntless 225 was putting out, the clutch suddenly needed more attention.

Final lessons
If you’re driving something with one of the engines that Holley supports with a Hyperspark distributor and you’re thinking about doing this, just go for it. You’re going to love it, and within a day, you’re going to have a more reliable, powerful, and efficient-running vehicle.
If you have one of the engines that’s sort of supported—in that a Holley Sniper throttle body will sit on the intake manifold properly—be aware that you will have to investigate on your own how to make it work. Early on I called Holley for technical assistance but never managed to get anyone on the phone. I also called vendor EFI Systems Pro, which had advertised its one year of free tech support as a great advantage to purchasing it there; I did get a bit of help on some basic points, but the larger question of how to make this engine work with a Holley Sniper EFI remained.
The biggest help came from the two posts from the Early CJ5 forum and the Jeep Dauntless 225 V-6 group on Facebook. Both provided invaluable assistance, specific to my particular situation.
Don’t be afraid to do dive into these waters. In all, my investment totaled about $1600, not including the fuel tank I needed to replace anyway. What I got out of it was fat spark from an HEI distributor, excellent power and reliability from fuel injection, and a lot more feedback about what my engine was doing from the handheld monitor, which I mounted just ahead of the steering wheel. At a quick glance, I now can monitor my engine temperature, RPM, and air/fuel ratio. If I want to increase or decrease the idle, it’s a touchscreen input away.
I’m looking forward to many fun drives with this Jeep.
Check out the Hagerty Media homepage so you don’t miss a single story, or better yet, bookmark us.


Do you have more pictures of the bracket that you made and where it mounts? Hard to fully visualize with one picture.
Hi Will!
I can take a few more pictures for you. As hard as it is to visualize, it’s a little tricky to see where it is. I mounted it to the original location of the mechanical fuel pump, and it’s pretty low on the engine.
Nice article, thank you! I am putting together a ’66 CJ5 with Dauntless now. I’ll get it running/driving with the 2 Jet and points, but eventually I may go EFI. One advantage you didn’t mention about EFI is that when you are climbing steep hills, the carb won’t run out of fuel.
Absolutely true. I wouldn’t hesitate to do it again. The installation process was honestly a breeze. I had the whole thing together, including the fuel tank, fuel pump and Sniper kit, in two days. The only place where I digressed from following the Sniper EFI instructions to the letter was coming up with my own solution for a trigger. I wish that had been part of the instructions provided by either Holley or the supplier where I purchased the kit, but there aren’t a whole lot of odd-fire V-6s around anymore. The institutional knowledge of how they work is hard to come by.
I have a Sniper 2300 on order for my 67 Odd Fire. A PO installed a Holley 2300. I already have the DUI HEI distributor that works like a dream. Do you think the problems stemmed from the staggered spark intervals? You ran into problems that I didn’t anticipate.
So did you also use the 2300 style Sniper? Or the Rochester style?
Hi Craig,
I enjoyed this article very much as I owned a Jeepster with the Dauntless for a time.
I used to enjoy your posts on advrider, so it’s nice to find you again. Cheers.
Good write up. I have a 1953 Willys 3B with a 1976 Buick 231 Odd Fire in it and went thru the same headache figuring it out. I used a Littlefuse 55075-00-02-A hall effect sensor from Mouser Electronics for $37 mounted to a plate off the fuel pump location and 3 ARP 3/8 bolts with the small 12 point heads in the balancer to trigger mine. Also wired in electric fans to it. I came across your article trying to figure out a way to use timing control in the sniper with the odd fire engine. It appears that may be an impossible thing to do.
I believe you can also get the tach signal from the alternator and use this as an input.
Why 3 bolts for a target? Doesn’t that screw up the actual RPM?
I just did the same thing. I used a ls3 style crank position sensor fairly reasonable at any parts house. It didn’t pick up the bolt heads I used so I drilled a small cavity in the heads and used epoxy to hold small rear earth magnets in place. I am running a MSD street fire to run the ignition being triggered off the points.
I followed you installation instructions to a tee. However, reading your article and talking to Holley, they assured me that the hall effect sensor and the tech forward your installation instructions my 1971 cj5 225 V6 is having issues. 3 bolts 120 degrees on crankshaft pully, mounted sensor as shown, red (bat +), white (signal), blk (-) yellow on coil not needed. Reprogrammed Holley handheld saved settings, started motor, motor runs for 5 second and dies. I get bat voltage at sensor but does not run. HELP what am I doing wrong.
My 69 works fine with this set up. double check the air gap between the bolts and the pickup, and make sure the rubber isn’t broken on the balancer allowing it to move away when running. The hand held will show if there is a signal. On the hand held in the vital window you should be able to see the signal. The first hall effect I ordered was sent wrong, it needed to see a magnet to work not a magnetic surface.