Media | Articles
DIY tips for replacing a leaky transaxle seal
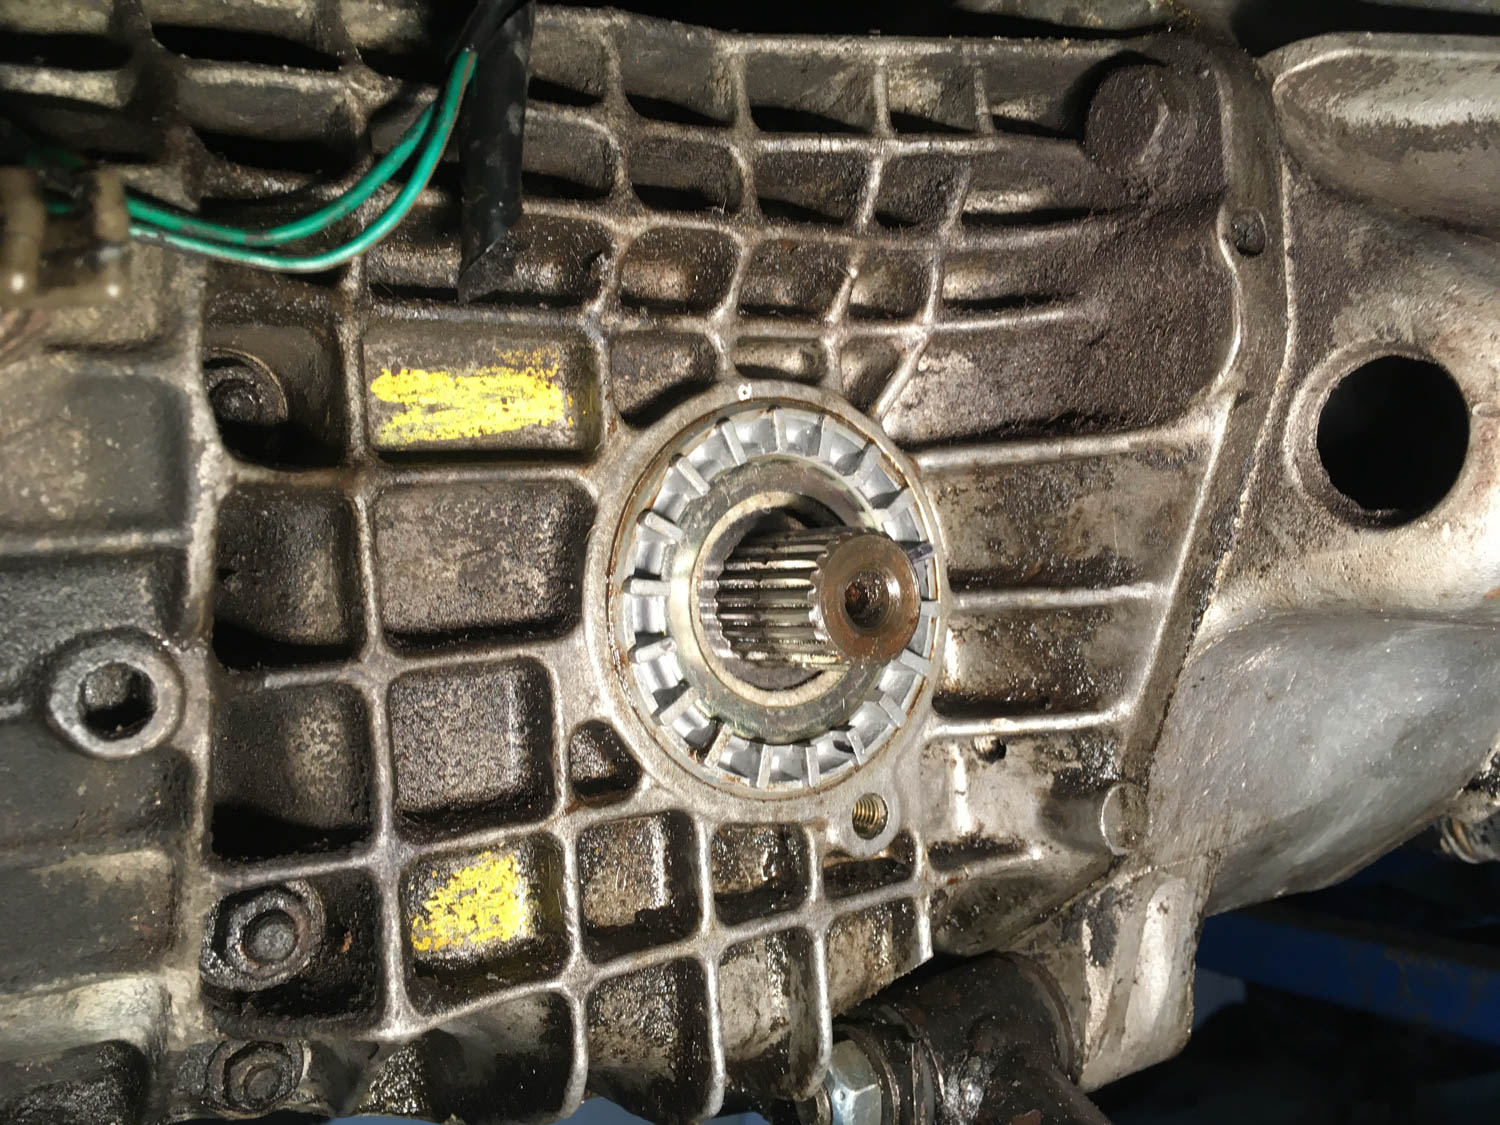
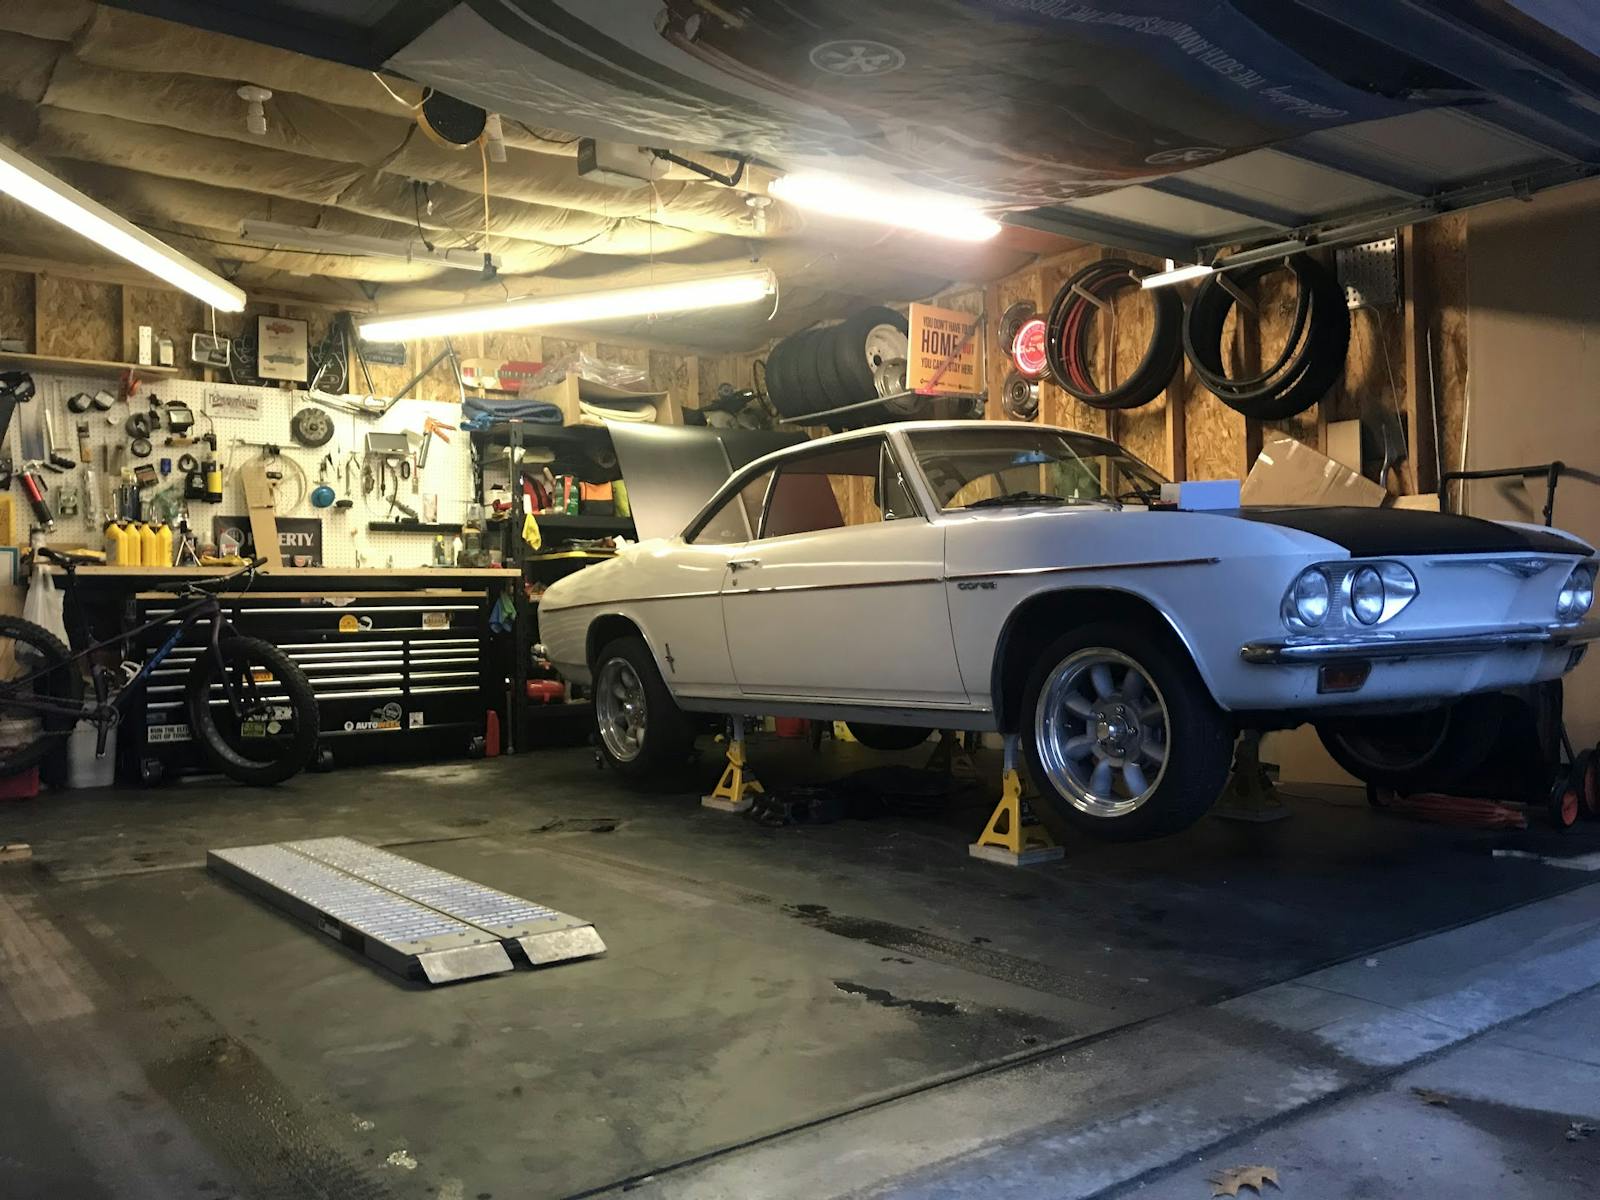
After spending several months rebuilding the front end in my 1974 Lotus Europa Twin Cam Special, then a week or so replacing the radiator’s cooling fan and wiring it in, it was time to move on to my third winter project—replacing the leaky seal in the transaxle.
The Europa is a mid-engine car that utilizes a Renault transaxle used in front-wheel-drive vehicles like the Renault R16 sedan and R17 Gordini coupe. Its selection dates back to when the S1 and S2 Europas had a Renault engine. Mine is a Twin Cam Special, so it has the Lotus-Ford twin-cam engine, but the use of the Renault transaxle continued through all Europa variants.
During the nearly six years the car sat in my garage while I was rebuilding the engine, the transaxle was also out of the car. When I finally finished the engine rebuild, I was in a rush to mate it to the transaxle and get the pair back in the car and the car on the road. I did pause and think, “Perhaps while it’s out I should re-seal it”—which is work I could’ve been doing during the six years it sat—but I was a man on a mission.

The transaxle has splined stub axles protruding out each side. The universal joints on the half-axles slide over them. Holes in both line up, then a roll pin is banged in to secure them. Actually, it’s a little more complicated than that. Shims have to first be inserted so that the pins load the bearings inside the transaxle. The procedure described in the manual was difficult to follow, but I read a much simpler explanation on a Europa forum: If you bang in the pin and it offers very little resistance, put in the thinnest shim and try again. If you really need to beat on the pin to get it in, you have too many shims. Take one out.
Marketplace
Buy and sell classics with confidence
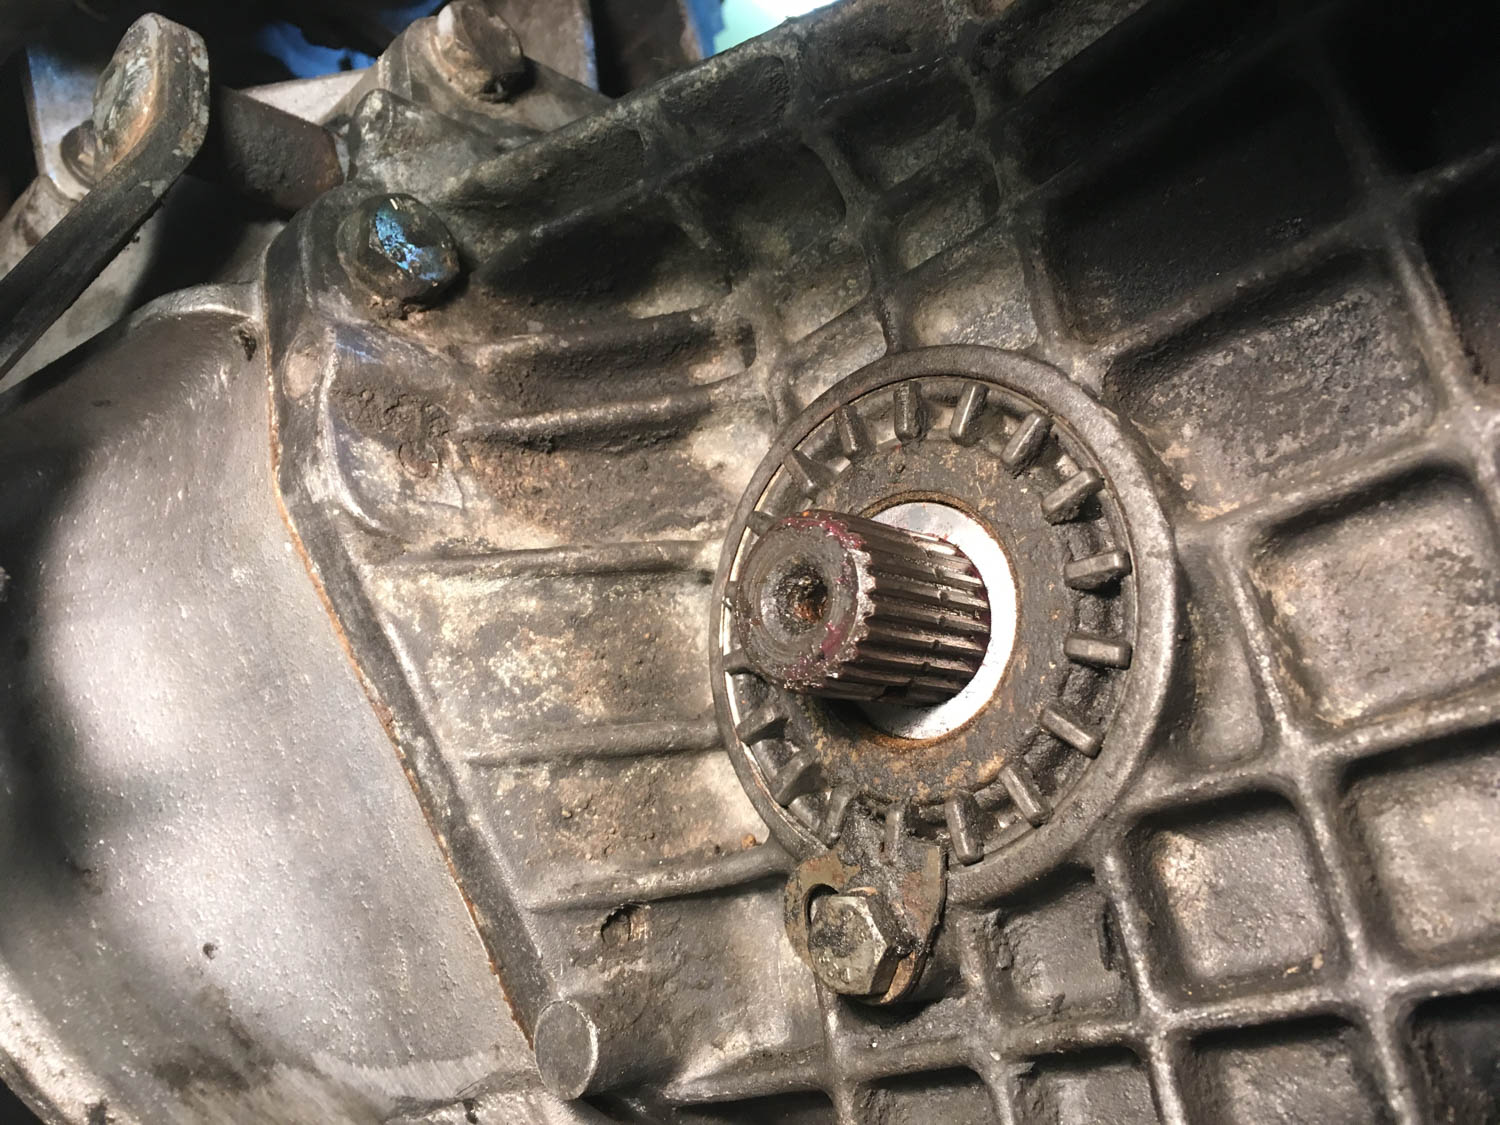
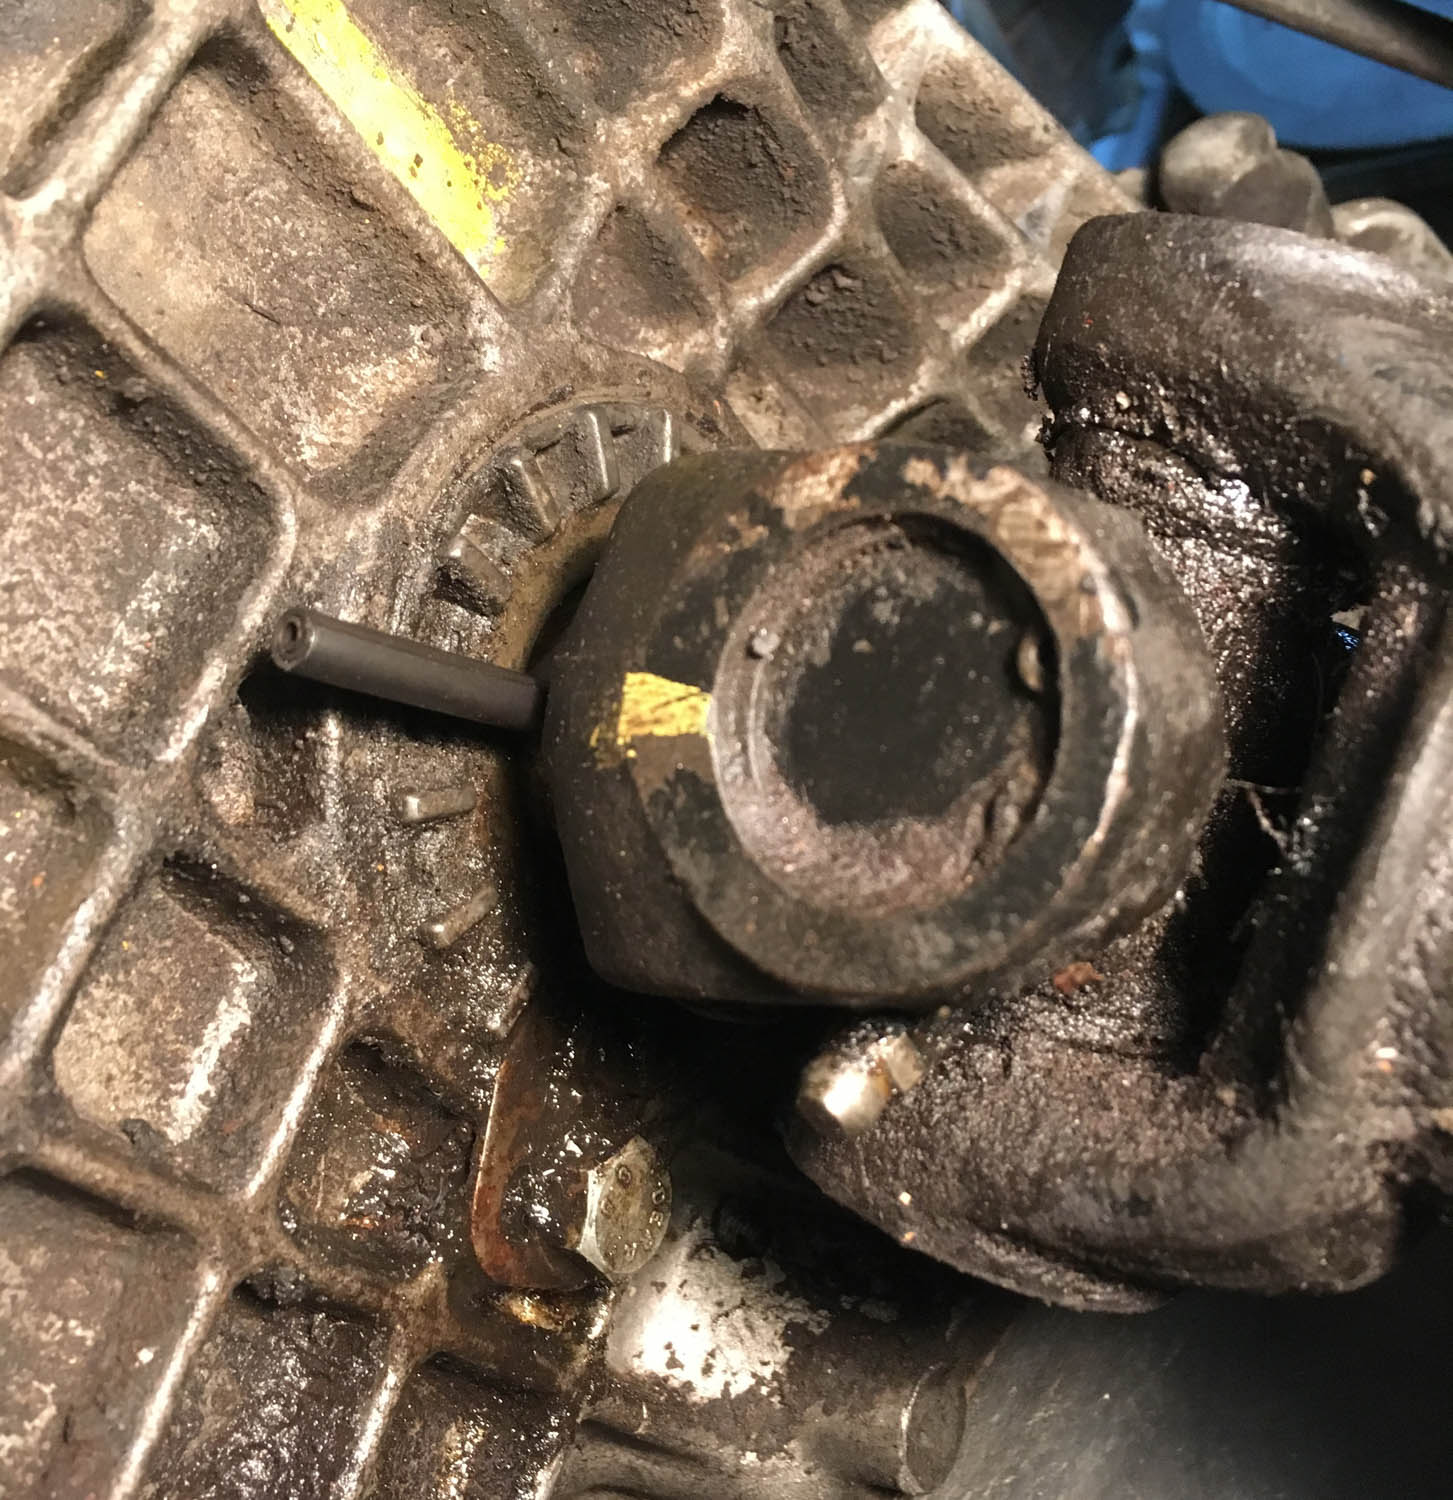
The thing is, the outer surfaces of those universal joints rotate right next to the transaxle seals, so if you think those seals need to be replaced, the time to do it is before you shim things and bang the pins back in.
Did I do that? Nooooooo.
In my defense… shut up.
(OK, I can do a little better than that. In my defense, I didn’t know whether the seals were leaking or not. I’d never driven the car. It’d been sitting for 40 years. As I’ve written, I approached it not as a stem-to-stern restoration—I could never afford that—but as a fix-what’s-broken-reuse-what-ain’t resurrection. Of course, if you look at the photo of the transaxle above, it’s pretty clear that it was leaking on that side. But, in my defense… shut up.)
OK, so, I’m an idiot, and it’s no surprise that, as soon as I began driving the car last spring, it began leaking 80W90 through the right-side transaxle seal. It wasn’t a Valdez-sized leak that I was concerned would destroy the transaxle due to low fluid level, but it was enough that I needed to put a drip pan or a cardboard sheet under it in my driveway. Live and learn. Yeah, I’d do it differently next time.
So, after the front end and the radiator were done, and with the Europa still sardined in my garage and up on the mid-rise lift, I turned my gaze to the transaxle. I crawled under its odd “bread van” rear end, banged out the right-side half-axle pin I’d banged in last spring, undid the lower control arm, and pulled the half-axle off. That again exposed the big finned nut in which the seal lives, making me feel even more like an idiot for not having replaced the thing last spring.

The first task was to get the finned side nut off. Reading on Lotus forums, I learned that the nut is aluminum and the fins are easily cracked, so don’t even think about trying the kind of thing I’d normally gravitate toward—namely, taking a screwdriver and a hammer and beating on the fins. RD Enterprises, one of the Lotus parts houses from which I order much of my stuff, sells not only the seals but a reproduction of the factory slotted socket needed to grab the fins. It’s pricey at $89, but sometimes you simply need to pony up and pay the man. I ordered the socket and seals for both sides (there’s an inner seal as well, but it’s a simple inexpensive O-ring).
I also learned that it’s crucial that you don’t just spin the finned nut off—you need to count the number of turns so you can tighten it back on the same number of turns and load the bearing the same way. I read that the smart thing to do is mark a fin on the nut and a spot on the transaxle with white paint, then video the removal with your phone so you have an actual record of the removal instead of relying on your counting.
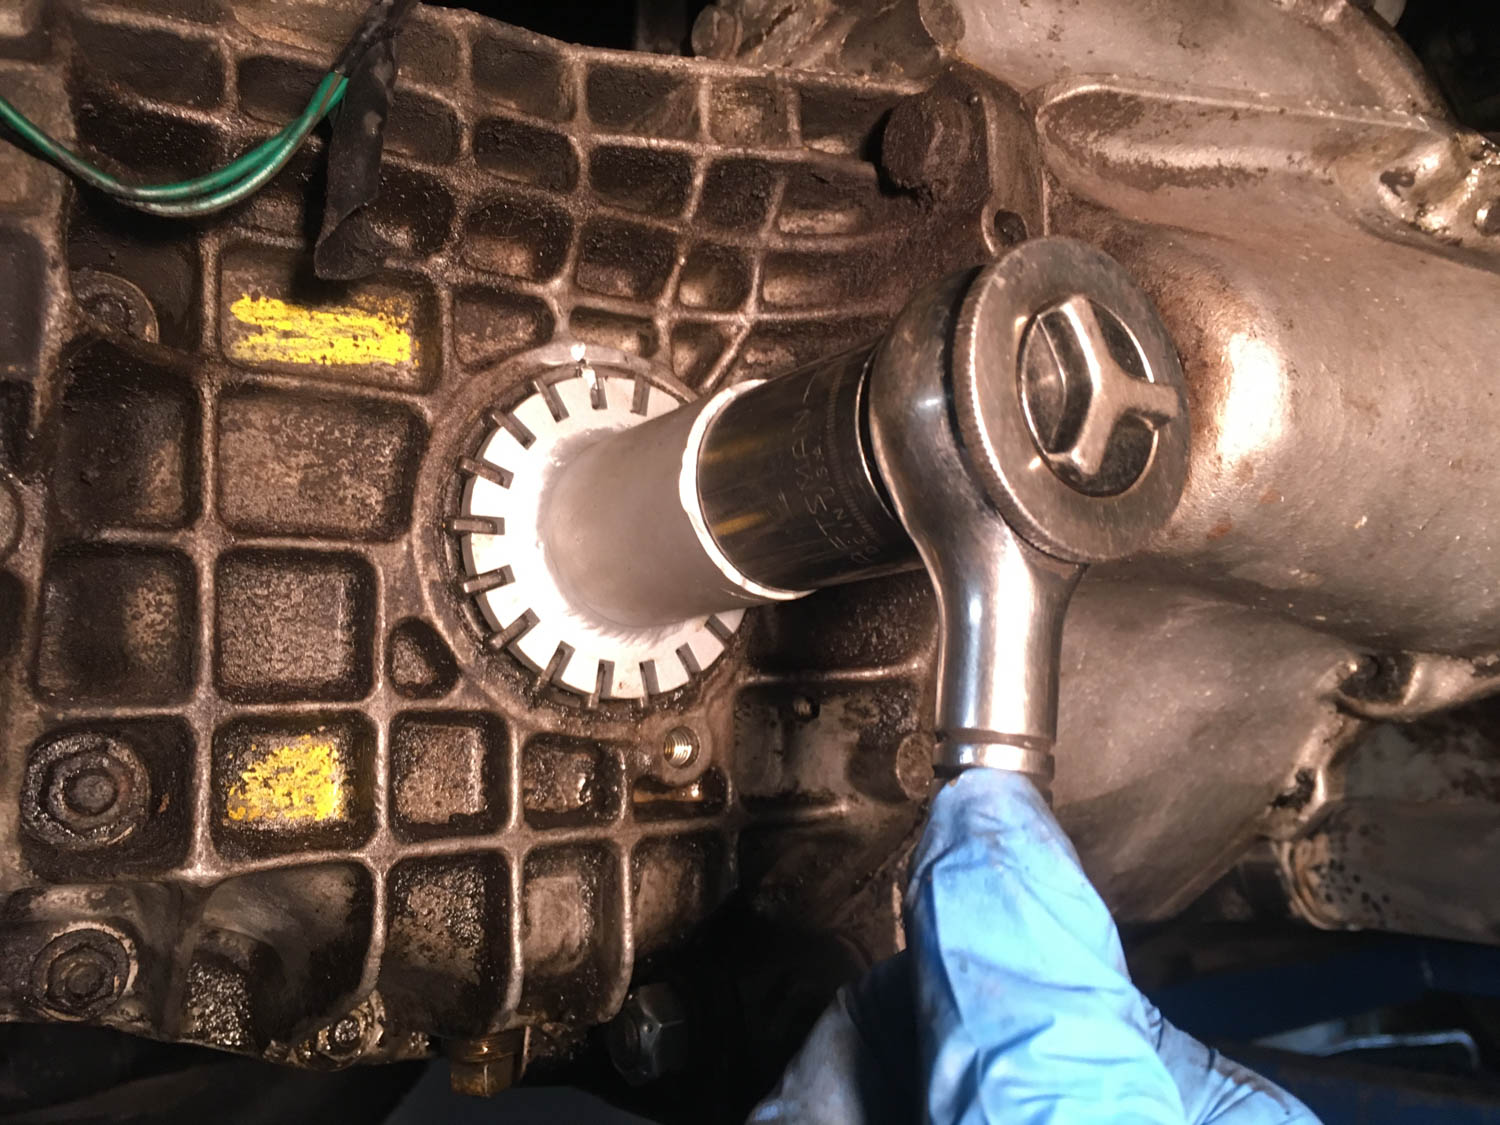
When the tool arrived, I slid it in place over the fins on the nut and cranked down on it with a socket and ratchet. I found that it didn’t dig into the space between the fins and thus slipped easily. This, combined with the initial tightness of the nut (they’re installed with thread sealant), made it very difficult to remove. I almost reached for the torch to loosen it when I tried using a big box-end wrench instead of the ratchet and socket. This was much more stable than the ratchet and socket, and by applying careful pressure, the nut eventually gave way. I counted—and the video recorded—eight full turns, plus about half a turn while the threads disengaged.
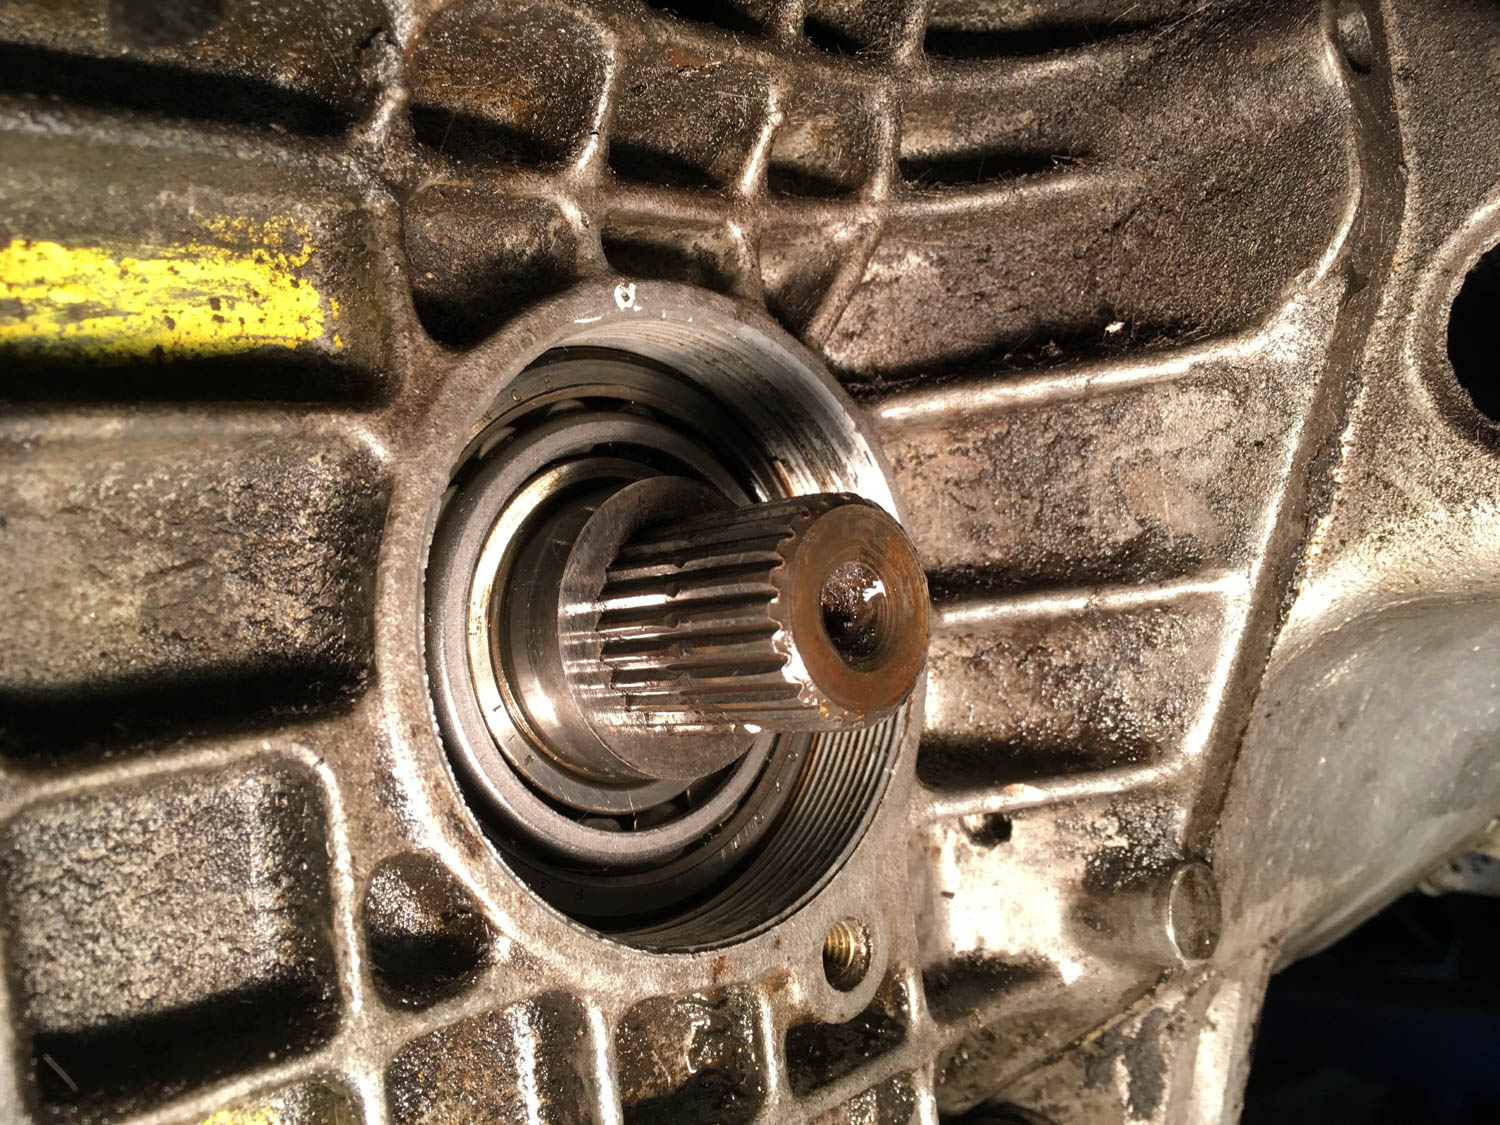
The next job was to press the seal out. I’ve done this hundreds of times on everything from wheel bearings to engine main seals. Usually you’d simply smack a hammer on a right-sized socket to beat it out or press it out with a vise or a hydraulic press. However, the fact that the nut was aluminum and one side had the flat bearing-loading surface and on the other those fragile fins made it more challenging. I bought a 2¼-inch hole saw and cut a hole in a piece of wood to receive the seal. I then found a socket about the same size as the seal and put the socket, the nut, and the block of wood in my hydraulic press, the same press on which I tried unsuccessfully to press out the bushings in the Lotus’ front wishbones a few months back. I’d placed the block of wood against the fins, figuring that that was better than risking any damage to the flat bearing-loading surface. I leaned on the lever of the press and felt the seal give way. Whew, I thought; that was easy.
But then, when I released the pressure on the press and withdrew the nut, I saw with horror that the finned nut had cracked. And it was my fault. I hadn’t read anywhere that the seal has to be pushed out in a particular direction, but it does. I pushed it in the direction of the fins, but turns out that the fins slant slightly inward, making the hole slightly narrower near the top. That’s what broke it. It needs to be pushed out the bottom instead.
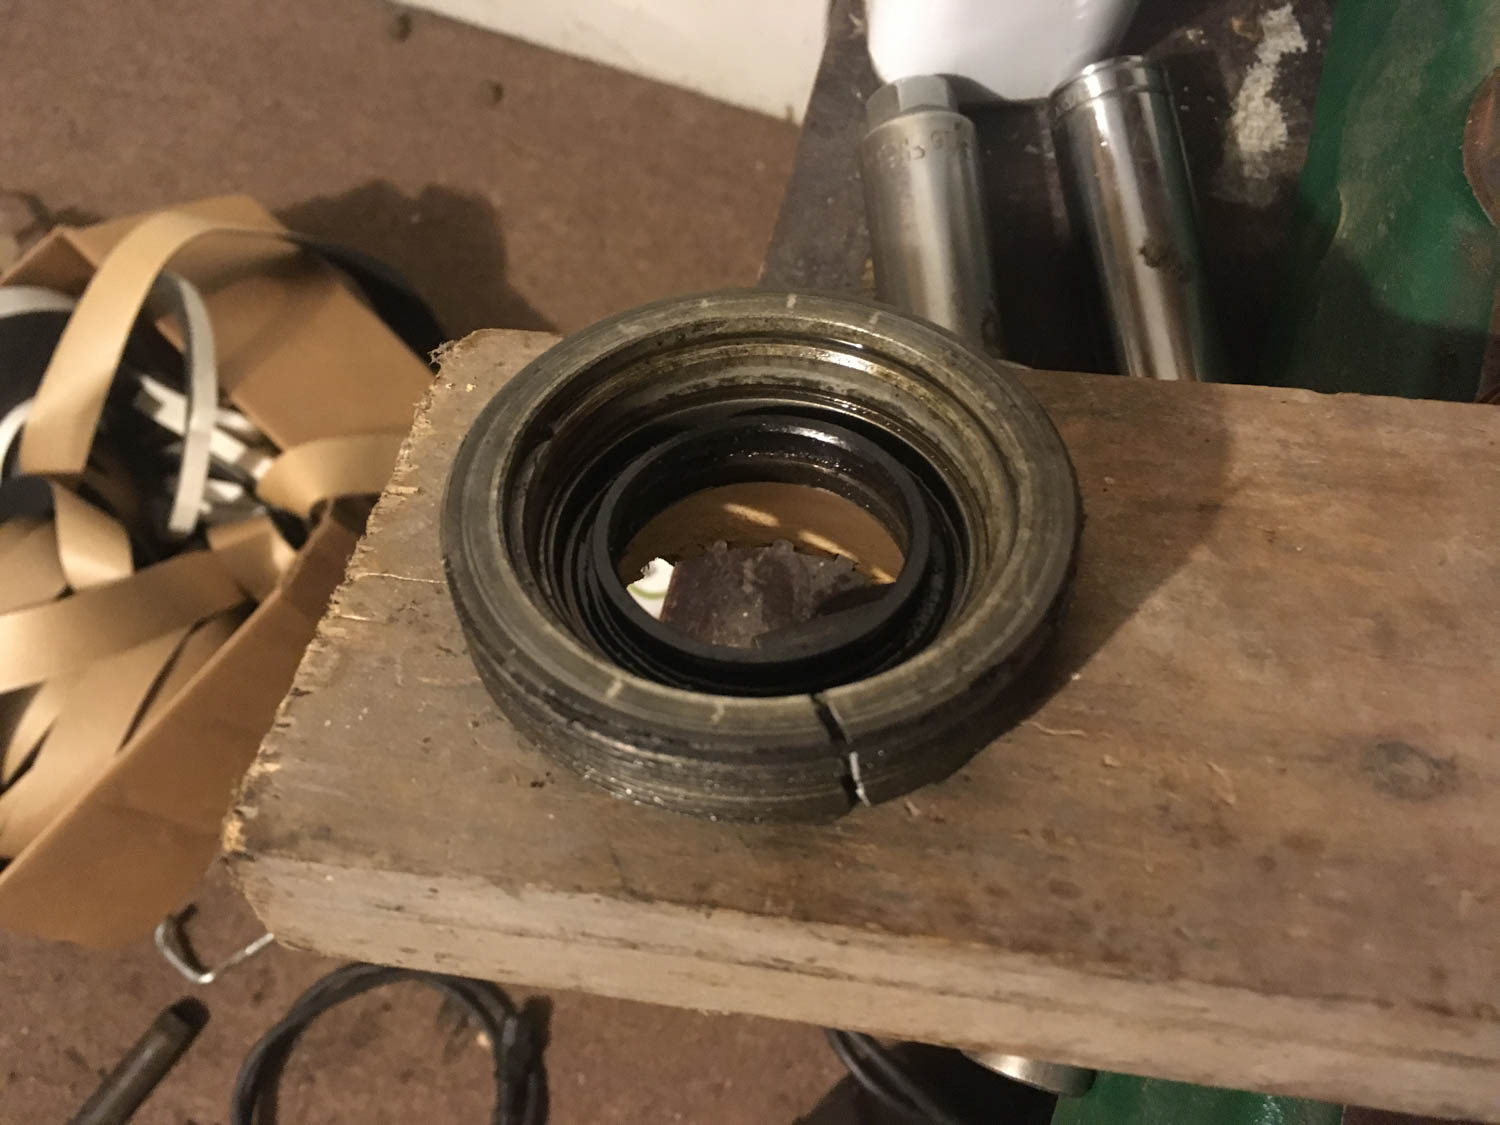
I looked for the finned nut on the RD Enterprises website but didn’t see it. I did some reading on the forums and learned that the nuts were reportedly NLA (no longer available), and if you have the bad fortune of breaking one, you need to find a used one.
Classic, right? Simply trying to stop an oil leak, I’d broken a rare part. Great. Just great.
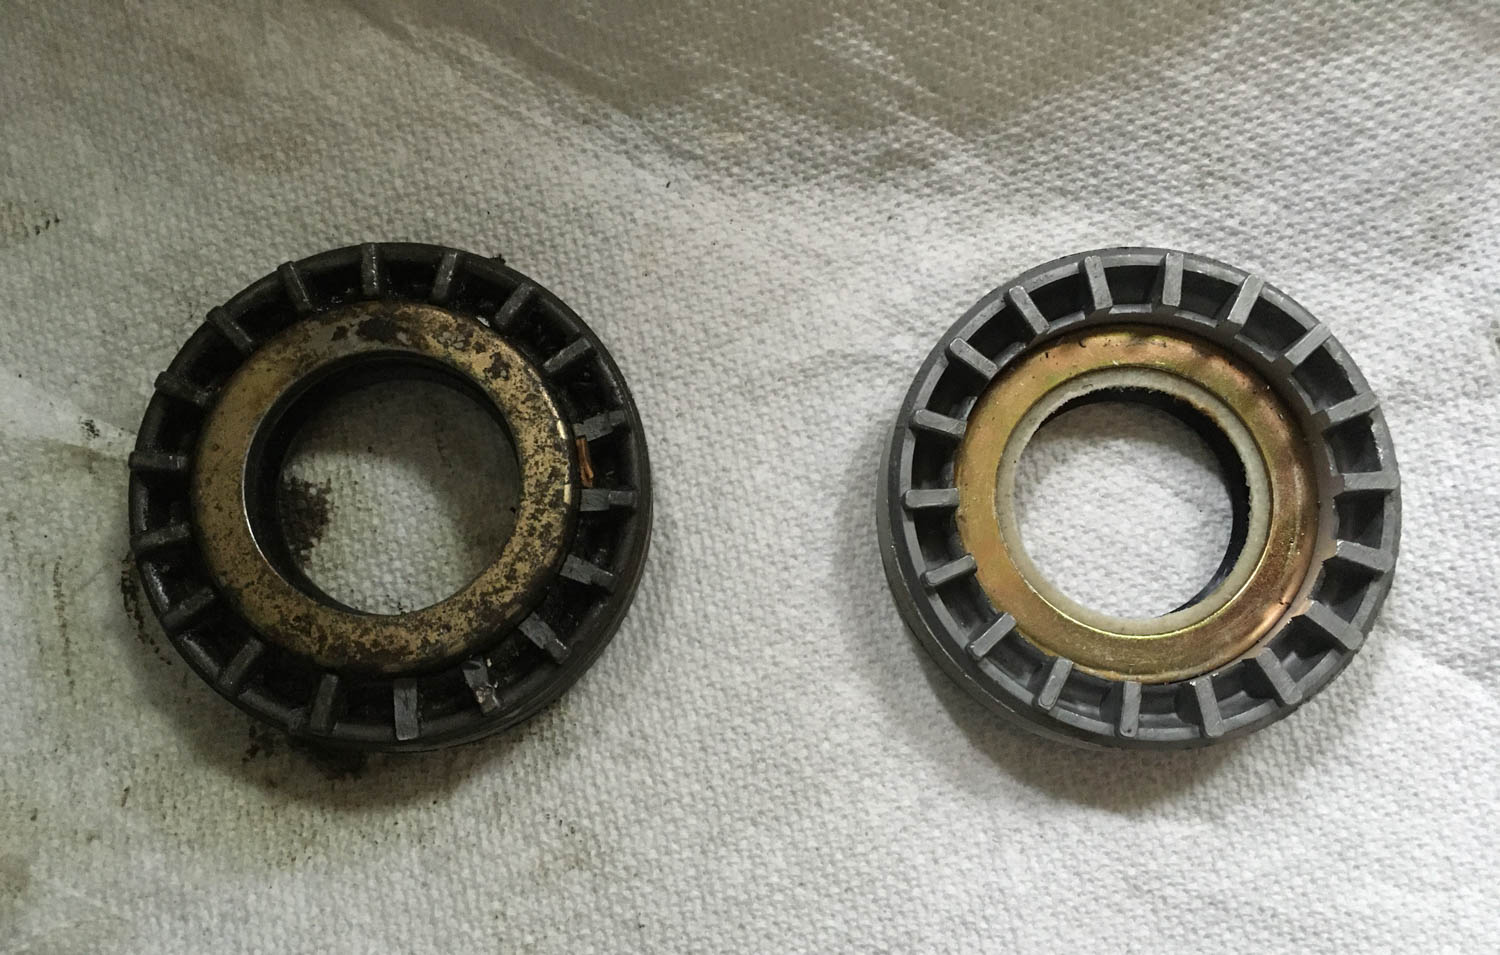
I sent Ray at RD Enterprises an email asking if he had a good used finned side nut lying around, but I also began scouring other sources. I looked up the part number in the Lotus manual, searched for it online, and found that it cross-referenced, not surprisingly, to a Renault part number. There appear to be two sizes of these finned nuts and two designs of the fins and slots, so you need to be careful, but I located two Renault parts houses in Europe—one in France, the other in Denmark—that had the proper nut in stock, including the pre-installed seal, for about €30 plus an equal amount for shipping (about $66 total). I momentarily hesitated and thought about ordering two—one for each side—but then backed off and ordered just one. I placed the order and waited.
(Funny story: In the meantime, Ray from RD Enterprises emailed me back, saying that no, he didn’t have a used finned nut in stock, but offered to give me some people to contact. I told him that I’d found the part on a Danish Renault website. “Uh… could you send me that link?” he asked.)
It took about three weeks, but eventually a padded envelope arrived from Denmark. I opened it, and to my delight found not one finned nut and seal, but two. I was grateful.
I took one nut and test-fit it. It was so tight that I held it next to the cracked one to verify that it was the same diameter (it was) and the threads were the same pitch (they were). I threaded it in a few turns with a substantial amount of effort, then backed it out. It seemed likely that it was simply a matter of new and old threads needing to mate.
The factory manual calls for use of aviation-grade Loctite on the threads. That seemed like an awfully big hammer to use, especially considering that a clip and bolt are used to lock the fins and make sure the nut doesn’t back out. The forums said that any light thread sealant including Teflon tape should be fine. Some folks recommended Hylomar, the never-hardening sealant used for much of the engine assembly. I still had a tube of Hylomar left over from the rebuild, so I lightly coated the threads, wiped off the excess, and began threading the finned nut in.
But several turns in, the finned nut froze and would not budge. I carefully tried to back it out, leaning so hard on the big wrench and slotted removal tool that I thought something was going to break. Finally, the nut began to give way with the unmistakable feeling of something being stripped. Sure enough, it came out with big curly metal shavings on it. Cleaning and inspection seemed to show that, fortunately, the shavings were from the nut, not the case. I had no idea what had caused the nut to strip. I didn’t think I’d mis-threaded it. The idea that the Hylomar had caused things to bind up seemed far-fetched, but that was how it felt.
I’d never been so glad in my life that a vendor had mistakenly sent me two of something. I tried the second finned nut, and it threaded in much easier than the first. I certainly wasn’t going to use the Hylomar again. I had a bottle of Permatex Aviation Form-A-Gasket, which is runny and also non-hardening, but its very runniness gave me pause; I didn’t want it getting into the bearings. I tried Teflon tape, but not surprisingly, the large diameter and snugness of the nut meant it just threw the tape off.
I held off on the sealant question for a moment and decided to verify the number of turns. I threaded the nut all the way in and found that it didn’t go in the 8½ turns that the original nut did; it stopped at closer to seven. I rewatched the video and verified that 8½ turns was the correct number. I even re-threaded the original nut (with the seal removed, the crack closed up) and confirmed that 8½ turns put it in contact with the bearing retainer.
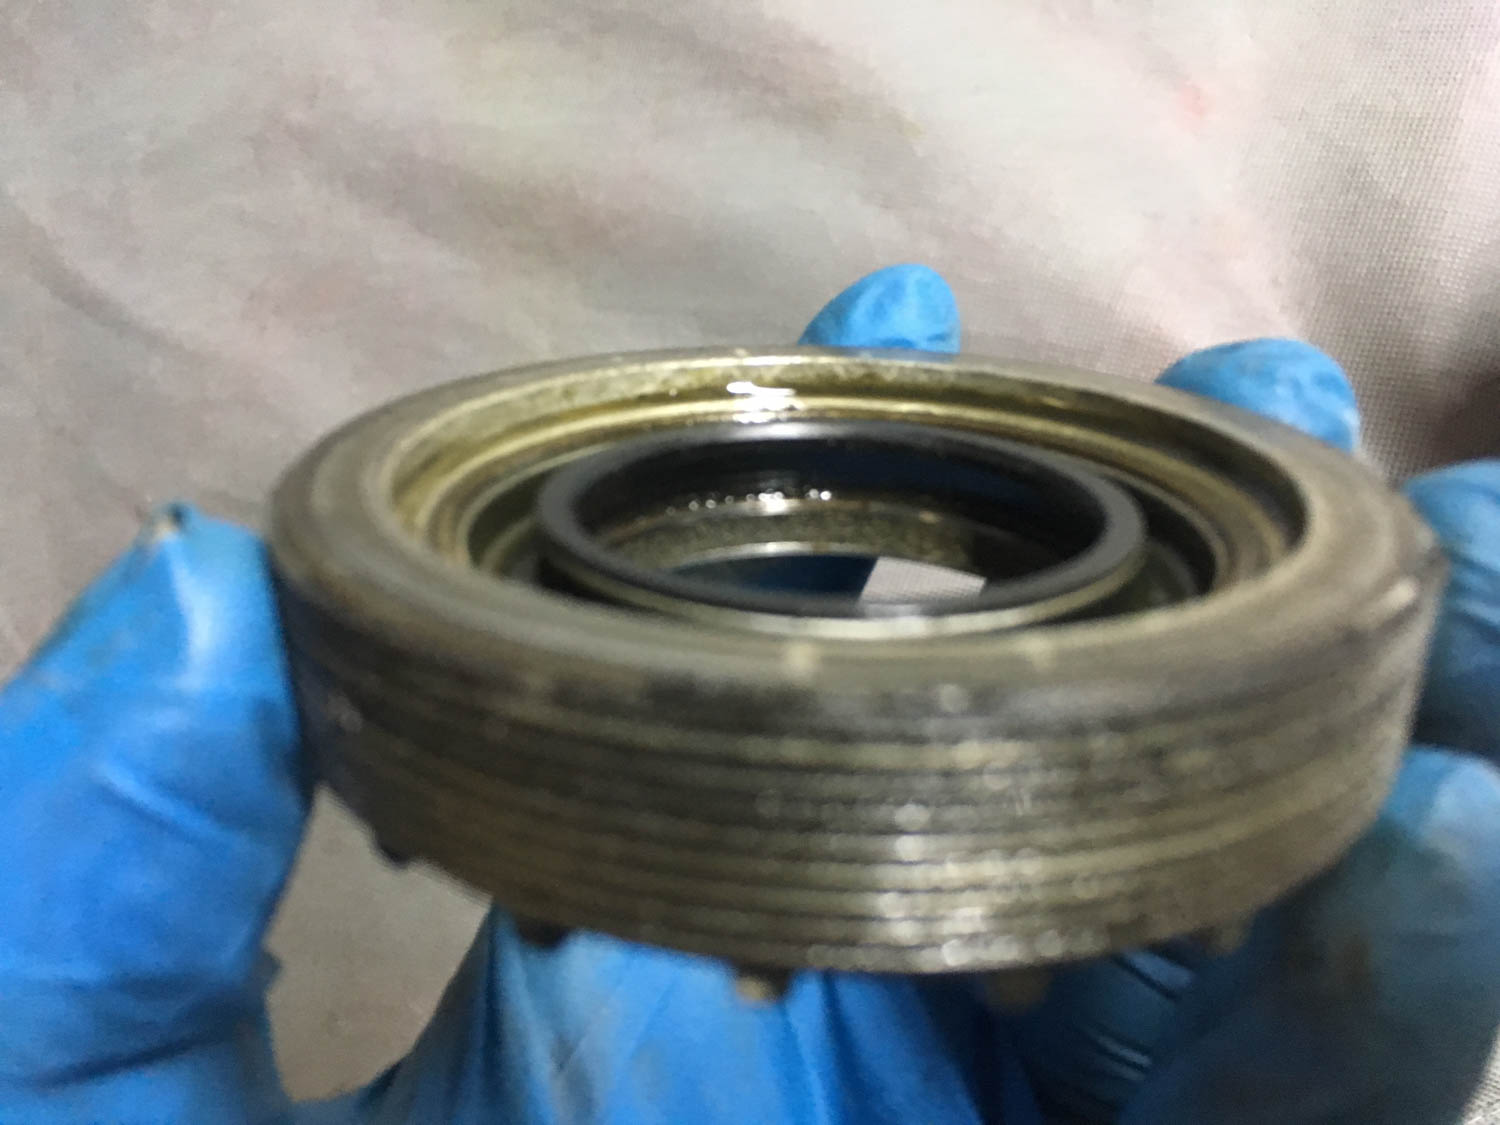
I found that the original seal was further out in the nut than the replacement. Below is a photo I took of the underside of the original nut before I tried to press the seal out and cracked it. You can see that there’s a flat step cut into the nut, and the seal is pushed in past that.
However, on the new nut with the pre-installed seal, the bottom of the seal was essentially flush with the bottom of the nut.

I took a right-sized socket and carefully banged the seal up even with the step, but it made no difference. I was stumped.
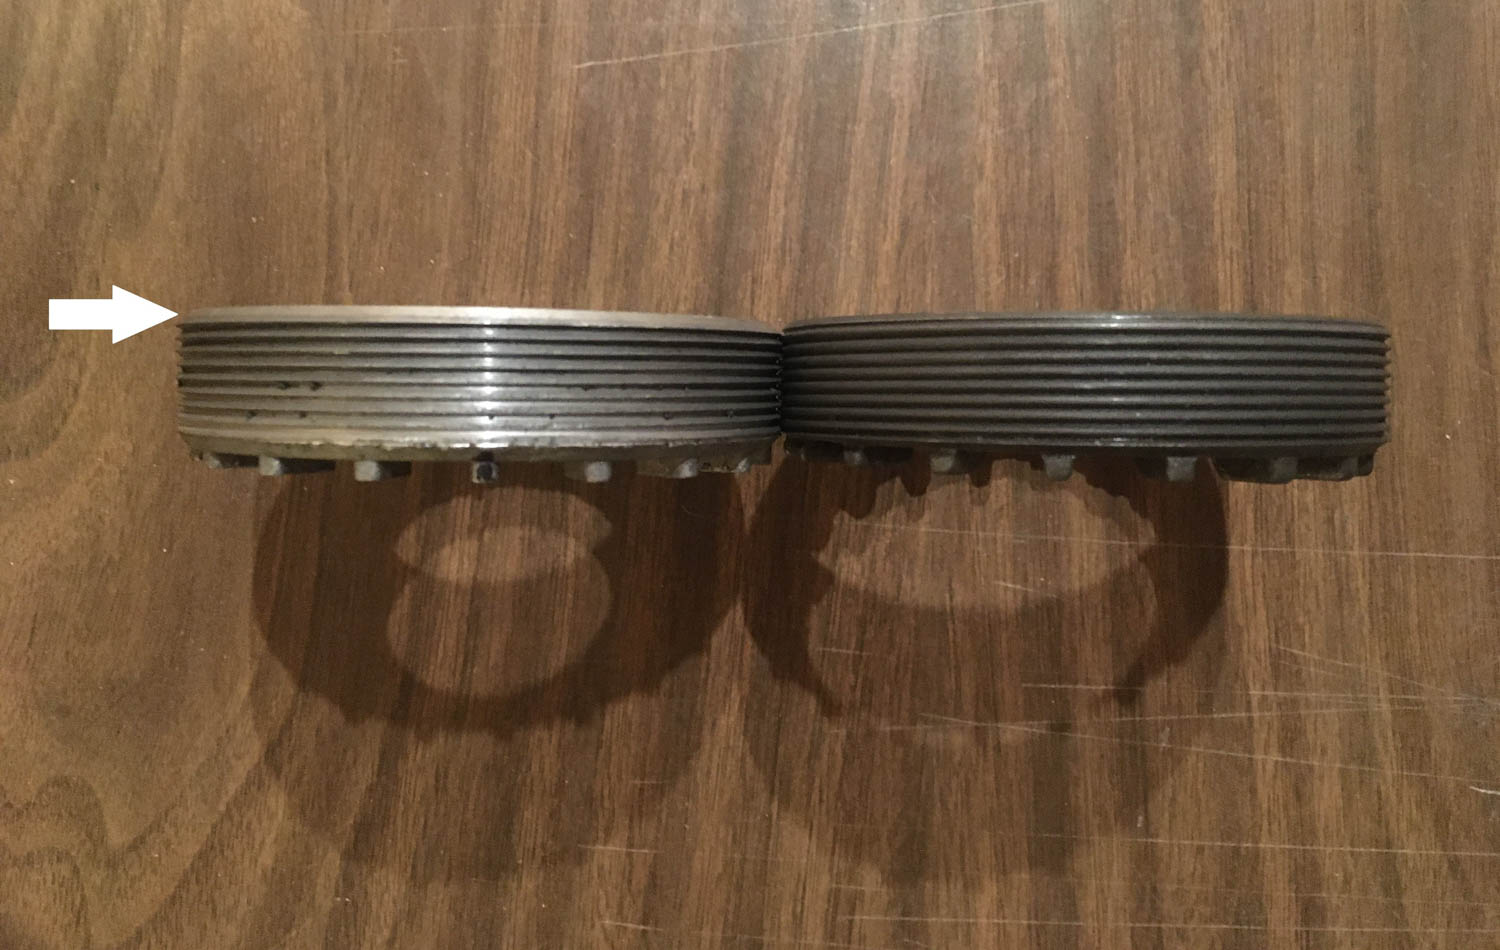
Finally, I figured it out. The root cause was that the threads on the old nut start pretty much right at the edge, but the new nut has a little bevel on it in front of the threads, making it not screw in as many turns before contacting the bearing retainer.
So, how far do I screw it in? I posted the question to a Lotus forum. I learned that the tension on the left finned nut sets the crown wheel play, and the right one sets the bearing play. The factory manual lists a procedure where, with the cover off the differential, you use a dial indicator to adjust out the play, but then you’re supposed to wrap a string around the pinion gear housing and pull on it with a spring balance and measure 2–7 pounds to verify that it’s sufficiently free. If it’s incorrectly adjusted, people warned, it’ll start to whine on either acceleration or deceleration, and if driven long enough like that, the ring and pinion gear can be damaged.
On the other hand, some folks chimed in that used bearings don’t really require pre-load, and that threading it: a) until it just touches the bearing retainer, or b) slightly tighter than hand tight.
I again threaded back in the original cracked nut and found that, when the marks lined up, I could feel it touch the bearing retainer, but I could still turn it by hand a little further. I tried to memorize what this felt like, practiced it with the new nut, then backed it out, put on a light coating of Permatex Aviation Form-A-Gasket, and threaded it in, turning it just a skosh past the touch point.

If the left side starts leaking, or if the transaxle must come out at some point in the future, I may pay someone to set both sides by the book. But for now, done. Whew!
***
Rob Siegel has been writing the column The Hack Mechanic™ for BMW CCA Roundel magazine for 34 years and is the author of five automotive books. His new book, Resurrecting Bertha: Buying back our wedding car after 26 years in storage, is available on Amazon, as are his other books, like Ran When Parked. You can order personally inscribed copies here.
