6 Final-Assembly Tips for Your Project

Kyle Smith

Anyone who works on cars likely has a favorite point in their projects. We might not even realize it, but there’s usually some task or process that we look forward to most. If we didn’t, well, we wouldn’t be doing this. For me, the tedious task of final assembly is one part I very much look forward to, and the engine of my 1988 Honda XR600R has finally reached that point. Here are six tips I’ve discovered that help me enjoy the time even more.

Understand your finishes

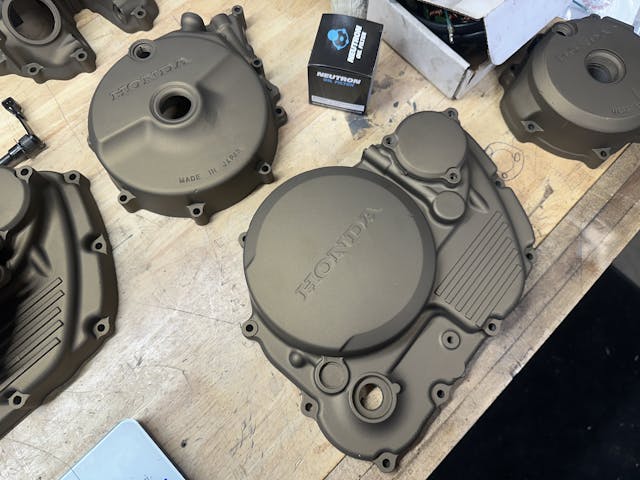
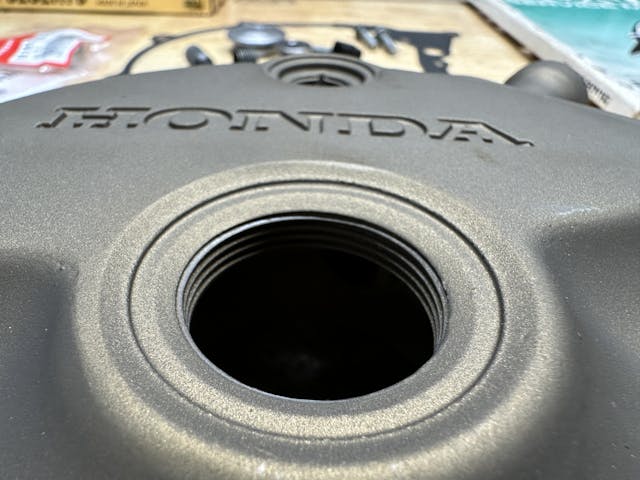
It’s likely that at least some of the parts and pieces to be assembled were painted, coated, polished, or otherwise finished in some way. Having to chase threads after a manifold or cover has already been installed is a pain at best and a cause for reversing course and disassembly at worst. Ensure all the parts are actually prepared for assembly before beginning.

Spread out

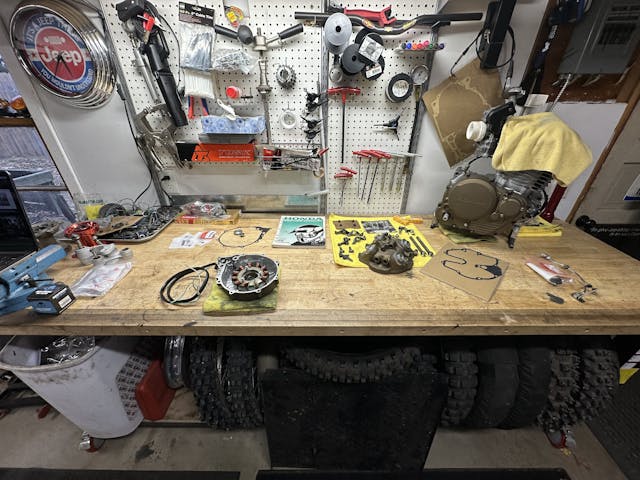
Final assembly is not the time to try to cram your work on just one corner of your workbench with a bunch of other stuff piled all around. It’s best to be able to look at all the parts before you, with nothing hidden in a pile to be found five steps too late. Create a nice open space where you can focus on the task at hand rather than trying to ensure you don’t topple the pile that belongs to your next project.

Keep your reference close 

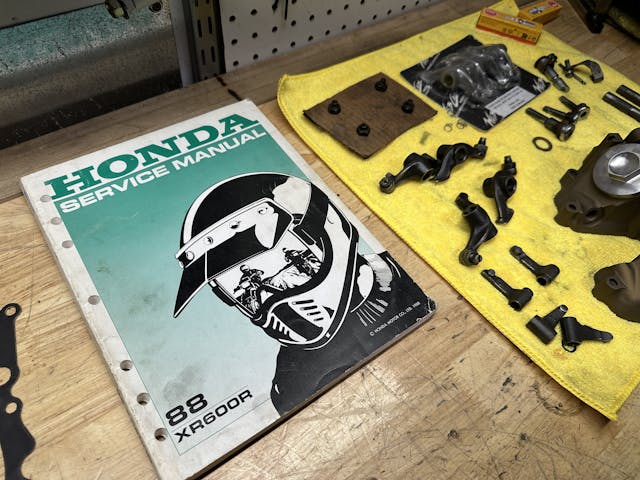
In that newly found space, make sure your shop manual or computer takes up residence within arms reach. Even with projects I’ve done a dozen times, it is nice to have a reference to eliminate second-guessing. Being able to check and confirm makes the whole process more relaxing and often a little quicker.
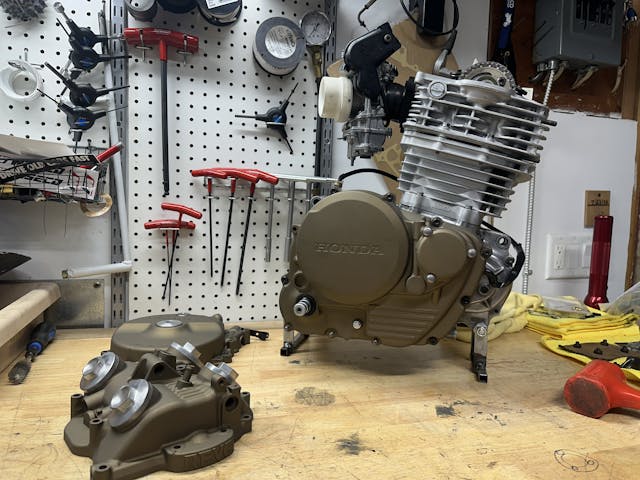
Use sub-assemblies

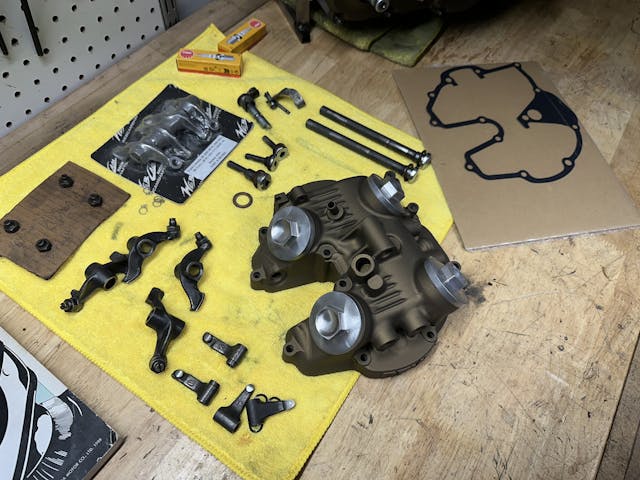
My XR600R engine has taken a year to evolve from the 14 boxes of parts that arrived in my shop to something that resembles the heart of a motorcycle. It came together in manageable sub-assemblies, each of which provided a nice sense of accomplishment as each was completed. The cam cover is a prime example: The rocker shafts, rockers, and more all needed to be carefully fit before the whole thing was carefully fitted to the cylinder head. I choose to tackle the assemblies one at a time. The clutch cover came together the other night—checking fit and double-checking all the appropriate seals ensures that when it mates up to the big thumper I’ll only have to do the job once.

Practice being lean

Space is at a premium in every shop, especially with a project blown wide open. That means storing a bunch of new bits and pieces is likely more of a hassle than it’s worth. Large manufacturing often functions on a “just in time” strategy to make the best use of space and materials. This means buying what you need in batches and having it arrive when you are ready for that task, no earlier. Often this means finishing one thing before moving to the next, but it also keeps me from tying thousands of dollars up in a half-done project, making it difficult to pivot if an opportunity comes up.

Keep it clean

It goes without saying, but letting dirt and grime into your project is counterproductive. You started this project to solve an issue, not to create more work for yourself, and putting dirty parts back together just gives you one more thing to take up your time. Keep any parts that are waiting for assembly covered or sealed to prevent other goings-on in the shop from getting them dirty. Just driving a car into my garage can put a surprising amount of grit into the air if the wind is going in the right direction, and it’s not worth having to step backward and re-clean parts I’ve already prepared or assembled.

Click below for more about
Read next Up next: This Week on Hagerty Marketplace: 4 Fun Rides from the SugarCreek Collection

Comments

    Unfortunately, with the cost of shipping parts across the Northern border crossing, I try for bulk purchases to minimize transit and customs fees.

    Ditto here. When I was restoring my ’71 Triumph T120, shipping from the UK was about $25. I tended to buy lots of parts at one time and frequently bought some stuff from the more expensive supplier because that one had something I could get from nobody else.

    An important thing for me before assembly happens much earlier- taking lots of photos before and during disassembly. That way I feel more confident when putting things back together, as I have something to refer to if things don’t go just right.

    Photos, Photos, Photos
    Amazing what you see in photos that you didn’t see at the time. Sometimes not even then this you were focusing the photo on!

    Not exactly the same thing, but along the lines of keeping track……when I am dis-assembling something like a cover with many similar but often different length screws, I’ll dab some nail polish on the screw head and the hole to keep track. Probably your wife, girl friend, daughter has got some colors they don’t want and for a few bucks at the dollar store you can get a bunch of colors. One nice thing is the stuff dies fairly quickly

    kyle, i think your ‘shop’ articles are a great tool in themselves. they make for a sort of mental exercise, creating repetitive thought and making tasks more of mental muscle memory instead of a check list (but lists are be valuable, too). thanx for coming up with different subjects that ultimately meld into one thing – time in the shop!

    Clear plastic sheets cut to size, no overhanging edges. One thing about keeping stuff clean and covered is keeping others away from the bench. Unsuspecting or careless visitor yanking a towel or rag that’s covering an assembly can be a nightmare.
    Edge protection too, I screw on a lip of 1×3” around the bench so stuff doesn’t roll or slide off accidentally.

    I keep a roll of painters plastic and very sharp scissors handy. It only takes a few seconds to cut and cover the bench top to keep all the dust and debris off the clean parts…it is also a quick keyboard cover when my hands are slightly less than clean and I need to search or watch an assembly.

    I respect the “Practice being lean” and “Just in time” philosophy. That said, I make a list of what parts I’m going to need and order them well in advance. The Just in time idea is fine, but I don’t want to find a part is on back order or that the delivery time will be way more than it should have been thus delaying the project. I also keep all the parts for a project or sub-assembly in the same place, not scattered around, so they can be found easily when needed.

    Checklists (S.O.P>>standard operating procedures)! Mark off each stage in the order they should be performed so that you don’t miss an operation and have to take stuff apart tp do something you forgot. Also mark bolts/parts that are torqued with either a red marker or grease pencil so you can see at a glance if they were done. That is what we did on the assembly line. 40 years ago in tech school, one pair that was working on reassembling a practice engine left the rod bolts loose because one guy thought the other had torqued them. Can you say, “Tossed rod?”>>Don’t get distracted during critical assembling. ALWAYS cover your parts with a sheet or plastic when not working so dust cannot get on things between sessions.

    I like to keep small parts in a magnetic bowl and have strong lighting above the bench and around an also clear floor area.

    I blew up a KLX250S (then a 350) after sucking a valve at 8K and bending/breaking everything top and bottom end. Whilst sorting things I sheared off a chain adjustment bolt that was always too tight. So I blew up the suspension to R/R the swingarm. There was not a sqft. in my garage that was not occupied by one or multiple Kawie parts. Thankyou Ebay and China ($160 new 300cc cylinder, piston, and wristpin) for making the rebuild possible and profitable.

Leave a Reply

Your email address will not be published. Required fields are marked *

Your daily pit stop for automotive news.

Sign up to receive our Daily Driver newsletter

Please enter a valid email address

Subject to Hagerty's Privacy Policy and Terms of Conditions

Thanks for signing up.