Media | Articles
5 Ways to Hide New Parts in an Old Engine Bay
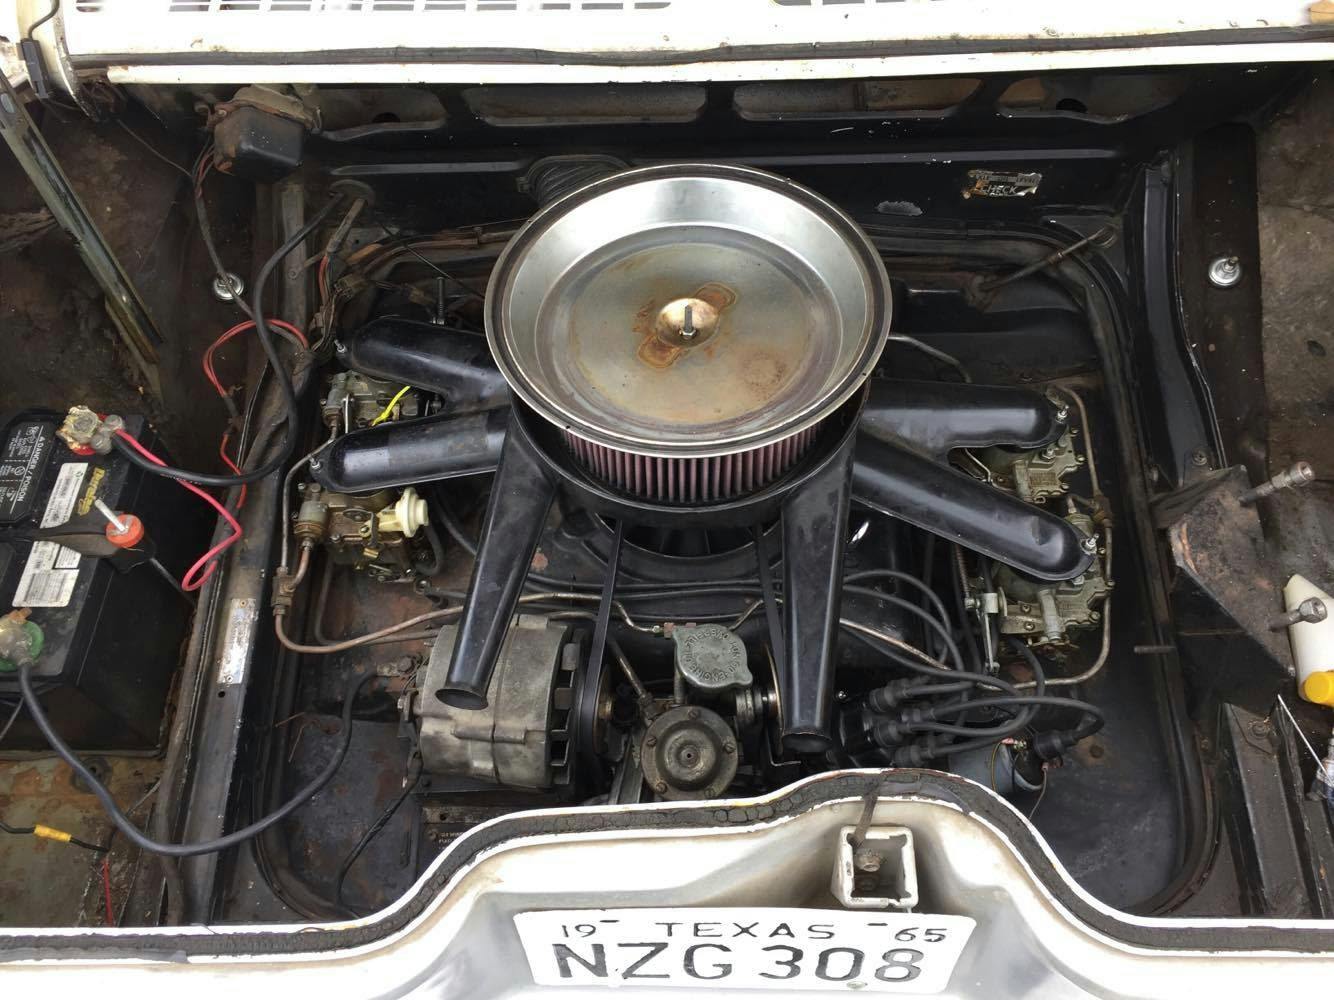
New parts can stick out like a sore thumb in an. . . aging. . . engine compartment. Those shiny new parts might restore the function but sometimes ruin the look. Want the best of both worlds? Here are a couple tips to make new parts blend in without losing the function.
Of course, these tips are highly dependent on the goals of your project. Not everything deserves or needs restoration. In fact, the desire to keep things looking well-worn or authentic to the rest of the car can keep the whole operation from looking half-finished and more like a survivor. No one needs to know that survivor has had a heart transplant.
Don’t use new parts at all

Known good used parts can sometimes be found cheaper through a junkyard, eBay, or other resellers than new parts. If the right look matters it could be worth going through the effort of gutting a new alternator and putting all the important bits in the “seasoned” housing, yielding restored function without the look of restored parts. Win/win.
Flat clear or paint match

For items like suspension and steering, there isn’t the option to only use the good bits to make the part right again. Since almost everything new comes slathered in gloss black paint it is easy to make them blend in a bit by simply knocking the gloss off by spraying a flat clear coat over the new shiny parts. This will instantly put a bit of age on without removing any of the corrosion protection of the factory paint.
If you want to get even fancier, lay down a coat of matching paint. Most automotive paint stores can mix a custom color into an aerosol can. Take in the old part, have them mix up some paint, and before you know it that new piece will disappear—but in a good way.
Marketplace
Buy and sell classics with confidence
Careful cleaning

One of the things that gives away where I have been and haven’t been is the clearly defined line of where I stopped cleaning. A spotless section of the car right next to 50 years of built-up road grime sticks out like a sore thumb. By cleaning only the absolutely necessary bits and areas to ensure safe and proper function it will create a less obvious fingerprint as to where repairs happened.
“Curated wear”

Call it fake patina if you want. A few carefully placed scratches, dents, or smears of oil can go a long way in transforming something brand new off the shelf and camouflaging it into the larger picture. Some Scotchbrite, steel wool, or sandpaper can take the paint off an area to match an old piece that has lost its paint after years of wear. Alternatively, a little bit of polish to brighten one spot on a dull part can accomplish a similar result. Is it slightly disingenuous? Sure. This technique can also look quite tacky if done poorly, but when done well, this is a real option for keeping the right feel to your vintage ride while also keeping it in top running condition.
Reuse hardware

Even if the part is new, the bolts and nuts don’t have to be. Shiny new hardware is a dead giveaway of where a mechanic has been to those who know where to look. Shiny new grade-5 bolt heads from the local hardware store will stick out immediately. If your old hardware can be cleaned up and reused it will hide most repairs far better. Focus on the thread with a wire wheel or thread chaser to ensure the hardware works like it should but leave the head alone for maximum sneaky factor.
***
Check out the Hagerty Media homepage so you don’t miss a single story, or better yet, bookmark it. To get our best stories delivered right to your inbox, subscribe to our newsletters.











Interesting article, Kyle, and exactly what I’m doing to my ’85 Celica Supra. I take the old parts off, clean them, and spray them with flat or satin clear. It works very well on old alloy castings and other metal and plastic parts. My car really *is* a survivor car, and my goal is to try and preserve it. Using the clear spray on clean parts is a nice way to “freeze it” in time, and it also eases future hand cleaning.
I wouldn’t reuse any bolts that require torquing.
So you put new wheel studs in everytime you change a tire?
Good catch, Rick. We live in a disposable society, regrettably. Those of us “recycling” history shouldn’t fall into that waste. Common sense suggests when a bolt should be retired.
Actually it depends on the function and factory spec. I just replaced my Suzuki’s water pump and had to fit new bolts because in that case the design requires it. Factory manual specifies new bolts or it will leak. On the other hand when I redid the suspension I reused almost all of the bolts and as Suzuki is not in the US anymore I could not have replaced them even if I wanted to.
I clean up the rest of the engine compartment yo match the new part.
Exactly. On all my rides dirty grease and grime is absolutely,,,
VERBOTEN under any circumstances !!!
I close the hood and drive
Loved your comment! I have a mix of vehicles (none show quality) that range from Cars & Coffee quality to “blast down the twisty road and go to the local wash-it-yourself car wash to blast off the bugs. Originality, or the look of originality certainly has its place, however if your joy is driving your car – don’t obsess over the markings on the head of the alternator bolt.
Now for a confession: When I had my ’67 Firebird 400, I sourced ALL of the restoration bolts from the local scrap yard and hunted for month to find the right lugnuts. On that project, the build was the joy. On my Monte Carlo SS, I bought it to drive 😁
My buddy always cleaned up and repainted any parts he removed for repair. That way he always knew what was worked on.
On a 55 Cadillac an electric windshield washer motor will fit inside the original vacuum cylinder in the washer fluid glass container. The car even has a original 12 volt wire going to the cylinder from the washer dash switch.
The flip side of this article is making OLD parts look like they are new or have been recently replaced. At a recent car show, I saw a ’68 Corvette for sale. Everything under the hood looked like new (master cylinder, water pump, alternator, A/C compressor, etc. but all were actually old high mileage OEM parts that had been carefully cleaned and made to look as if they were new and had been recently replaced. Deceptive? You bet!
Sort of.. I’ve seen many engine bays where this was done without the cost of replacing all the associated components for a show look. Certainly deceptive if when selling not disclosing the work and intent. But for a Sunday afternoon with the hood up at get together, just fine.
Just scrub the engine bay with degreaser (the Gunk stuff from Autozone works well enough) then give it wash on a hot sunny day. Takes years of age off the engine bay and only takes an hour or two of your day. I don’t know about the rest of you guys, but I can’t stand looking are neglected, greased up engine bays. It doesn’t have to be perfect (especially for a classic that’s daily driven or even driven semi-regularly), but at least show that you put some effort into making the engine compartment look presentable.
The common advice is to buy new parts. But, VERY often, the original parts can be repaired and reused. They usually are superior in every respect to what’s being offered as new-replacement parts. There is a growing industry which repairs original parts. Cleaning an engine bay–entirely–is advisable. Especially in air-cooled circles. All of that crud holds heat and corrosive elements. A clean engine is likely going to perform better. Let the “critics of clean” eat out their hearts. In reality–they’d love to have a clean engine bay–they either can’t, won’t or don’t know how to clean it themselves or don’t have the money to have it done. LOL
👏👏👏
The “superiority” of OE versus Aftermarket parts really is about which parts we are talking about. Most “moving suspension” parts are far superior in longevity as aftermarket than the O.E. parts were. Most original equipment pieces in any cars (excluding heavy duty applications such as Police/Taxi packages) was designed to “wear out” in 100,000 miles including any rubber bushings. (Give or take 25,000 miles and considering driving conditions). Now take a brand name aftermarket part designed for the same car and same type of driving, it will last twice that long. Even when but my the best quality aftermarket part they are almost always less expensive than the O.E. part is (if you can even find it).
This is a rare topic we’re not connecting on, Kyle. Maybe it’s because I have so few friends, but no one I know would think any less of a high mileage engine bay with a shiny alternator. If the time comes to sell good luck with “this, this and that are new but I deliberately made them look old”.
Yeah, I don’t have many friends who sell cars. Not everyone enjoys this hobby the same, and that’s a good thing!
Let’s not fake patina. Clean it up, don’t purposely scuff it up.
I don’t understand how keeping your engine bay/parts clean is deceptive as long as everything is in good working order. I have replaced many parts on my 72 Corvette and if I was selling and the buyer had an issue
with new parts with everything in good working order I would rather not deal with them.
Good luck on a warranty if you scuffed up the defective part.
I just keep everything looking clean and new as possible on my 1969 Camaro.
I don’t like old dirty looking stuff.
Besides cars I restore all kinds of machinery, toys, antiques etc. Sometimes I make it look brand new. Other times I just clean it up and make it functional again. There are somethings ÿou need to show the history of the item to demonstrate how well built they are and the abuse they took over the years but I never put any part back on that’s dirty.
There used to be a shop nearby that rebuilt alternators and starters and after getting some bad brand new “rebuilt” parts at the local auto supply store I started taking them my old starters and alternators and getting them rebuilt. I recall working out in the cold to replace a starter, only to find when it was all done, that it wouldn’t start! I was sure it was the starter, so I yanked it out and took it back the same day, and they confirmed it was bad, and got another and I did the whole job all over again. So after that I started taking my starters and alternators to the rebuild place, if I could wait for it, and didn’t need the car the next day. I did that for my 72 Camaro over 30 yrs ago and those parts are still working fine, it cost less than the auto store, and had the original look and stamping nos.
That comment takes me all the way back to the early to mid 70’s when my Father and his partner in a Service Station (his partner was an actual life long mechanic). His partner had a son my age also (we were 10 to 15 years old in this case) they would pay us $5. or $10 labor for each starter and alternator we would clean up and rebuild. Keep in mind the parts room was fully stocked with the brand new items we would need to do this and we were both taught very young just how to do them correctly. They’d charge the customers $40. on average for the rebuilt part and about $10. an hour labor for removal and install of the part. This was during a time when depending on the salvage yard you could buy used working replacements for $10-$30. depending on make and age of the parts. New were usually about $40-$120 depending on what they were for.