Media | Articles
5 Tips When Replacing Steering Components on Your Project Car

The three critical systems of a car, in order of importance, are: Steering, brakes, and the drivetrain. If you question this ordering think no further than how many times you have heard someone tell stories of driving a vehicle with no brakes. I’ve never heard a story of someone intentionally driving a vehicle that had no steering.
Now that we agree that steering is critical, we therefore also all agree that maintaining your steering components is important. For those of the DIY proclivity it is a relatively simple system to understand and work on. To get you started, here are five tips for tackling the system of tie-rods, drag links, and idler arms, steering boxes, and pitman arms.
Check your threads
There aren’t many areas on a car where left- and right-hand threads are mixed together in an assembly. Steering is one of them. With modern impact tools capable of twisting the threads right off a nut or bolt, going the proper direction is important because you might not get a second chance. Trace the threads with your finger or a pick to confirm if “righty tighty, lefty loosey” still applies.
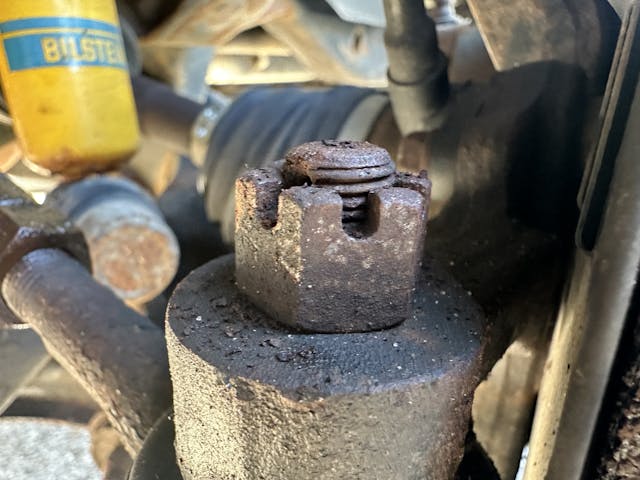
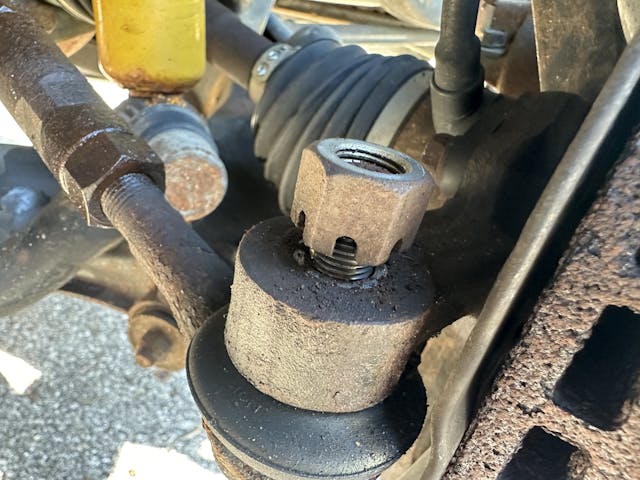
Careful with your castles
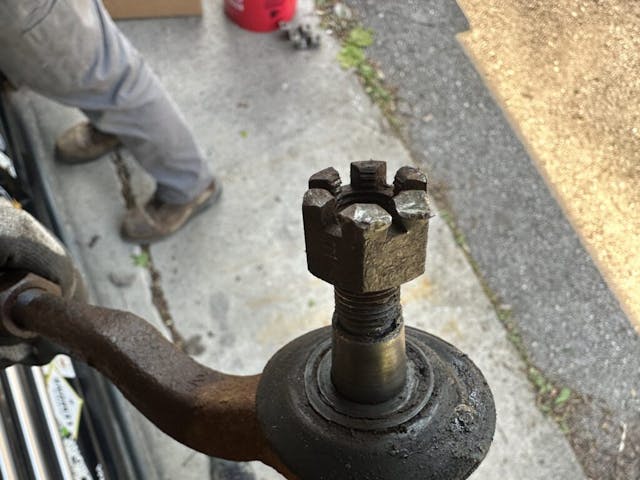
While it sounds like advice pulled from a Dungeons and Dragons rulebook, it’s also true for cars. Castle nuts get their name from the crenellations cut into the top which allow the use of cotter keys to keep the nuts from turning. They work well too, but unfortunately, they are often relatively delicate. Failing to get a socket fully seated can easily strip a castle nut, and a misplaced hammer blow can deform it enough that it will be difficult to remove. If you need to use a hammer for persuasion on one of these, remove it completely, flip it over, and thread it back on. This gives you a flat surface to hit with a hammer that will also not damage the threads.
Get the special puller

There are a couple of tight-fitting joints on the steering components. This means getting things apart can be frustrating—but it doesn’t have to be. Buying a proper ball joint press or pitman arm puller can be a steep investment considering this work is not done weekly or even monthly for most at-home DIY’ers.
Marketplace
Buy and sell classics with confidence
Luckily most chain auto parts stores are happy to rent the special tools to people like you and me. This often requires putting down the full price and getting a refund upon returning the tools, but compared to the frustration of using the wrong tools the hold on some of my cash is very much worth it. Be sure to find proper instructions on use online as the rental tools rarely include them.
Match the new tie rods to the old ones
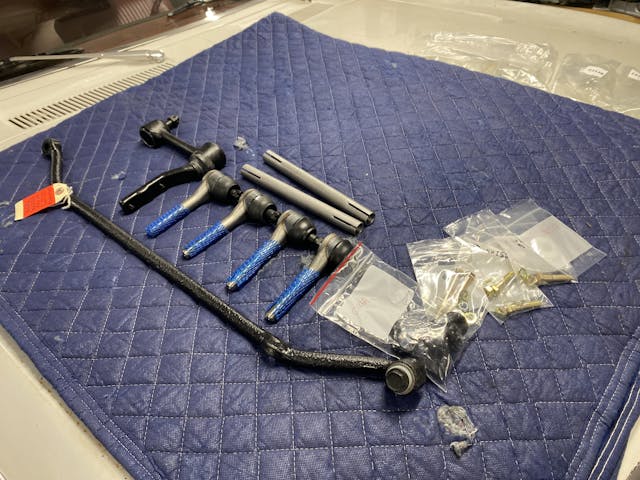
Nearly everything in your steering system has some form of adjustment, and the most critical and obvious are the tie rods. While it is possible to just assemble them and ignore the horrible toe in or out just long enough to get to the alignment shop, your alignment guy is going to like you a lot more if you take the minute to thread the new tie rods together to roughly the same length as the one being removed. This puts the adjustment in the ballpark and also makes the drive to the alignment shop much more pleasant.
Assemble with anti-seize
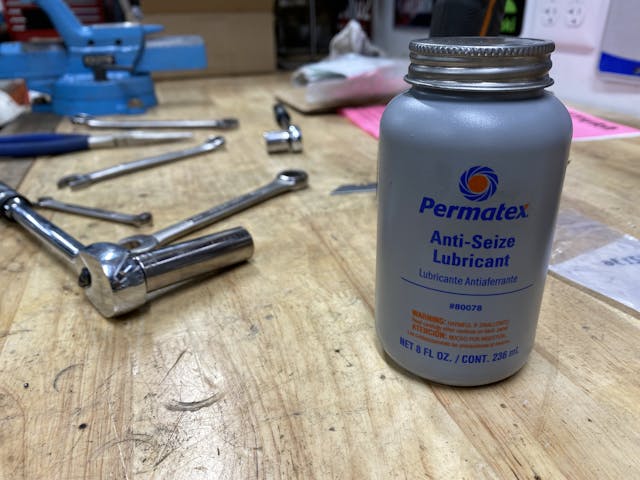
The hardworking components of your steering system are sitting on the underside of your car under constant assault from every size and type of road debris. Water, road salt, dirt, rocks, and radical temperature changes can supercharge the hold of corrosion on threaded parts. A dab of anti-seize goes a long way in keeping this at bay. It will also help the parts last longer as there is the option of doing a second alignment later. Ask anyone who has argued with stubborn, crusty tie rods and you’ll learn that anti-seize can be the small difference between a routine job and testing your patience while mangling tie rod sleeves.
Don’t forget the cotter pins
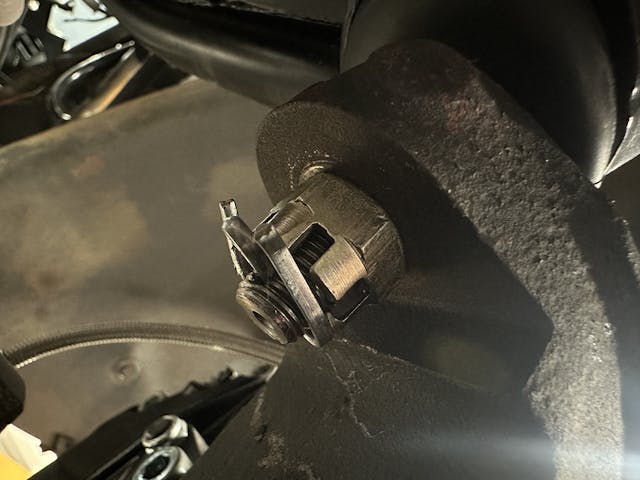
Torquing hardware to spec determines both clamping pressure and helps keep things from loosening up. Because many of the parts in a steering system see a rotational movement that could potentially loosen the threaded fasteners, many steering components have the additional positive retention of a cotter key going through the bolt and castle nuts to keep them from turning. Aligning the castle nut to the hole through the bolt can be annoying, but it’s an important step to keep your steering from unintentionally coming apart. No one wants that.
***
Check out the Hagerty Media homepage so you don’t miss a single story, or better yet, bookmark it. To get our best stories delivered right to your inbox, subscribe to our newsletters.

Find more values
Search for prices of other cars, trucks, vans and motorcycles


If you must use the castle nut to pop the bearing, at least remove it and thread it on with the castles down and flat side up. Then the hammer will do minimal damage. As a kid I didn’t have the tools but at least I had some brains.
If you didn’t read the article, you really open yourself up to looking dumb by posting comments that were already addressed by the author. As an adult I don’t have everything, but at least I have some brains.
That’s what I was thinking I just put a tie rod end on my old truck haven’t done one in awhile I chalked the threads spun it on and put the castle nut to where the pin went through and and between the nut spaces not worried about alignment and it hasn’t come apart yet!!!! Yes I greased it.
Kyle, where do you place ball joints in this? Suspension or steering? If I’m replacing this much of the steering, chances are the other pivoting/moving part – the ball joints are getting replaced too.
Good question. I consider ball joints more in the suspension arena, but agree that during this job is a time to take stock and decide if that is a job worth tackling at the same time. Not every project needs everything replaced at once, but sometimes it does make sense to fall into the “while I’m in there” trap.
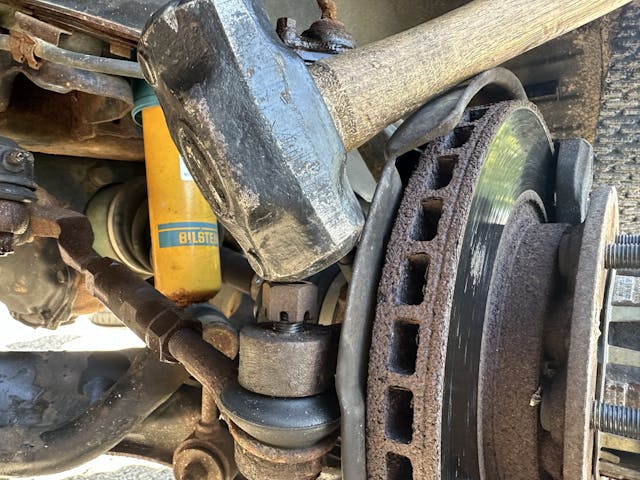
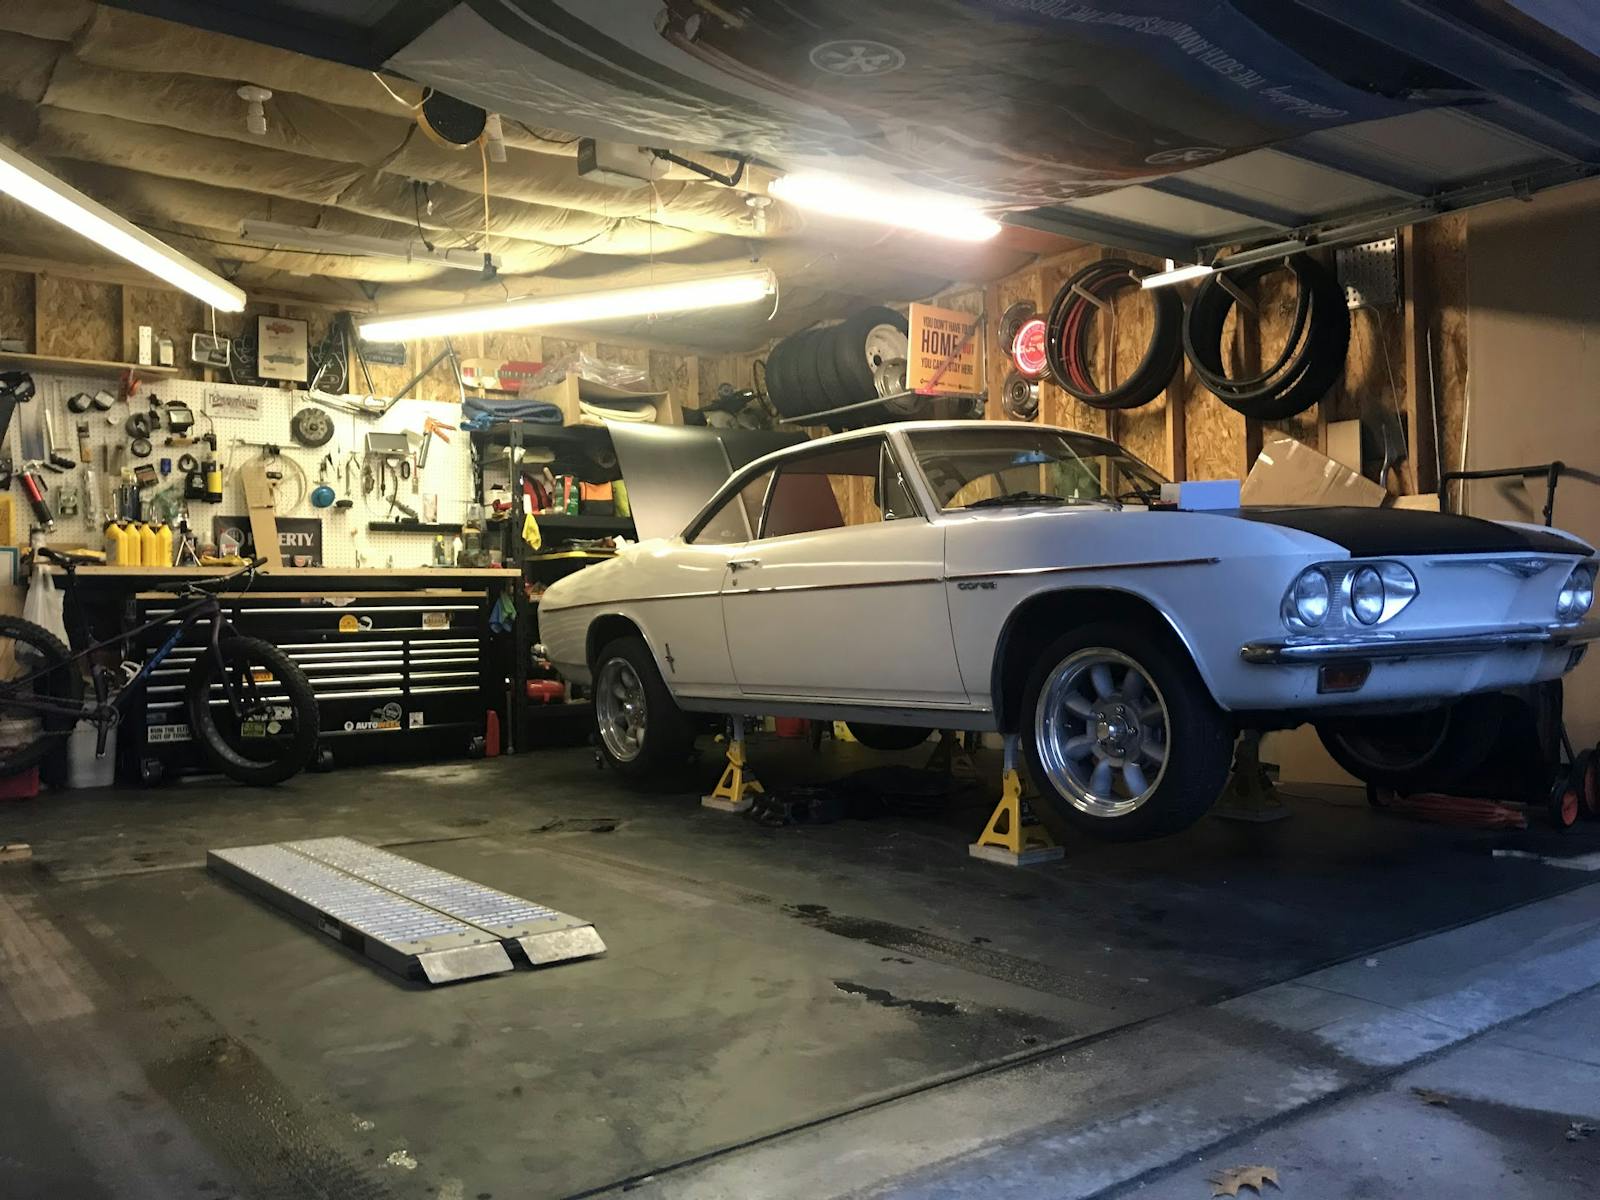
Don’t like the single jackstand in the first photo. Two would be safer
There are two jack stands, each appropriately placed on the frame rails. The light in the photo “hides” the second one.
Ball joint separator – the Hack Mechanic showed one being used in a recent article. Best thing I have ever used. Pickle fork – H*LL No!
You cotter pin installation questionable. Watch the attached video!
https://www.youtube.com/watch?v=KUCvBnXgIh4&ab_channel=Shaun4BigBlocksLLC%F0%9F%9B%A0%EF%B8%8F%E2%9A%99%EF%B8%8F
Your confusing hubris with expertise if that video is what you send out as an example of the “proper way.” I’d go to the FAA or a racing rulebook before a YouTube video where the person loves four letter words.
I don’t think you should be recommending anti-seize compound or any thread lubricant other than a light motor oil for safety related components such as suspension parts. A “dab” is not defined nor do you say where to put it. Note that anti-seize type compounds also act as a thread lubricant and can greatly increase the load on the fastener when you use the factory recommended torque specification. Without adjusting the recommended torque level to compensate for the increased lubricity, you run the risk of the fastener failing due to the equivalent of an over torqued condition (tensile failure). Fastener torques from the factory are the result of analytical and empirical analysis and more is not better. I can’t think of any situation where they ever include the addition of a dab of anything on the threaded joint. Just put a small amount of motor oil on the joint and you’ll be closer to what the factory wants than some sales pitch for something that you shouldn’t be using.
The same goes for all the hoop-la over after market engine fasteners with their purported special alloy fasteners and lubricants. Do they say what all this load does to cylinder bore distortion? How about crank bore distortion? Do they recommend deck plate honing? You might want to research the head bolt materials (and main bearing) used in modern engines. They’re really excellent products and unless you’re pursuing extreme race conditions, aftermarket fasteners are a complete waste of money and may actually hurt overall performance.
I understand the service aspect of wanting to make it “easier next time” but you better realize how easily it could become a dangerous situation. Just keep a breaker bar around for that first quarter turn.
Giving a shot of liquid wrench a few days before doing the job helps.
Line up your old parts with the new. Make sure the angles and dimensions are the same before installing. Make sure the alignment guy afterward is honest and is fully aware of what you have done to that point. I once had a Ford Ranger with about 60,000 miles on it that needed some steering work. Because I had a connection to a dealer parts dept. I decided to replace all of the steering as I could get it a cost. Deals like that rarely come along. (I had worked for the dealer) A friend who was a HD mechanic and I replaced the works, The new Ford parts were slightly different than the original. A double check of the part #s assured all was correct and when installed some of the clearances were slightly tighter but everything worked as it should. I then took the truck to a local shop that the aforementioned dealer sent a lot of work to. Dropped off the truck and took my friend to lunch. Upon return we found all of the new for parts we had just installed the previous day laying in the bed of the truck. The shop explained that the alignment guy of 25 years experience claimed that the parts were “too worn” to do the alignment and had installed all new Moog parts. Angry doesn’t even come close. I pointed out that the parts still had the Ford part tags on them and shiny paint. When challenged the mechanic changed his tune claiming that the tolerances were causing the steering to interfere with the cross-member or some nonsense and not actually worn out. Ironically the Moog parts allowed for even less clearance than the Ford parts. I took the Ford stuff before reinstall back to the dealer and we compared the pieces to three other sets that were in stock and all were identical. I made the shop replace all of my original parts and paid for the alignment only. I even had to supervise to make sure the clown didn’t damage anything intentionally while replacing my parts. He claimed he would not warranty the work because of the Ford parts. The counter guys were red with embarrassment as they new me from my days working for the Ford dealer. In the end, they of course lost my business and after telling my tale to my friends at the dealer they lost the business from them as well as the Chrysler dealer across the street. The Ranger I drove without incident for another 5 years.
To remove a tie rod end from a knuckle, I strike the knuckle with the hammer, not the tie rod nor the castle nut.
I learned this from older technicians when I was entering the trade. If you are reusing the tie rod and don’t want to ruin the boot with a pickle fork, it is a good move.