Media | Articles
The Fire Wrench
Last week I promised (threatened?) to write about removal of the mousy heater box from newly purchased 1969 Lotus Elan +2. I’m not quite finished, so instead we’re going to talk about something near and dear to my heart but misunderstood—why you sometimes need to use a torch to remove stuck bolts, and why that method works.
The 2008 Nissan Armada I bought last December had sat unregistered for about a year before I bought it. Cars that sit outside have rust form on the surfaces of the brake rotors. If a vehicle hasn’t sat too long, hitting the brakes hard a few times typically wipes the rust off, but if it had a long period of disuse, there’s often an area of deposits where the pads were stuck to the rotors. Like the surface rust, these may completely wipe off with repeated braking, but if they don’t, it creates a pulsing brake pedal, and, if the deposits are on the front rotors, a shuddering steering wheel. These same symptoms are also said to be caused by “warped rotors.” We can get into a technical debate on whether brake rotors on street cars ever actually “warp” from heat, or whether pedal pulsation is always due to deposits on the rotors, or by the rotors not being installed on a clean, flat hub face. Nonetheless, the solution is the same—replace the rotors and make sure the hub face is clean when they’re installed.
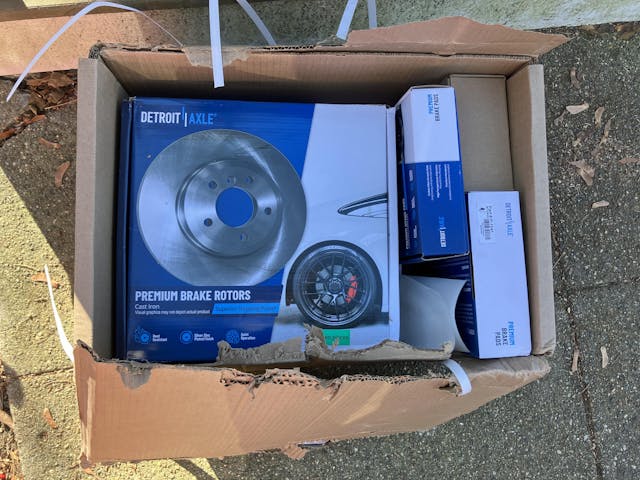
Of course, I didn’t replace them when I bought the Armada, as it was so needy that the functioning but pulsating brakes fell to the bottom of the punch list. However, after using the truck to tow home the needy BMW E30 in August and the Lotus in October, it became clear to me that I was pushing the boundaries of sanity. I bought a set of Detroit Axle front and rear rotors and pads on eBay that, with both a coupon and an offer sent by the seller/manufacturer, came to the ridiculously low price of $234 shipped. I pity the FedEx driver who had to deliver the 101-pound package the last 20 feet. My 66-year-old back and I unpacked the box and moved its contents one rotor at a time.
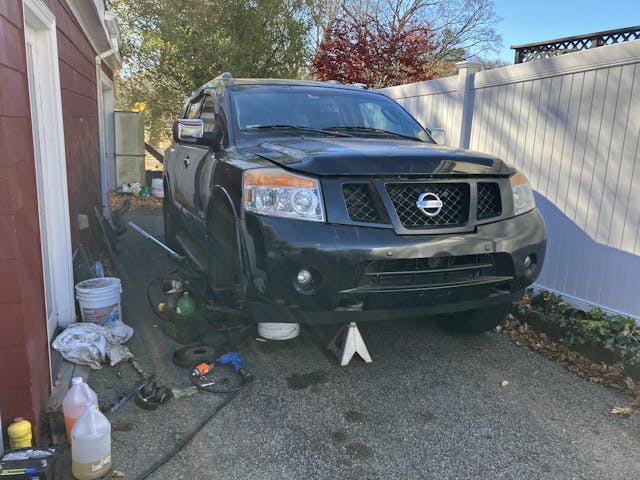
As I’ve written before, working on the Armada is challenging. It doesn’t wholly fit in my garage unless I kick two other cars outside, and I couldn’t do that as I’d already begun tearing the Lotus Elan apart. I saw that we had a few days of 60-degree weather coming up, so I staged the car in the driveway using aluminum sheets under both the floor jack and the stands so they didn’t sink into the asphalt.
Like most modern cars, the Armada has “floating” calipers that slide on a bracket. The bracket is attached to the steering knuckle with beefy bolts and doesn’t need to come off unless the rotor needs to be replaced. The caliper is bolted to the bracket with smaller bolts that slide in rubber bellows. This setup enables the caliper to have its piston(s) on only one side, and for the brake pads to be replaced fairly easily. Since I was replacing pads and rotors, the bracket had to be removed, so I fired up my compressor, stretched the air hose out to the driveway, snapped the 18mm six-point Snap-On impact socket (a set of half-inch impact sockets is one of only two Snap-On tools I own) onto the impact wrench, and did the whacketa-whacketa thing on the first bolt. The joy of owning an impact wrench is hearing that sound quickly transition into whacketa-whacketa-WHEEE as the bolt spins out.
Marketplace
Buy and sell classics with confidence
Except it didn’t. I tried the second bolt—same thing. I waited until the compressor cycled so its pressure was at a maximum and tried it again. No WHEEE. On a caliper bolt. It was surprising; even up here in the rust belt, I don’t think of caliper bolts as rusty, never-have-been-removed troublemakers like, say, control arm bolts.
Now, my Craftsman 2.5-hp, 20-gallon compressor is older than my firstborn child, and he’s 36. It probably hasn’t had its oil changed in several presidential administrations, and like myself, it doesn’t put out the force that it once did. With regard to stuck bolts, that’s actually not a bad thing. You can always put a four-foot pipe on the end of a wrench or breaker bar to deliver big torque to a stuck fastener, but when you do that, you run the risk of snapping off the fastener. Having the compressor and impact wrench torque-limited (in my case, by the compressor’s age) can actually be a valuable safety gate on the whole “any 15-minute repair is one broken bolt away from being an eight-hour ordeal” thing. But even with this quasi-intentional limit and the high-quality Snap-On six-sided impact socket, I could see that the corners on the bolt were beginning to round off.
It occurred to me that it was possible that the bracket bolts were installed at the factory with Loctite on the threads. I checked on the Armada forum, found that this was true, and saw numerous posts of people who’d descended into the hell of rounded-off corners or snapped-off bolt heads.
There’s a chapter on dealing with stuck fasteners in my first book. Hopefully by now you know that WD40 is a light lubricant, not a penetrating oil, and it is never going to loosen any badly stuck fastener. I like SiliKroil and/or wax. Others use PB Blaster or a mix of acetone and transmission fluid. But any kind of penetrating oil has to be able to get into the threads, and in the case of the bracket bolts, the threads were inaccessible.
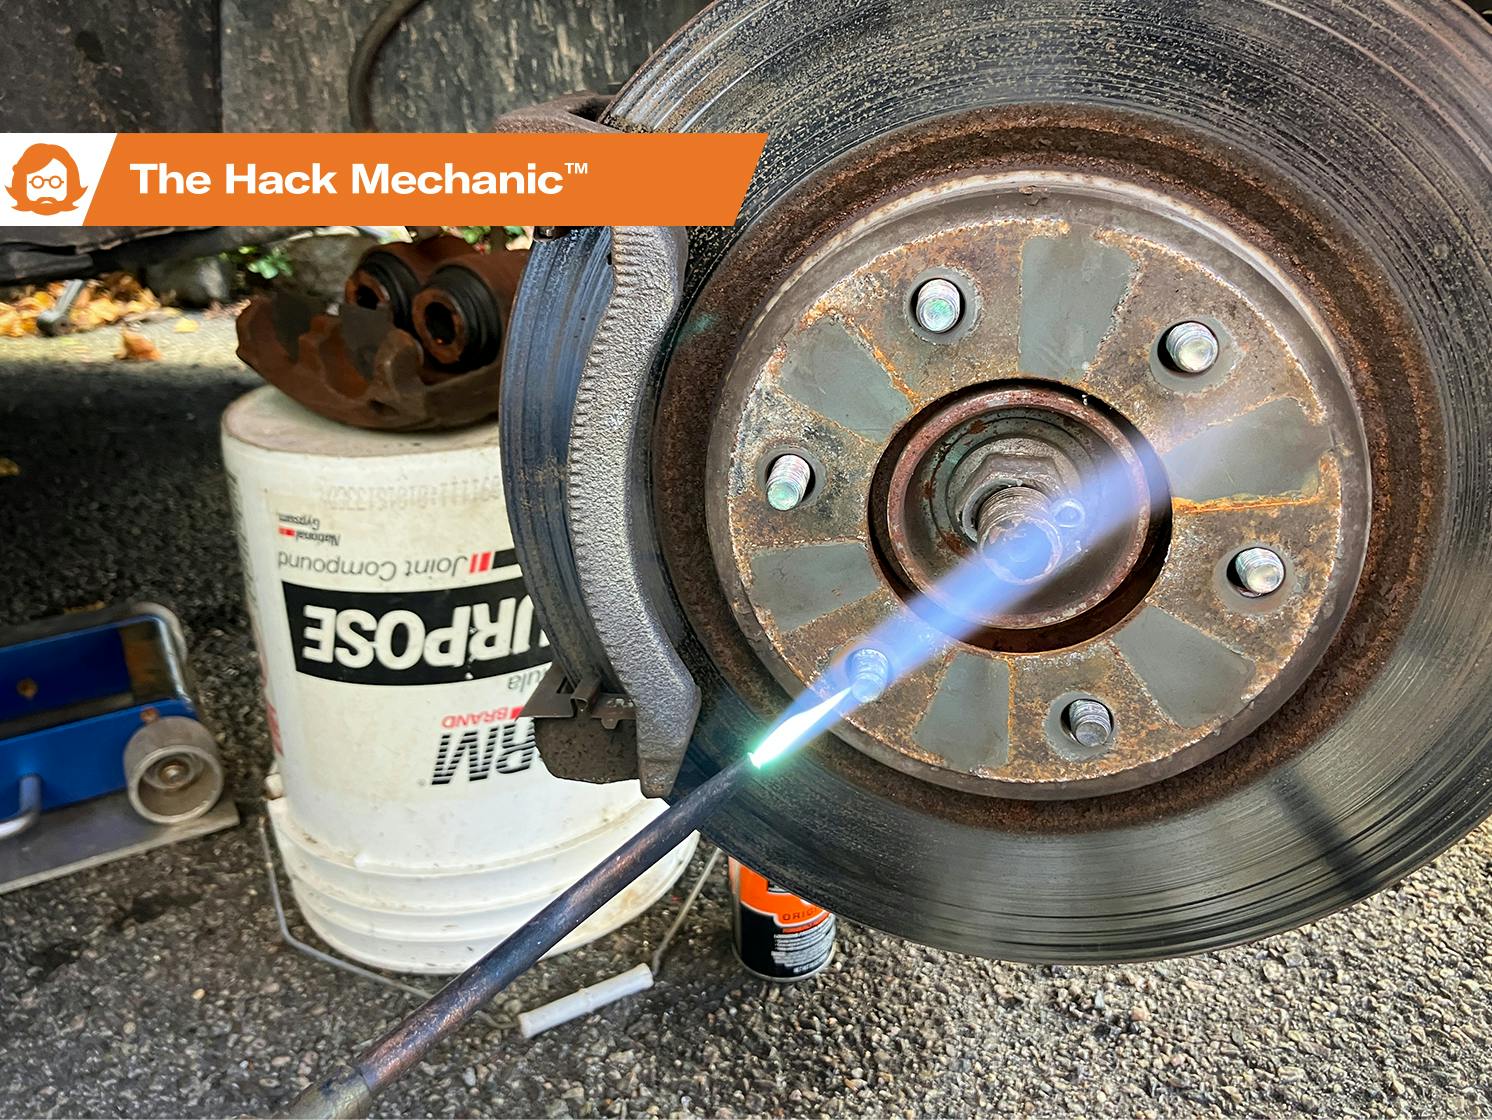
In a larger context, when I encounter a situation like this, I stop and get some Hack Mechanic situational awareness. That is, I look at how bad the situation will be if I snap off a bolt. If the bolt goes into some other inexpensive and easily replaceable part, or if you know that the other part is junk anyway, as it often is when replacing exhausts, sometimes the thing to do is just go for it; but if you know you’ll deeply regret it when you feel that sickening sensation of having the bolt twist but not hearing the threads crack (which indicates that it’s snapped rather than unthreaded), the thing to do is preemptively go for the heat. A small propane torch usually isn’t hot enough. MAPP gas can get small fasteners cherry-red. But for big stuck fasteners, you need an oxy-acetylene torch. Or as it’s affectionately known in the repair world, The Fire Wrench.
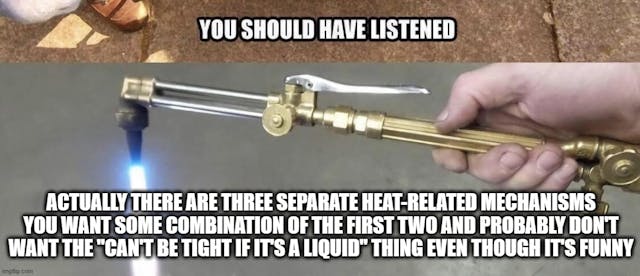
You’ve all likely seen this meme:
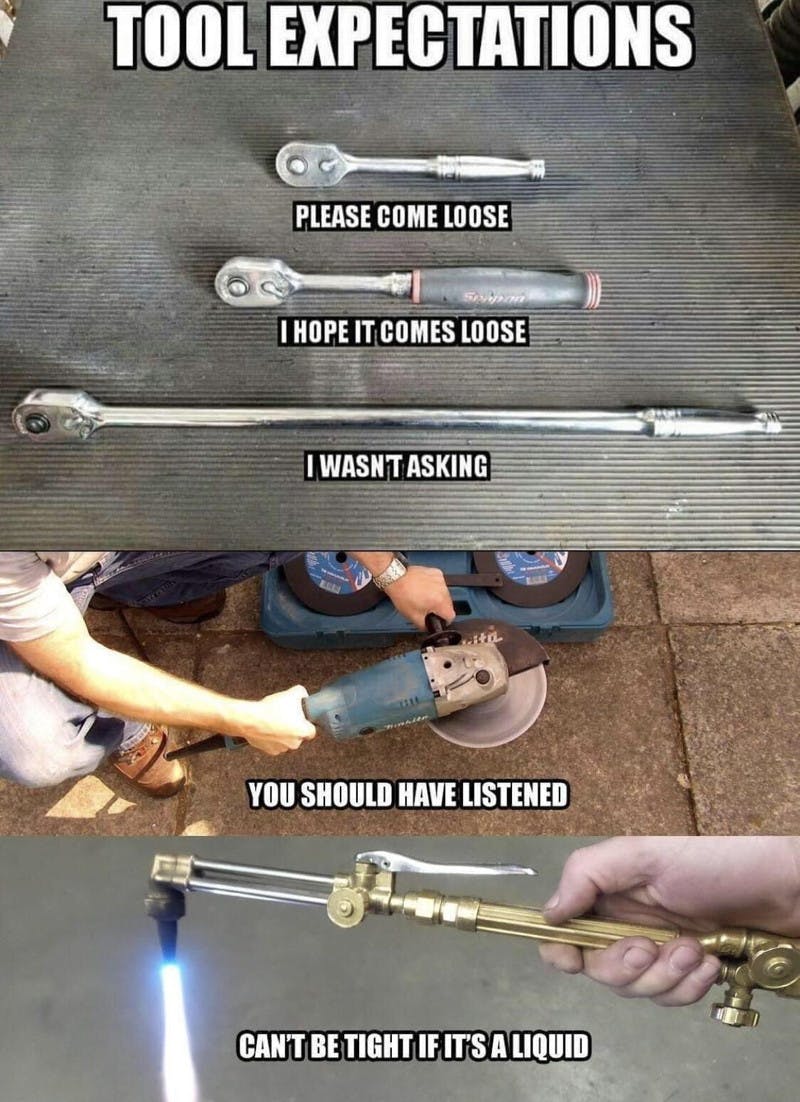
While it’s funny, the meme is more than a bit misleading. The torch attachment shown in the meme has a lever on it, which means it’s a blowtorch, which is meant for cutting metal by melting it. When faced with a stuck fastener, you don’t usually want to melt metal, and if you melt it in the wrong way, you’ll cry.
Let me back up. There are three different truths that can come into play when you apply heat to a stuck fastener. The one that’s most often referred to is that metal expands when it’s heated, so if you have a nut on a stud, you heat the nut to release the death grip it has on the threads of the stud. Similarly, if you’re trying to remove a stud from an engine block or head, you should heat the area around the stud, not the stud itself. You can do your own research on the different expansion rates of iron, steel, and aluminum to judge whether or not you think that this is the primary mechanism by which heat unsticks things.
Personally, I’m a bigger believer in the second truth—that heat helps break the bond of corrosion or other binding factors in the threads. In the case of my caliper bracket bolts that were Loctited at the factory, that’s exactly why I wanted heat. I wanted to literally melt the old Loctite.
To be absolutely clear, when you break out the torch, you don’t really care what percentage of the loosening is expansion of metal versus what portion is corrosion-breaking or Loctite-melting. It’s largely an academic question. If you’re dealing with a nut on a stud or bolt, you heat the nut up cherry-red, it comes off easily, and you’re thrilled. (Although, if you’re removing a stud, I’d still concentrate the heat at the area around the base rather than heating the top of the stud.)
But the third truth— the “can’t be tight if it’s a liquid” thing—is different, and it’s something you need to be very careful about. This approach is totally the right one if you have a stud with splines on the sides that are an interference fit into a hole in a flange on something like an exhaust manifold that holds a headpipe or catalytic converter, and the threaded top of the bolt has snapped off. Heat that remaining little stub until it’s as orange and malleable as lava, then smack it with a punch. It acts like it’s Play-Doh, deforms in the middle, shrinks a bit in diameter, and pops out. It’s awesome. You’re never so happy to own a tool in your life.
The Armada’s caliper bracket bolt is about two inches long. Its cap was easily accessible, but that wasn’t the part that was seized. About an inch of the bolt goes through a non-threaded hole in the steering knuckle. That wasn’t the seized part, either. It was the remaining inch that was threaded into the bracket. In this situation, heating the cap of the bolt to near-melting temperature would be the worst thing you could do, because when you put torque on it, it’s just going to twist off like warm taffy and leave the part that’s stuck in the threads.
The other thing about The Fire Wrench you need to be aware of is that an oxy-acetylene torch is not a scalpel. The flame tongue is about eight inches long. It is very easy to melt nearby wires or rubber boots, or to cook the grease out of bearings. Ask me how I know.
So, with all that explained, you can see that the thing to do was to use the torch to heat not the bolt cap but the part of the bracket into which the bolt was threaded. Multiple heatings and test whacketas with the impact wrench were required, but eventually the bolts began to budge. Once there were some exposed threads, I goosed them with SiliKroil, waited a few minutes, then whacketa-WHEEE’d the bolts all the way out.
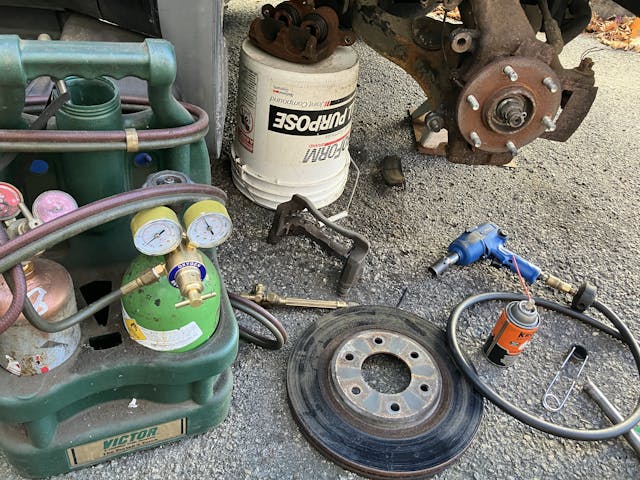

With the bolts out, I could see how rounded the corners of the caps had gotten, even with the use of heat and a high-quality six-pointed socket. I’d never had anything even close to this happen on the vintage BMWs I usually work on—I re-use those caliper bolts without a second thought. With the Armada’s, I didn’t feel right putting them back in. And it wasn’t an altruistic “do the right thing for the next owner” thing—it was an entirely self-interested desire to not get shot at some later point by the bullet I’d just dodged.
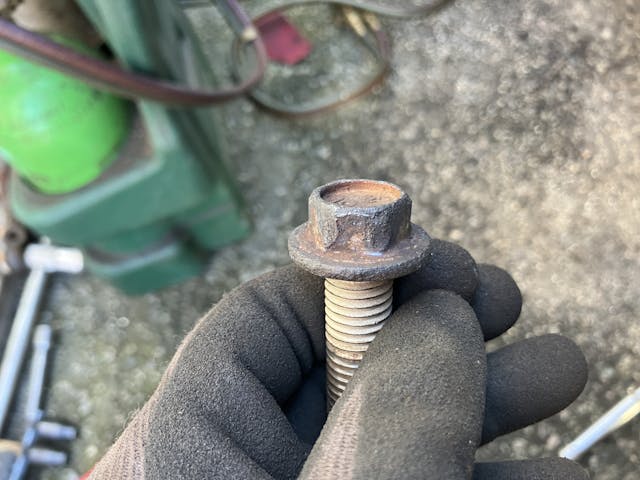
Sourcing replacement caliper bolts was surprisingly challenging. I couldn’t find them in the online Nissan parts diagrams, and the part numbers listed on the Armada forum seemed to be for bolts for the heat shield, not the caliper bracket. I normally don’t pay as much attention to bolt grade as I probably should and usually would substitute any available M14x2.0 bolt that’s about the same length. Last week I mentioned doing exactly that for a caliper bolt on the Lotus Elan +2, but that’s a featherweight car. The Armada is a 5600-pound truck that I use to tow. I wanted the correct grade 10.9 flared-head bolts. Fortunately, my local True Value hardware store has a fabulous selection of fasteners, including these. They were $5.80 each, and I was glad to pay it.
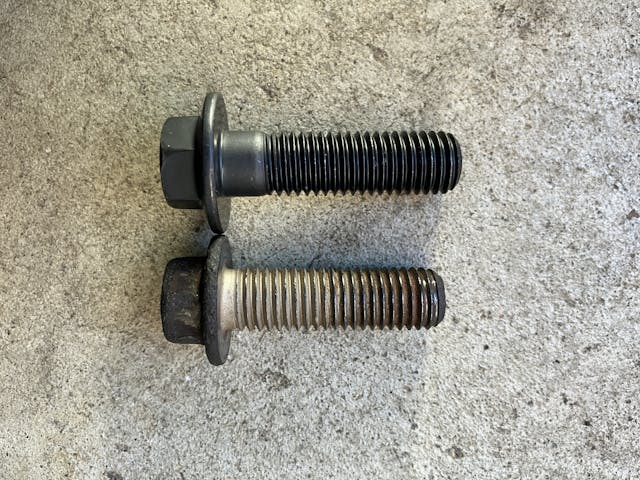

The Armada now stops great and doesn’t shudder while doing so, and The Fire Wrench was an absolutely indispensable part of the repair. But not because it liquified metal—because it liquified Loctite and broke the bond of corrosion.
There. I fixed the last part of the meme.
***
Rob’s latest book, The Best Of The Hack Mechanic™: 35 years of hacks, kluges, and assorted automotive mayhem, is available on Amazon here. His other seven books are available here on Amazon, or you can order personally inscribed copies from Rob’s website, www.robsiegel.com.





Very timely for me. After a very recent bout with a blown rear brake line replacement, I took a look at all the brake pads and rotors on our 2004 4Runner. I’ll be doing something similar to what you did on the Armada soon, Hack, and I’ll likely be using some of the same methodology if (when?) I don’t hear “whackata-whackata-whee!” – better check my acetylene tank levels now…
After looking at that recessed hex bolt holding the wheel speed sensor on, I see why you left it alone. That fastener could have easily turned into a “Fire Wrench Part 2” article!
I like New England (lived in VT for 4 years), but rusty cars give me way too much psychological trauma to ever move back there.
A quick reminder that aluminum does not changes color as it approaches melting temperature (1220F), it just turns into a blob.
After 20 years of wrenching in rust up North, I’m intimately familiar with torches.
Recommendation to protect any wiring is a small bendable piece of metal you can use a shield. This and/or copious rags that have been drenched in water.
It only takes one or two Synflex air lines bursting in your face under a dump truck before you learn effective ways to protect the stuff that burns.
You can also buy flexible heat shields in the plumbing section of big box stores. They look like some sort of heavy cloth. These are intended as protection for the Prest-o-Lite acetylene torches used in plumbing work, but I’d bet that layering two or three of them together would do well for oxy-acetylene.
To be technically accurate, the torch cuts by rapid oxidation… not really by melting
However you describe the process, if the threaded component is able to be sacrificed, I have removed stuck nuts by ‘shaving’ the nut off with a torch. Not recommended for a novice, and definitely not recommended in this scenario
Rob, I see your brake parts, the box says Detroit, but did it also say Made in China? I ask because I paid real American dollars for a complete set of rotors and pads for the 1976 Eldorado “made by” AC/Delco and when the three heavy boxes arrived the contents said Made in China.
While I see your point, at the end of the day it’s a chunk of iron and I don’t care who made it..
For a few days before the long day waned at GM, their Chinese iron brake rotors were costing them customers. People notice that there are different-colored chunks of some other substance showing. But it’s a whole new company now, so no problem I’m sure.
At the end of the day, that “chunk of iron” is being entrusted to stop my family and me (not to mention people in other vehicles) under all sorts of circumstances that I can’t predict. Given that it might be made from inferior materials, in uncontrolled locations, and not fully inspected for defects, I damned well DO care where it’s made!
Re: DUB6, Exactly!
Never ever install low or questionable quality brake equipment. NEVER.
I have mentioned this before. I had new Mercedes Benz rotors, pads and a brake flush, completed by my dealer for a tad over $1000, ouch. But those new brakes actually saved a child’s life just a few months later, when he whipped his bike to the left, in front of me and I stood on the brake pedal with both feet to stop. (I was going downhill) I thought I might have bent the pedal arm! I missed hitting the boy by only a couple of feet. Any other brake rotors and/or pads would not have stopped my heavy SL in time. Had I experienced just three feet or so of brake fade, I would have hit that child. I can still recall that event with chilling reality.
What if that child was yours? Still considering cheap brakes? Think again.
“Any other brake rotors and/or pads would not have stopped my heavy SL in time. ”
You don’t know that, and likely never will. You’re helping yourself feel better by justifying the eye-watering price you paid for your brake job at the dealership. They make (minimum) 40% gross profit on parts and 70% on service. If you’re willing to pay that markup, that’s your decision. But fear-mongering based on a sample-size-of-one example is dubious at best. Looking further ahead, visually scanning front yards, and watching for movement underneath parked cars are all valid and safe ways to avoid preventable disasters in residential areas. Giving wide berths to children and other bike riders is also just common sense and good practice.
I don’t want to see kids struck by wayward SLs, either, but there is nothing special about Mercedes rotors or pads that can’t be duplicated at less than half cost from a reputable aftermarket brake component supplier. Not that “Detroit Steel* Made in China”, or whatever Rob put on his Armada is necessarily an aforementioned reputable supplier. But quality replacement brakes are plentiful and affordable for 95% of all passenger vehicles on our roads.
My Dad was non-mechanically inclined and as cheap as they come, but he never, ever, skimped on brakes (or tires)
When it comes to replacing the caliper bracket bolts (or other parts encountered during the project), most of us I’m guessing are of the same mind. I don’t necessarily want to save the next owner some grief, but I certainly want to save my future self some grief. Particularly true if I’m not sure how long I’m keeping the car. The Acura needed new tires 6 or 8 years ago and I wasn’t sure how long I was going to keep it. Put Michelins on it anyway (glad I did – they saved the car once), and now it’s almost time to replace them again.
Thank you again for the reminder of how spoiled we are in non-rust belt land. Another good read.
The meme while not fully accurate is funny. Glad you got the brakes off!
Long time fire wrench user that donated it to an artistic kid when I retired and moved. Missed it until I discovered inductive heating devices. No collateral damage, pinpoint accuracy and works fast.
It would be fun to see a comparison write-up on those applications.
I have not yet bought and used an inductive heater, but while I can see how its coil can get around a nut or the head of a bolt, I’m not sure it would’ve been effective here, as I don’t think the coil could surround the threaded section of the bracket where the bolt was seized.
That has been my experience with the inductive devices. They work great in ‘trade show’ scenarios but not under a rusty project car, for exactly the reason you stated.
I love reading Rob’s garage stories. They remind me why I’m never buying another old car again.
I love the fire wrench and use if more than I think I should have to. Even with a special pneumatic fan clutch tool, a fire wrench is a must for softening the thread locker the geniuses at Dodge use on the threaded fan clutch and quite often a must for the flange bolts on GM’s LS exhaust manifolds to take off the converters. And speaking of heat, a heat gun is required for melting the sealer when disconnecting the harness connecter on early GM 4L60 transmissions eliminating prying it apart resulting in breaking plastic.
A mechanic, of sorts, that worked for my father’s farm machinery dealership referred to the oxy-acetylene torch as The Smoke Wrench. 🙂
Also known as……
Smoke wrench
Blue tipped milling machine
if no rust and just a locktite use issue, i’ve removed many bolts by going back and forth from ‘remove’ to ‘fasten’ on my impact. doing this often, one gets a feel how far they can go before getting the wrong result from hearing ‘wheeee’
i had to use a pipe extension on a 3/4″ breaker bar to remove a crank pulley bolt on a vw inline 6 turbo diesel engine in a volvo 760 sedan (seem to remember previously breaking a 1/2″ impact socket before going 3/4). because of inherent diesel engine vibrations, the whole threaded section of this bolt was dipped in red threadlocking liquid. the outer edges of the threads barely stuck out. possibly the tightest bolt i’ve had to remove. 2nd would be the crank pulley bolt on a mid-00s honda v6. geezus!
Yeah. What IS IT with those Honda crank pulleys?!
two friends that owned a ’05 pilot have since sold them. all i’m stuck with is the special tool. life is good!
Try a Lisle 77080 socket. It has extra mass that amplifies the torque from your impact. I haven’t used mine on a Honda yet but made a difference on an overly tightened bolt on a Toyota when my impact and regular socket didn’t do the job.
Norm. I went thru the same agony on the Honda engine. I know they make a special impact socket for that bolt. Forgot the name Would like to see some reviews on them
I changed the timing belt on my 99 Odyssey and nearly gave up on that crank bolt. My friend’s impact did nothing, so I wedged the special tool against the frame rail and put my floor jack under the end of my breaker bar. The van was an inch off of the jack stand and I was about to throw in the towel when it let go and settled back on the stand. The special tool left a nice dent in the frame rail too.
I have had to get stuck tires off cars it is get the white grease put it on the stuck part of tire wait then with the use of a work boot clad foot I would give it a kick with a kiaha a martial art yell tire comes off car.