Media | Articles
My Lotus front-end refresh is bound to uncover some issues
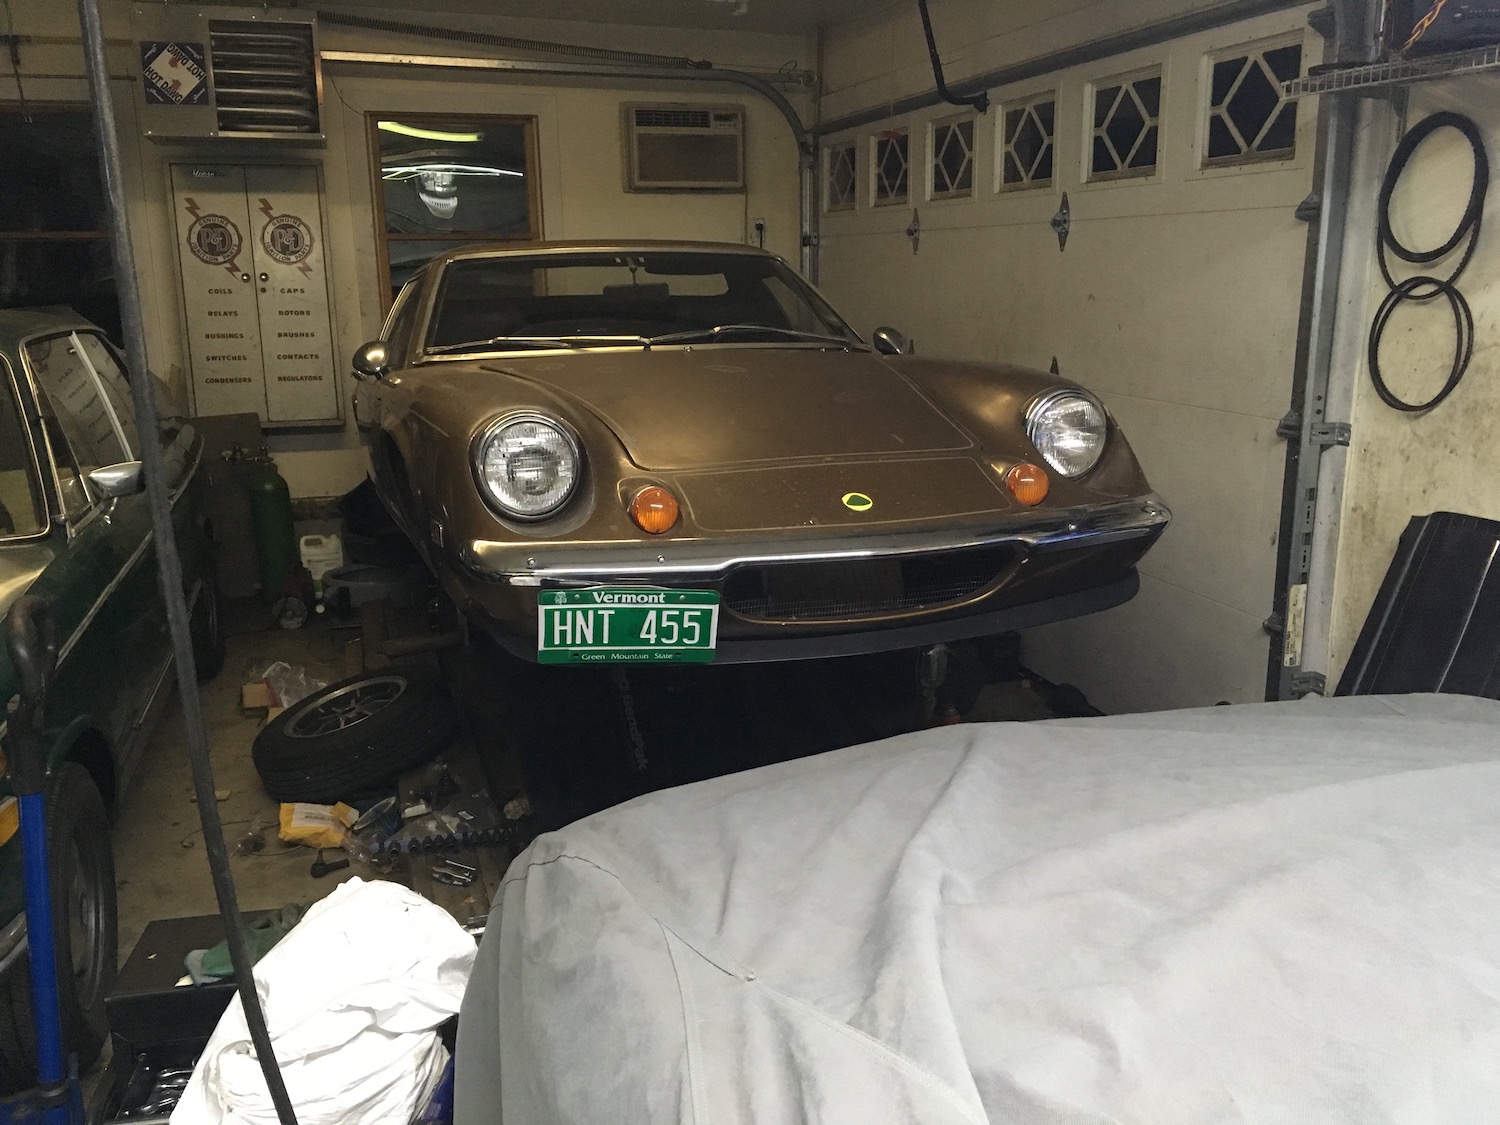
As many of you know from my many DIY articles, six years ago I bought a 1974 Lotus Europa Twin-Cam Special that had been sitting since 1979. I was aware when I bought it that it had a seized engine, but that was only the beginning.
Really, you’re fooling yourself if you think that a car that’s been sitting for 40 years doesn’t need everything. So, once I completed the nearly six-year-long process of rebuilding the engine earlier this year, I needed to conduct something resembling a comprehensive assessment and refreshment of every major system in the car.
There’s a canon you often hear in the car world, “Do it once, do it right.” A variant of this is, “There’s only one way to do things—the right way.” This is my least-favorite advice in the world. Seriously. It may be well-meaning, but it’s bereft of creativity and flexibility, and you’ll notice that it’s never accompanied by a blank check or even a small donation to help foot the bill so that you can, um, do it once, do it right.
But I get the concept. Really. I do. And at the system level, it makes a lot of sense. The idea is that if you’re, say, refreshing the front end of a car that you want to keep for the long term, it’s best to replace every wear-and-tear part at once—shocks, tie rods, ball joints, bushings, all of it—instead of having to keep jacking the car up and tearing it apart to do it piecemeal. Even I admit that you’d be foolish to, for example, replace the left tie rod but not the right, since tie-rod replacement requires that an alignment be done. You would certainly want to replace any parts of the same age whose failure would require paying for another alignment. That’s common sense—and it has a tangible economic incentive.
The problem is that, when time and resources are finite, if you apply this to everything, it’s easy to wind up with a disassembled car and zero forward motion. Every project and owner are different, and there’s no one-size-fits-all approach to getting a long-dead car back on the road. My time-tested approach is to do “rolling resurrections” where I first sort out the fuel delivery system, get the car running and moving around the block under its own power, and then find out what it needs so that it can be driven farther and faster. Until I reach that point, “do it once, do it right” is the last thing on my mind.
Marketplace
Buy and sell classics with confidence
Even at the system level, things aren’t black and white. Let’s say you’re refreshing a cooling system. On a vintage car, that typically means replacing the hoses, thermostat, water pump, and belt. What about the radiator? Do you just go ahead and replace it if there’s no evidence that it’s leaking or blocked? Often the answer is driven by economics. If a new radiator is $150, maybe you just pony up for it, but if it’s $500, maybe you want some evidence that the original one is actually bad. These things have to mesh with your experience, your comfort level, and the balance in your mad-money fund.
Back in the spring, I wrote a piece about managing the slippery slope. In it, I described how, while I had the Lotus’ mid-mounted engine out, I addressed some issues in the rear suspension. This was because A) the rear trailing arm bushings had the consistency of warm licorice, and B) they were much more easily accessible with the drivetrain out of the car. I would’ve been a fool not to tackle them at that time, and I try not to be a fool. But in general, I really try to stay focused on the task at hand and not ride the toboggan down the slippery slope.

One of the big pieces in getting the Lotus across the threshold from moving under its own power to driving safely was dealing with the brakes. After all, you want metaphorical forward motion of the project, as well as physical forward motion of the car, but you also need to be able to safely stop that forward motion when the physical car is driven on a physical road. I bypassed the non-functional power assist booster (a common modification on the little 1600-pound Lotus) and installed rebuilt calipers and new rotors and pads. Because the hubs had to come off in order to replace the rotors, it made perfect sense to replace the wheel bearings at the same time.
However, once the nose of the car was in the air and the rotors and hubs were removed, I could see that the rubber boots for the ball joints and tie rods were completely missing, having deteriorated into oblivion during the car’s 40 years in storage.

I also noticed that one of the front sway bar links (which attach the center of the bar to the body of the car) was broken. I tried welding it, but it broke again. These links are not trivial to replace. They’re not like those in my vintage BMWs, which are simply U-shaped brackets that wrap halfway around a rubber bushing and then bolt to the front subframe. They’re about 12 inches long and have eyelets at both ends. The lower eyelet wraps completely around the subframe. To replace it, the sway bar has to be removed from the car and held in a bench vise, the old vertical link and bushing must be worked off the end, and then the new one is installed.

At the time, I did not address either of these issues. I did verify that the boot-less ball joints and tie rods had no play in them, but I intentionally stopped short of replacing these components or doing any other front-end work on the car and instead stayed focused on completing the work to get the brakes functional. I don’t regret this in the least, as it got the car back on the road quickly. This, in turn, allowed me to drive the car faster than tricycle speed, uncover the next round of problems, fix them, and drive the Lotus through the summer and fall. (I did, however, immediately order the replacement ball joints and tie rods, and I checked for play frequently, as I was keenly aware that the lack of grease-filled dust boots would likely cause the balls-in-sockets to become contaminated and wear quickly.)
As I drove the car, I found that its steering was surprisingly tight, and the shocks seemed functional but soft, but at speeds over 60 there was so much wheel and tire vibration that it felt like the car was going to tear itself apart. I ponied up for a proper road-force wheel and tire balancing. That helped, but did not completely solve the vibration issue.
With that information, I resolved that, when the car was laid up over the winter, I’d tackle the front end in a more systematic fashion and address the following issues:
- As discussed above, replace the boot-less ball joints and tie rods, and replace or repair the broken way bar link.
- Although I didn’t feel any play in the front end, something was causing the car to shudder at speed. Maybe the new ball joints and tie rods and a properly-secured sway bar would fix it, but given the opportunity from the winter layover, a thorough inspection of all components was in order. The Europa doesn’t have a traditional MacPherson front suspension but instead uses a double-wishbone design. Each wishbone has two rubber bushings. With upper and lower wishbones on the left and right, that’s eight bushings. Inspection of these requires the wishbones to be removed, which in turn necessitates disassembly of the entire front end. Replacement of the bushings typically requires a hydraulic press, as they’re metal-sleeved bushings pressed into metal wishbones.
- Similarly, the trunnions needed to be inspected. These are the pieces below the lower wishbone that essentially fill the role of a steering knuckle on a MacPherson suspension. By the time you take the trunnions off the car and disassemble them to inspect them, you might as well simply rebuild them, since their nylon bushings can be popped out and pressed in by hand, and rebuild kits are cheap.
- The shocks needed to be evaluated. Although doing the bounce test on the car (pushing down sharply over each wheel) seemed to show that the shocks were soft but not blown or seized, I admit I’ve been wrong in that assessment before. I wanted to pull the coil-over shocks and springs out, remove the springs, and manually extend and compress the shocks to test them.
- Lastly is the issue of the height of the nose. My Europa is a U.S.-spec car that had to comply with federal headlight height standards that caused all federal-spec S2 and Twin-Cam Europas to be almost laughably lifted in the front, looking like a boat on plane. When the cars were new, the solution was apparently to retrofit the front springs used on the Euro-spec cars. Now, however, nose height is usually handled as part of a full suspension refresh with not only shorter springs, but also with variable damping rate shocks that have spring perches whose height is adjustable.
So, as the Lotus was safely ensconced in the garage and the first snows of winter came down, I raised the car up on the mid-rise lift and began tearing into the front end. I was grateful that I could simply walk into the basement and, from there, into the attached garage without going outside, allowing me to easily do a little bit each night (one of my major mechanisms for moving projects forward). I was also grateful for the fact that, with winter stretching out in front of me, there was no rush, allowing things to unfold at a relaxed pace and not force me into snap decisions.
I’m going to devote the next few stories to the process of a front-end refresh. Although there will, admittedly, be things specific to the Europa, many issues will come up that apply to most cars and projects. Money will be spent. Choices will be made. Things will go wrong. Parts will be stuck. Knuckles will be skinned. Certain blue words will be uttered.
Hang on, folks, it’s going to get bumpy.

***
Rob Siegel has been writing the column The Hack Mechanic™ for BMW CCA Roundel magazine for 33 years and is the author of five automotive books. His new book, Resurrecting Bertha: Buying back our wedding car after 26 years in storage, is available on Amazon, as are his other books, like Ran When Parked. You can order personally inscribed copies here.


