Media | Articles
What you need to know for a rattle-can DIY paint job
Aerosol or rattle-can paint gets a bad rap from the collector car cadre. But using a premixed factory match color in an aerosol can is a viable way for the do-it-yourselfer to finish up scratches, rust outs, color-match spoilers and trim, or go for the 1980s-perfect monochrome Euro look from wiper arms and mouldings out to the wheel centers.
Realistically, you’ll never get Pebble Beach-worthy finish without a paint booth and specialized equipment, but the much-maligned rattle can get the job done in a pinch.
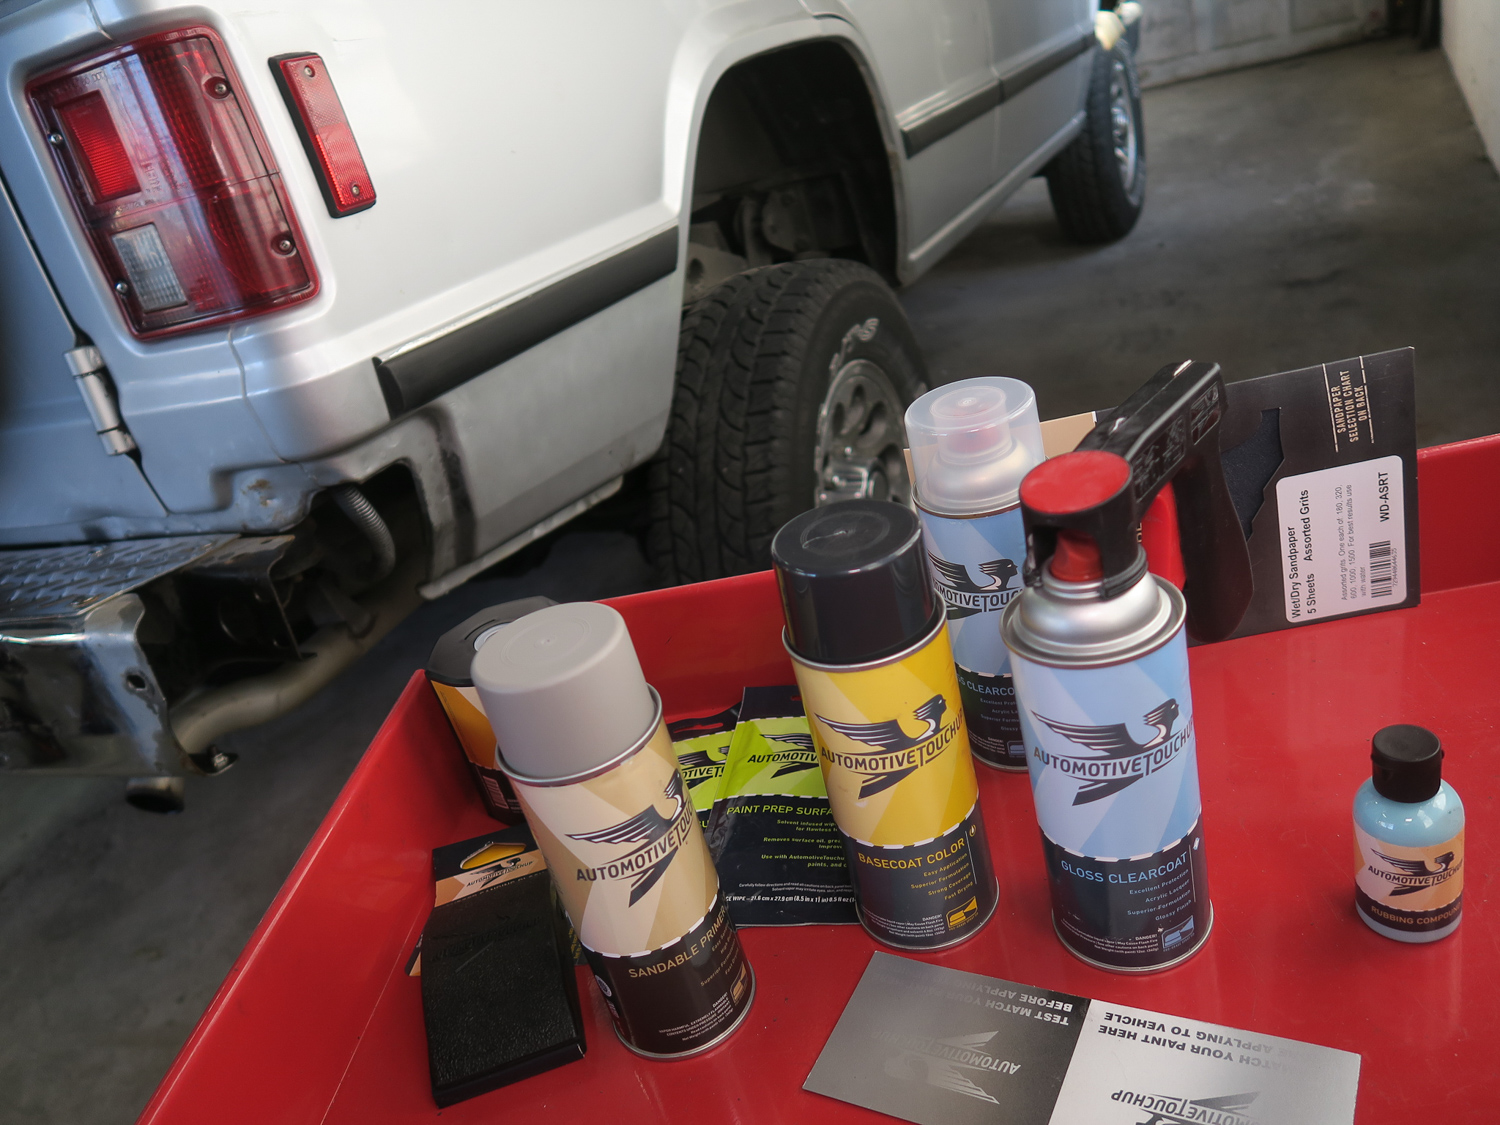
After ruthless road salt, a few logs, more than a few brush and stick clearing sessions, and an occasional boulder bash, this 1989 Montero was left with some paintless and rusty spots that required some attention ahead of the annual New England corrosion season. Modern technology has made it possible to order up everything required to finish a touch-up task with factory color-matched paint in an aerosol can without the giant investment in compressors, dryers, paint guns, reducers, filters, and so on.
Secret code

The first step is to figure out the factory paint code from the underhood VIN tag. I sourced an aerosol from an auto parts store a few years back, but this time around I turned to the miracle of the internet and paint code databases. I cross-referenced the code by year, make, and model on the Automotive Touchup website and placed the order. When the paint arrived, I hit one of the color match cards with the basecoat to make sure it was a match before starting in on any bodywork, grinding, and sanding.
Marketplace
Buy and sell classics with confidence
Prep school

Painting cars, houses, or anything else is 99 percent prep work and one percent application.
Scrub down the area in question with soapy water or degreaser. I figured dents and dings added some battle-scarred character to the Montero and focused on the rust spots. Say hello to your old pal Bondo, mix up some Tiger Hair, or fill any offending deep scratches or chips with body putty then sand it all down in stages. Keep sanding and work out to finer grits. Power tools are OK to start with but hand sand with the contour of the body on the way out.
Mask, prime and base coat

Mask off and prime. Sand the primer out your finest grit and then clean everything up. Some naptha on a microfiber cloth pulled all this gak off even though the area looked clean. Rattle up the basecoat paint can ball bearing for at least a minute and then lay it down. Spray in a parallel line, not a curved arc. Set up a raking shop light and watch for the paint and solvent to level out together and hit the wet look. Wait at least 20 minutes between coats. No more sanding. Hit things with a tack cloth between coats to remove any paint goblins.
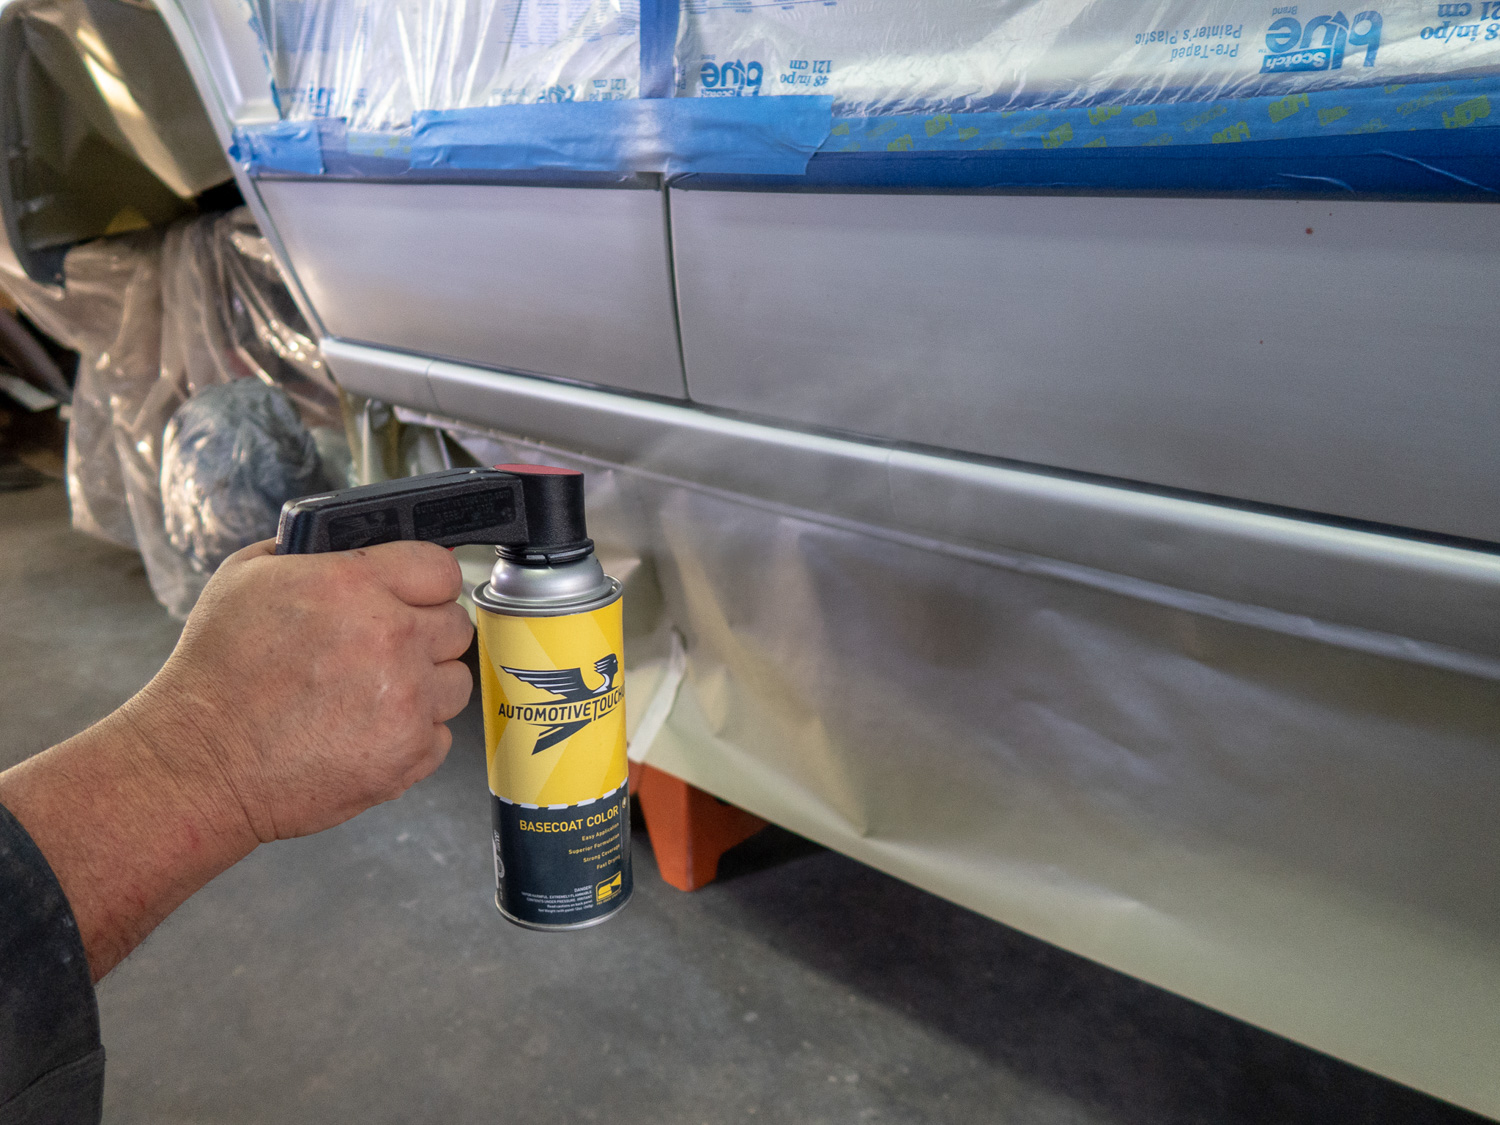

Use a soft mask line to blend basecoat into the existing color. A hard masked edge will leave a ridge and read as two different shades. Basecoat clearcoat paint is at once forgiving and challenging. Clearcoat is the last part of the one percent and easy to goof up. Lay down multiple thin coats to avoid sags. Watch for the clearcoat level out wet and then stop. Wait at least 20 minutes between coats, tack cloth off any goblins, and then hit it with as many layers of clearcoat it takes for that deep finish. Wait at least 12 hours, use some rubbing compound if required, peel off all the masking. Presto.


I already had plenty of masking tape, paper, and sandpaper kicking around, but Automotive Touchup offered everything in the box finish kit or factory matched aerosol paint cans a la carte. Aerosol premixes can also be purchased at your local automotive paint supply or auto parts outlet, though walking in with a paint code that isn’t from a Big Three classic product can be hit or miss.
If you want the best results, painting an entire car is a job best executed the proper way with a paint shop, but a can or two of aerosol works for a decent touch-up or color match with minimal investment. Rattle on.


