Media | Articles
Installing a lift pump in a Duramax diesel
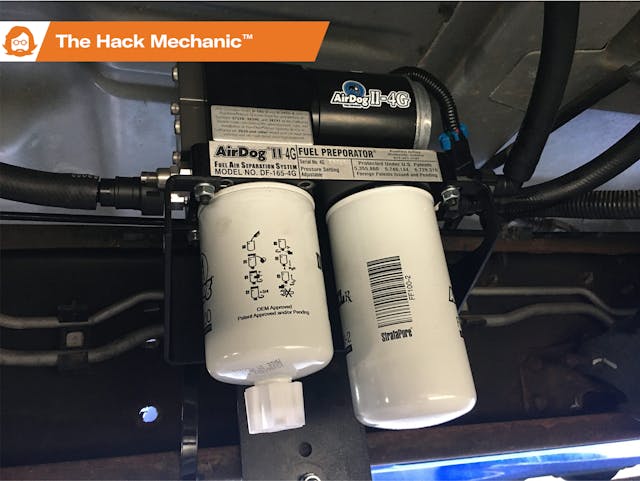
Last month, I wrote about starting trouble with my 2008 Chevy Duramax Diesel, which appeared to be due to the fuel system losing its prime. While most diesel pickups have a “lift pump”—a fuel pump that sends diesel up to the fuel rail, where the diesel injection pump then ingests it, steps up the pressure, and sends it to the injectors—this generation of Duramax doesn’t, instead relying on the vacuum generated by the injection pump to suck the fuel out of the tank.
This works, as they say, until it doesn’t—until a hose clamp no longer seals a rubber fuel hose, or an o-ring in the priming head deteriorates, either of which can cause the injection pump to suck air instead of fuel. Obviously, if something is worn or broken it should be fixed anyway, but the consensus seems to be that the Duramax really should have a lift pump (later models eventually did), and so-equipping it should not only ease starting issues but also add longevity to the expensive injection pump and injectors.
However, the cost of doing so carries some pretty sharp sticker shock. As someone who’s installed an endless stream of electric fuel pumps in both carbureted and injected cars, my knee-jerk reaction was “$700?! For an aftermarket fuel pump?!” I couldn’t understand why these kits were so expensive. It’s not as if they’re supplying fuel at high pressure. It’s not as if, like the actual injection pump, they’re supplying fuel at thousands of psi. My understanding is that they run in the neighborhood of 10 psi. My brain went into cost-conscious Hack Mechanic mode and I thought, “Why can’t I just splice a reasonably-priced helper fuel pump in there?”
There are a few things that separate the expensive kits from the cheap stand-alone pumps. First is the pump itself. Since you’re installing something that wasn’t in the fuel line to begin with, you really don’t want it to die, as it will be a restriction that squashes the passive suction that originally allowed the engine to run without it. Most of the value-priced a la carte diesel pumps I saw on Amazon had a bump of one-star reviews of people complaining that it didn’t last long. As many diesel pickups are commercial vehicles, the last thing you want to do is fix a problem by installing something that will create further downtime. The second is that the kits are complete with all the mounting hardware, fuel lines, and quick-connect fittings needed for installation. The third is that the kits generally come with added fuel filtration in the form of a 2-micron diesel filter and a water separator that will save your expensive diesel hardware if you get a load of bad fuel.
It took me a while to feel confident enough to pony up the nearly $700, but I eventually pulled the trigger on an AirDog DF-165-4G lift pump kit. The “DF” stands for “demand flow”—returning unused fuel to the tank via a return line. The “165” is the number of gallons per minute pumped. This, along with the 165’s adjustable pressure regulator, are marketed to allow headroom for the diesel to be reprogrammed for, say, pulling big loads up long hills. There’s also a power-peak-pressure DF-100 with a fixed pressure regulator suitable for an unmodified truck like mine, but the difference in cost between the two was only about $15. Although I don’t need the modification capability, the next owner might find it a plus.
When the expensive heavy box arrived, I opened it up and had at it. Things appeared well-packed and complete.
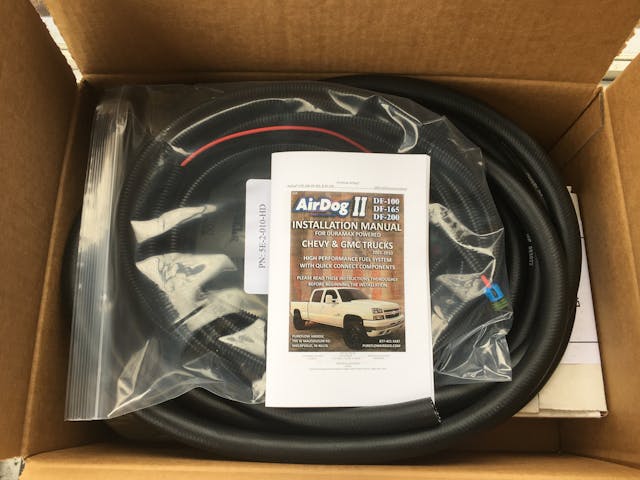
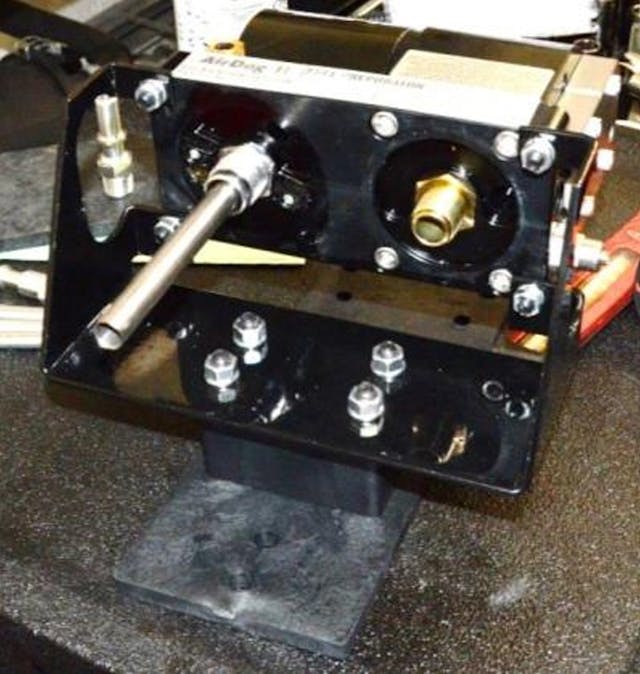
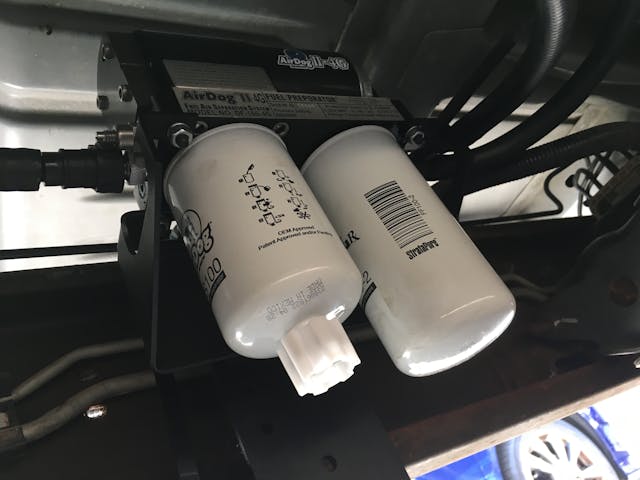
The pump is part of an assembly that includes an aluminum slab, on the bottom of which are the spin-on fittings for the diesel filter and the water separator, and on the ends of which are threads into the quick-connect fuel inlet, outlet, and return fittings go. Installation of those took just seconds.
The next task was assembly of the part of the kit that holds the pump. There are a pair of ¼-inch steel brackets that sandwich the truck’s frame. A cradle attaches to the inner bracket and the pump/slab to the cradle. A series of holes are drilled in the inner bracket, allowing the pump to be placed as high as possible to maximize ground clearance. The instructions (and numerous videos, both from AirDog and do-it-yourselfers) showed benchtop assembly of the inner bracket, cradle, and pump, a quick test-fit against the frame rail, passing the two upper bolts and one lower one through to the outer bracket—boom, installed.
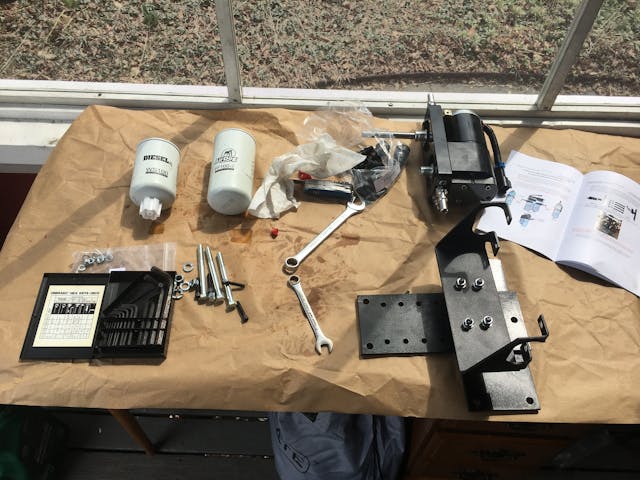
Except my installation didn’t go like that.
There were a few issues. Some had to do with the AirDog manual, which contained a lot of detail, but whose photos were too small to make out the details of the brackets. I initially had them upside down.
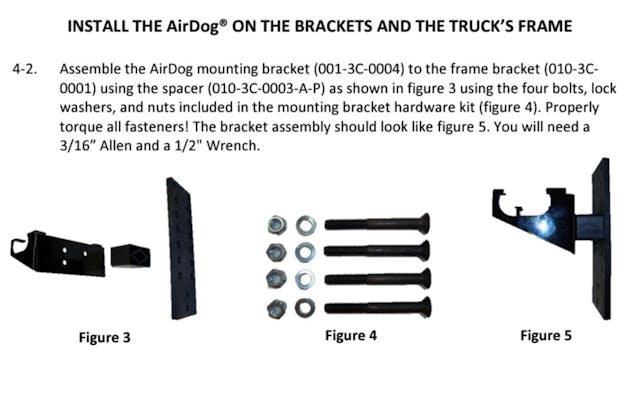
But what really bugged me was that the photos in the manual all showed the pump facing the wrong way on the bracket. I followed the directions and began to hang the pump from the frame rail before I noticed that the fuel inlet was facing the engine and the outlet was facing the fuel tank. The manual says that the kit is to be mounted on the driver’s side frame rail, and “The AirDog can be mounted on the inside or outside of the frame. Some bed and cab configurations may only allow system to mount on the outside of the frame.” However, every video I watched, including the excellent one from AirDog, showed the pump mounted on the inside of the frame rail. I get that the kit is meant for all Chevy Duramax Diesels from 2001 to 2010 and that there may be differences in installation between models, but when you’re spending $700, a simple statement in the manual saying “When assembling the pump cradle and bracket, be certain the fuel outlet is facing the engine” isn’t too much to ask. After this, I quit relying on the manual and instead switched my allegiance to the videos.
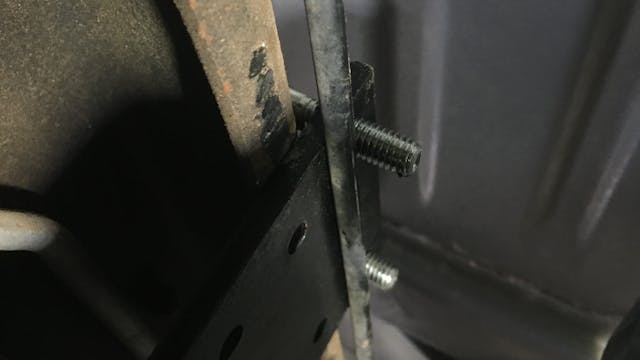
The next surprise was that, to mount the pump assembly, the inner bracket needed to be slid between the frame rail and a brake line, and both the two upper bracket bolts and the bracket itself contacted the line. From a liability standpoint, I’m really surprised that the manual didn’t mention that care must be taken not to have the installation rub or pinch the brake line. I solved it by extending one of the clips that positions the line, moving the line away from contact.
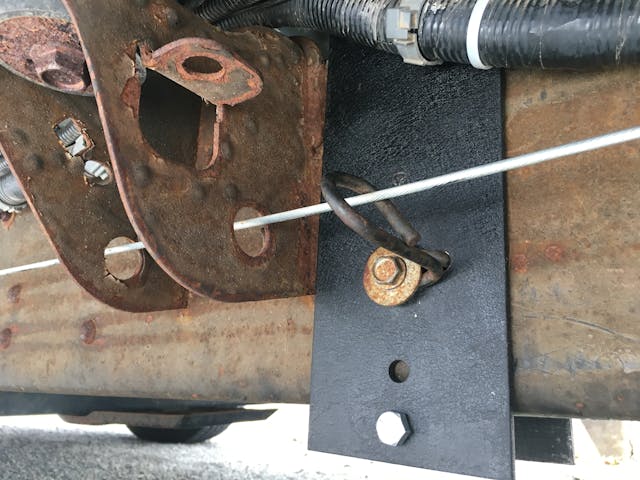
Next in the game of lift pump Whack-A-Mole was the issue of exactly where on the frame rail to mount the thing. It needed to be along a section where there isn’t anything bolted to the rail, and that turned out to be more restrictive than I would’ve thought, as when I mounted it where there was room, the required input line to the back of the fuel pump rubbed against other existing fuel lines. One video I watched referenced this rear-clearance issue and said to slide the assembly forward until it’s flush against the mount for the rear crossmember. Unclipping a wiring harness anchor bought me another inch, but I couldn’t slide it any further, as a guide for the parking brake cable was in the way. I removed the cable guide and tried to judge whether the resulting deflection had any real effect on the parking brake, but a nagging voice told me that this was a bad idea.
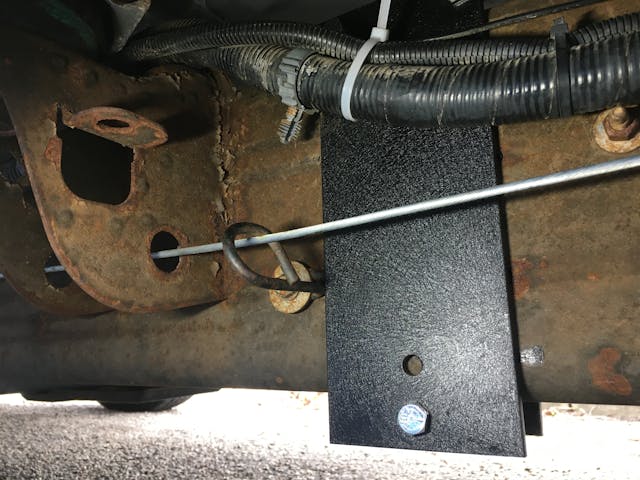
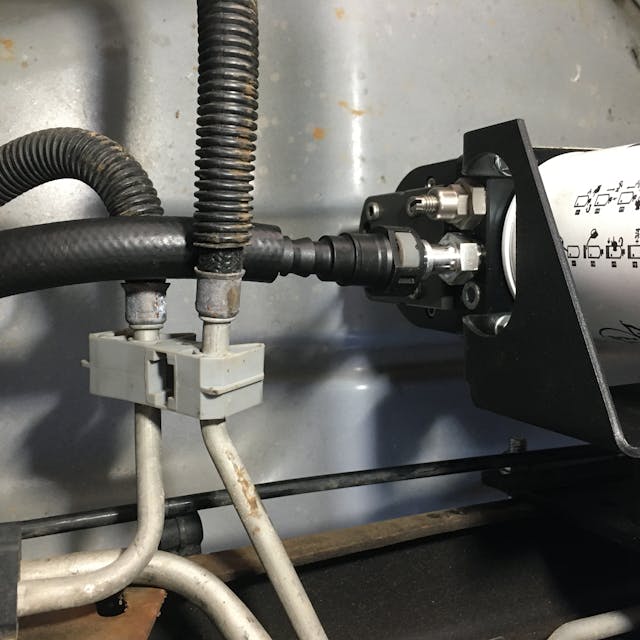
I let this marinate overnight in my mind, and in the morning realized that I could easily solve the problem by simply marking and drilling holes in the bracket that allowed the cable guide to use its original holes in the frame.
With the pump assembly mounted where it needed to be, the next task was the fuel line plumbing. In theory, this is easy. The pump is basically spliced between the fuel tank and the engine, with a return line added that dumps unused fuel in at the filler neck. Undo the quick-connect fitting at the top of the tank, run a new line from there to the input to the lift pump, connect the output of the pump to the quick-connect input to the fuel cooler, slice the filler neck hose to insert a tee, run the return line there, done.
Ah, if only it was that easy.
The manual said that a ½-inch fuel line disconnect tool (it looks like the bell of a tiny trumpet) would be needed to press in and release the recessed clip on the quick-connect lines. Of course, the manual also said that, to access the fitting at the top of the fuel tank, either the truck bed would need to be removed or the tank would need to be dropped. I watched several videos that assured me that this almost certainly wasn’t necessary—that via some blind groping, you could reach up above the tank, slide the tool over the line, push it in, release the clip, and get diesel fuel running into your armpit as god intended.
I tried this first on the more easily accessible end of the line on the fuel cooler.
It didn’t make sense. The disconnect tool was blocked by a squarish red disconnect fitting. There was no mention of it in the manual. Both it and the videos showed use of the bell-shaped disconnect tool.
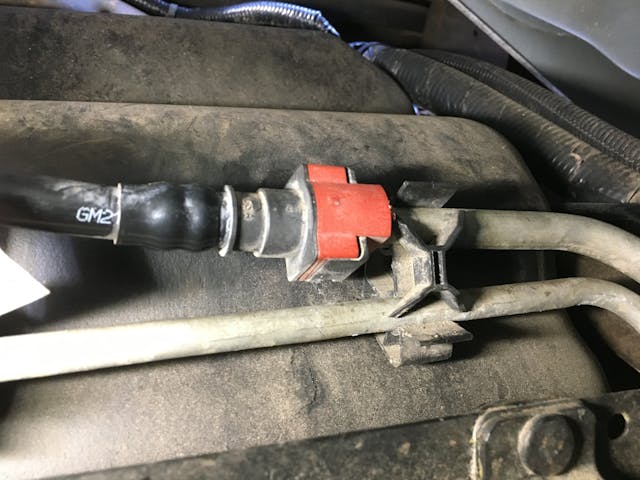
I eventually found a video that showed a squarish red fitting like mine, and how you needed to squeeze the tabs on the back and then pull it forward. Unfortunately, the bottom of this clip wasn’t finger-accessible. By squeezing my head up next to the driveshaft, I was able to lay eyeballs on the bloody thing. I could reach one tab with a finger. For the other, I employed a right-angle pick. With some work and a few choice words, I got it disconnected.
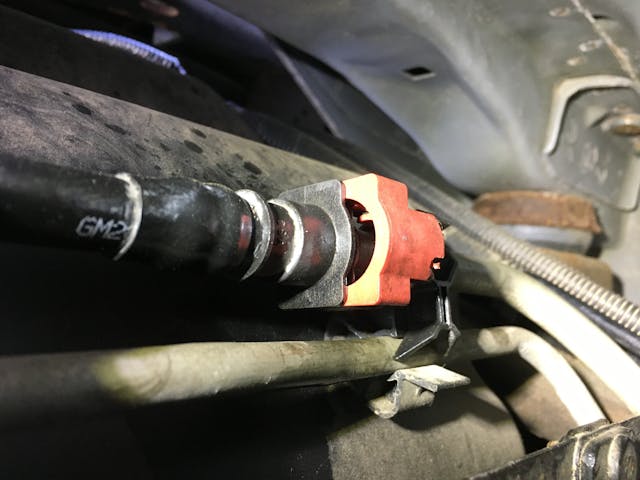
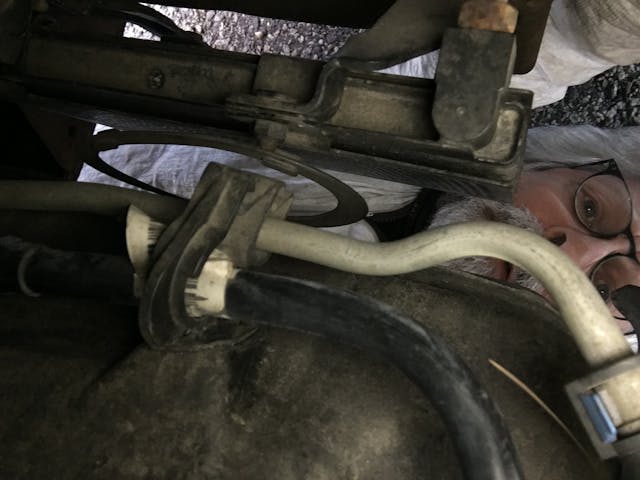
Unfortunately, that was the easier-to-reach of the two red quick-connect fittings. I still had to deal with the one above the fuel tank, and that one I could only see by sliding my phone above it. I could lay a finger on the tab that was facing upward, but the other tab was on the underside of the clip, and attempts to reach and depress it with a right-angle pick or other tool proved fruitless. I struggled with it for hours.
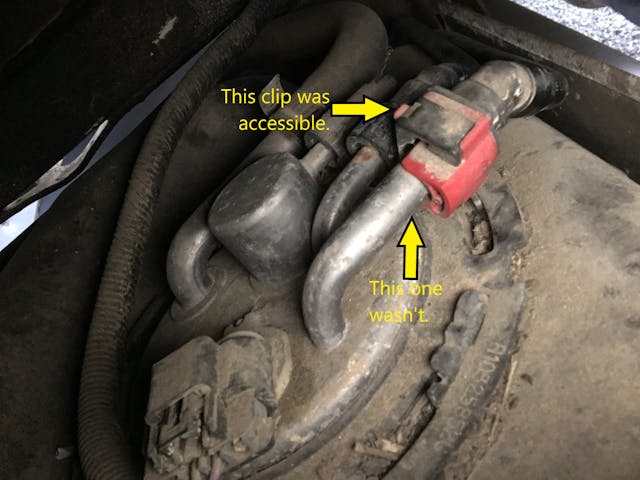
I briefly entertained dropping the tank, but eventually I realized that if I could rotate the clip, I could position both tabs so I could squeeze them simultaneously. Unfortunately, in order to rotate the clip, I needed to rotate the fuel line to which it was integrated, and since it was a plastic line with fairly rigid angle-bends in it that passed through a tight body channel, it wasn’t free to rotate even though I’d disconnected the other end. Although I hated to do so, I cut the plastic line (I try not to cut off my means of retreat from a repair until it’s clear that it’s successful). Some amount of groaning, swearing, and scuffed fingers later, the little bugger finally came out.
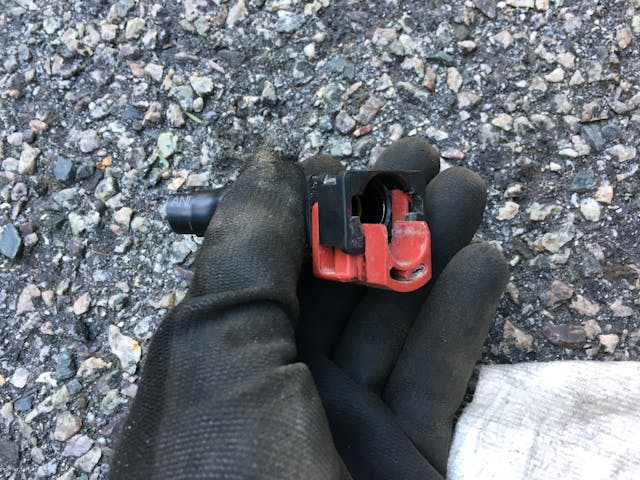
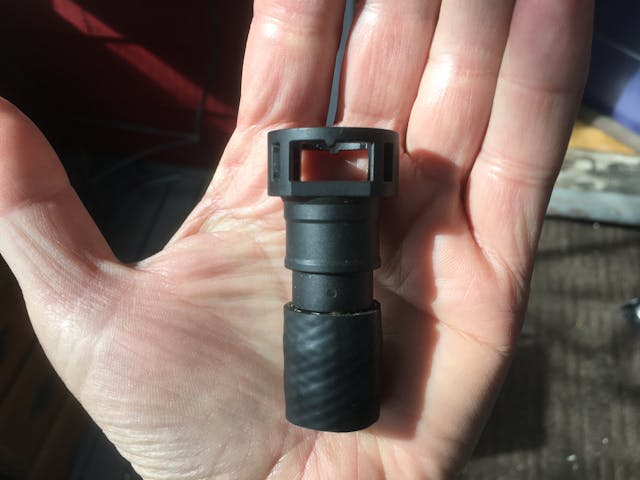
After giving my right shoulder a day to recover, the rest of it was pretty straightforward. The barbed ends of the new quick-connect fuel line fittings were, as advertised, a snug fit into the fuel hose, and insertion required coating them with oil and pressing the hose onto them with one smooth motion. This was easy when I could lay the fitting on cardboard on the ground and put my weight onto the hose, and not so easy when the fuel line was trimmed to fit and dangling under the car.
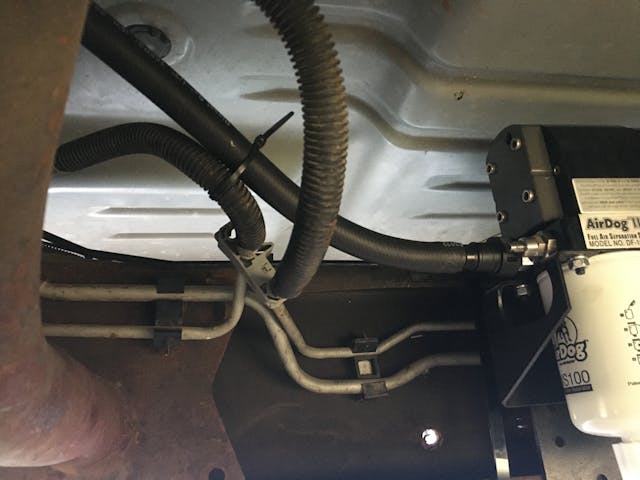
When I went to install the fuel return line, there was one final surprise. I cut the hose on the fuel filler neck and spliced in the tee fitting, oiled up the barbed quick-connect fitting and pressed the fuel line over it, and slid it over the tee, but it wouldn’t lock in place. After multiple tries and about 10 seconds of cogitative dissonance, I looked at the brand-new fitting, and saw that it was missing the little plastic portion that snaps around the bulge in its male counterpart and holds the fitting in place. In the short term, I held it on with a hose clamp. When I came back inside, I contacted the vendor, which contacted AirDog, which sent me another fitting.
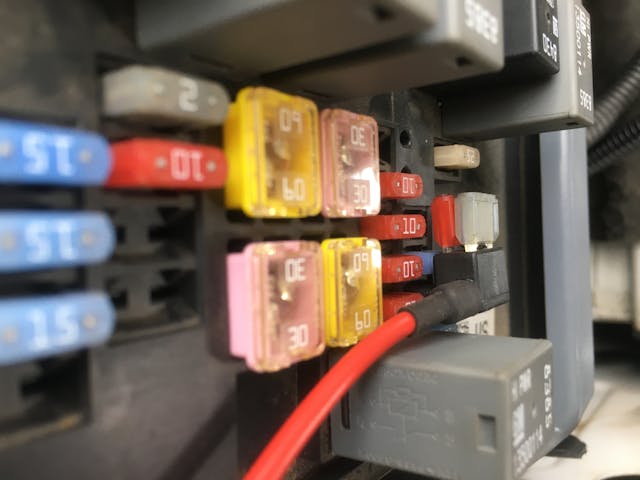
Electrical installation of the lift pump was very straightforward—a wiring harness with a relay and a fuse, ring terminals for battery positive and negative, and a piggy-back-style fuse holder that lets you tap into an existing blade-style fuse without having to either enter the fuse box from underneath or splice into an existing wire. When the key was cracked to ignition, I could hear the lift pump spin, hear it self-prime as it pushed the air out (as recommended, I left the new fuel filter loose with a pan under it until it spat), after which the big diesel fired up instantly.
Earlier, I talked about the lack of trust that occurs when a truck like this won’t start—that is, it’s one thing for a vintage car to die on a joy ride and quite another for a truck to die or not start when you’re miles from home towing a trailer. Obviously, no repair inoculates a vehicle against all maladies, but if this truck does have additional issues, I’m pretty sure they won’t be related to fuel priming.
***
Rob’s latest book, The Best of the Hack Mechanic™: 35 years of Hacks, Kluges, and Assorted Automotive Mayhem is available on Amazon here. His other seven books are available here on Amazon, or you can order personally inscribed copies from Rob’s website, www.robsiegel.com.
Check out the Hagerty Media homepage so you don’t miss a single story, or better yet, bookmark it. To get our best stories delivered right to your inbox, subscribe to our newsletters.


Wow your truck is clean underneath Rob! Like something from the deep south. Not the rust belt.
God bless your patience and skill Rob! I’d be both terrified and heading to see how much $ in the checkbook if I had to go through this on my 6.7 Ford diesel. Frankly when you open the packed underhood it virtually screams “No user serviceable parts inside”…
Wow! That truck is super clean. If that was up here in Minnesota, I’m pretty sure you’d be doing a lot more than just adding the lift pump. There’d be a lot of grinding of rust, cursing and heating of bolts and generally dodging the rain of scale exiting from the underside of the vehicle. Great article! Thank you.
Had this installed on my 2003 Duramax. For a few hundred bucks I let the pros install it. One other thing we did was install a 1 micron filter in place of the original filter in the engine compartment. This steps the filtration form 100 micron to 2 micron to 1 micron. The 1 micron should last forever, remember to change the 100 and 2 regularly, I did mine every year just to be sure. After my first set of injectors on my LB7 were replaced, I also started using a good fuel additive to add lubricity to the fuel and protect the injectors. My diesel expert claims this combination of filtration and lubrication will significantly extend the life of the injectors. When I sold it the injectors had 80,000+ miles on them and the truck ran great.
Very cool installation. Full of helpful pictures and dialog on the various pitfalls. Great job!
165 gallons per MINUTE?
“…..and get diesel fuel running down into your armpit as god intended.”
Made me spit out my coffee!
I was a big truck Diesel mechanic for many suns and moons and never encountered a Diesel fuel system that did not have a transfer pump… then I worked on my neighbor’s smaller Duramax which had lost its prime and discovered this little factoid about the Duramaxes. I recommended a transfer pump, but he absolutely refused any non-factory repair option and ended up getting the (high pressure) fuel pump replaced for upwards of 3 grand. This is Reason #24 why I will never own a Diesel vehicle. This was a couple years after a round of injector replacements with a similar price tag. I pointed out that he could have probably replaced an entire gas engine for less money. Diesels make sense when you are hauling 80,000 lbs from New York to California. In any other case they just make smoke, noise, and empty pockets
I have been following your trials and tribulations with this truck since you first started writing about it. I understand the reasoning you used when you first purchased it as the price for a low mile truck of that caliber was too good to pass on especially when you need a tow vehicle on a fairly regular basis. I’m glad to see that you have gotten it to the point where it is doing the job and this last modification should take care of your fuel delivery issues. I myself have owned and driven many heavy diesel semi tractor trailer trucks and agree with TG that they are best suited to heavy haul use. That being said, There are a lot of light/medium duty diesel sold to the public that often don’t get any more use that an occasional pull the boat to the lake or travel trailer on a once a year vacation. Doesn’t pencil out when you factor all the operating costs associated with a diesel.
On another note, something I’ve been meaning to relay to you is that on most dually trucks you can single the rear tires out if you aren’t hauling heavy loads in the bed. This will give you better fuel mileage and might even ride better with less unsprung weight. Some people just leave the inside tire on but that looks kind of weird. I prefer the look of removing the inside tire and that would likely handle better with the wider stance.
When I added a lift pump to my 2016 Chevrolet Silverado with a Duramax I used one that replaced the fuel sump and sending unit in the fuel tank. Easy installation no modification and comes equipped with wiring to just plug into your fuse box. The system was a little bit more money but works great.
John, I looked at that, and I understand the appeal, but it required access to the top of the tank (I have a utility body on mine), and it didn’t buy you the 1-micron diesel filter.
For what you paid for the kit, the poor quality control (defective fuel fitting) and lousy instructions are a real disappointment. If I were looking to install a lift pump like this I would seek out other options after reading your article.
Johnathan, I wasn’t thrilled with it either, but the overall positive reviews of the pump on a variety of platforms (e.g., Duramax forums plus Amazon) was a much bigger factor.