The one thing worse than breaking a bolt—and how to deal with it

Nothing allows you to safely use a tool or material outside of its design parameters quite like understanding how it works and preparing for what could go wrong. The freedom enjoyed by most people who work on cars comes from the ability to understand what they can change about a project—tools, materials, process—and what they cannot. While the tools and space you need to work on a given project are rigid, curiosity is endless and often leads you into interesting adventures.
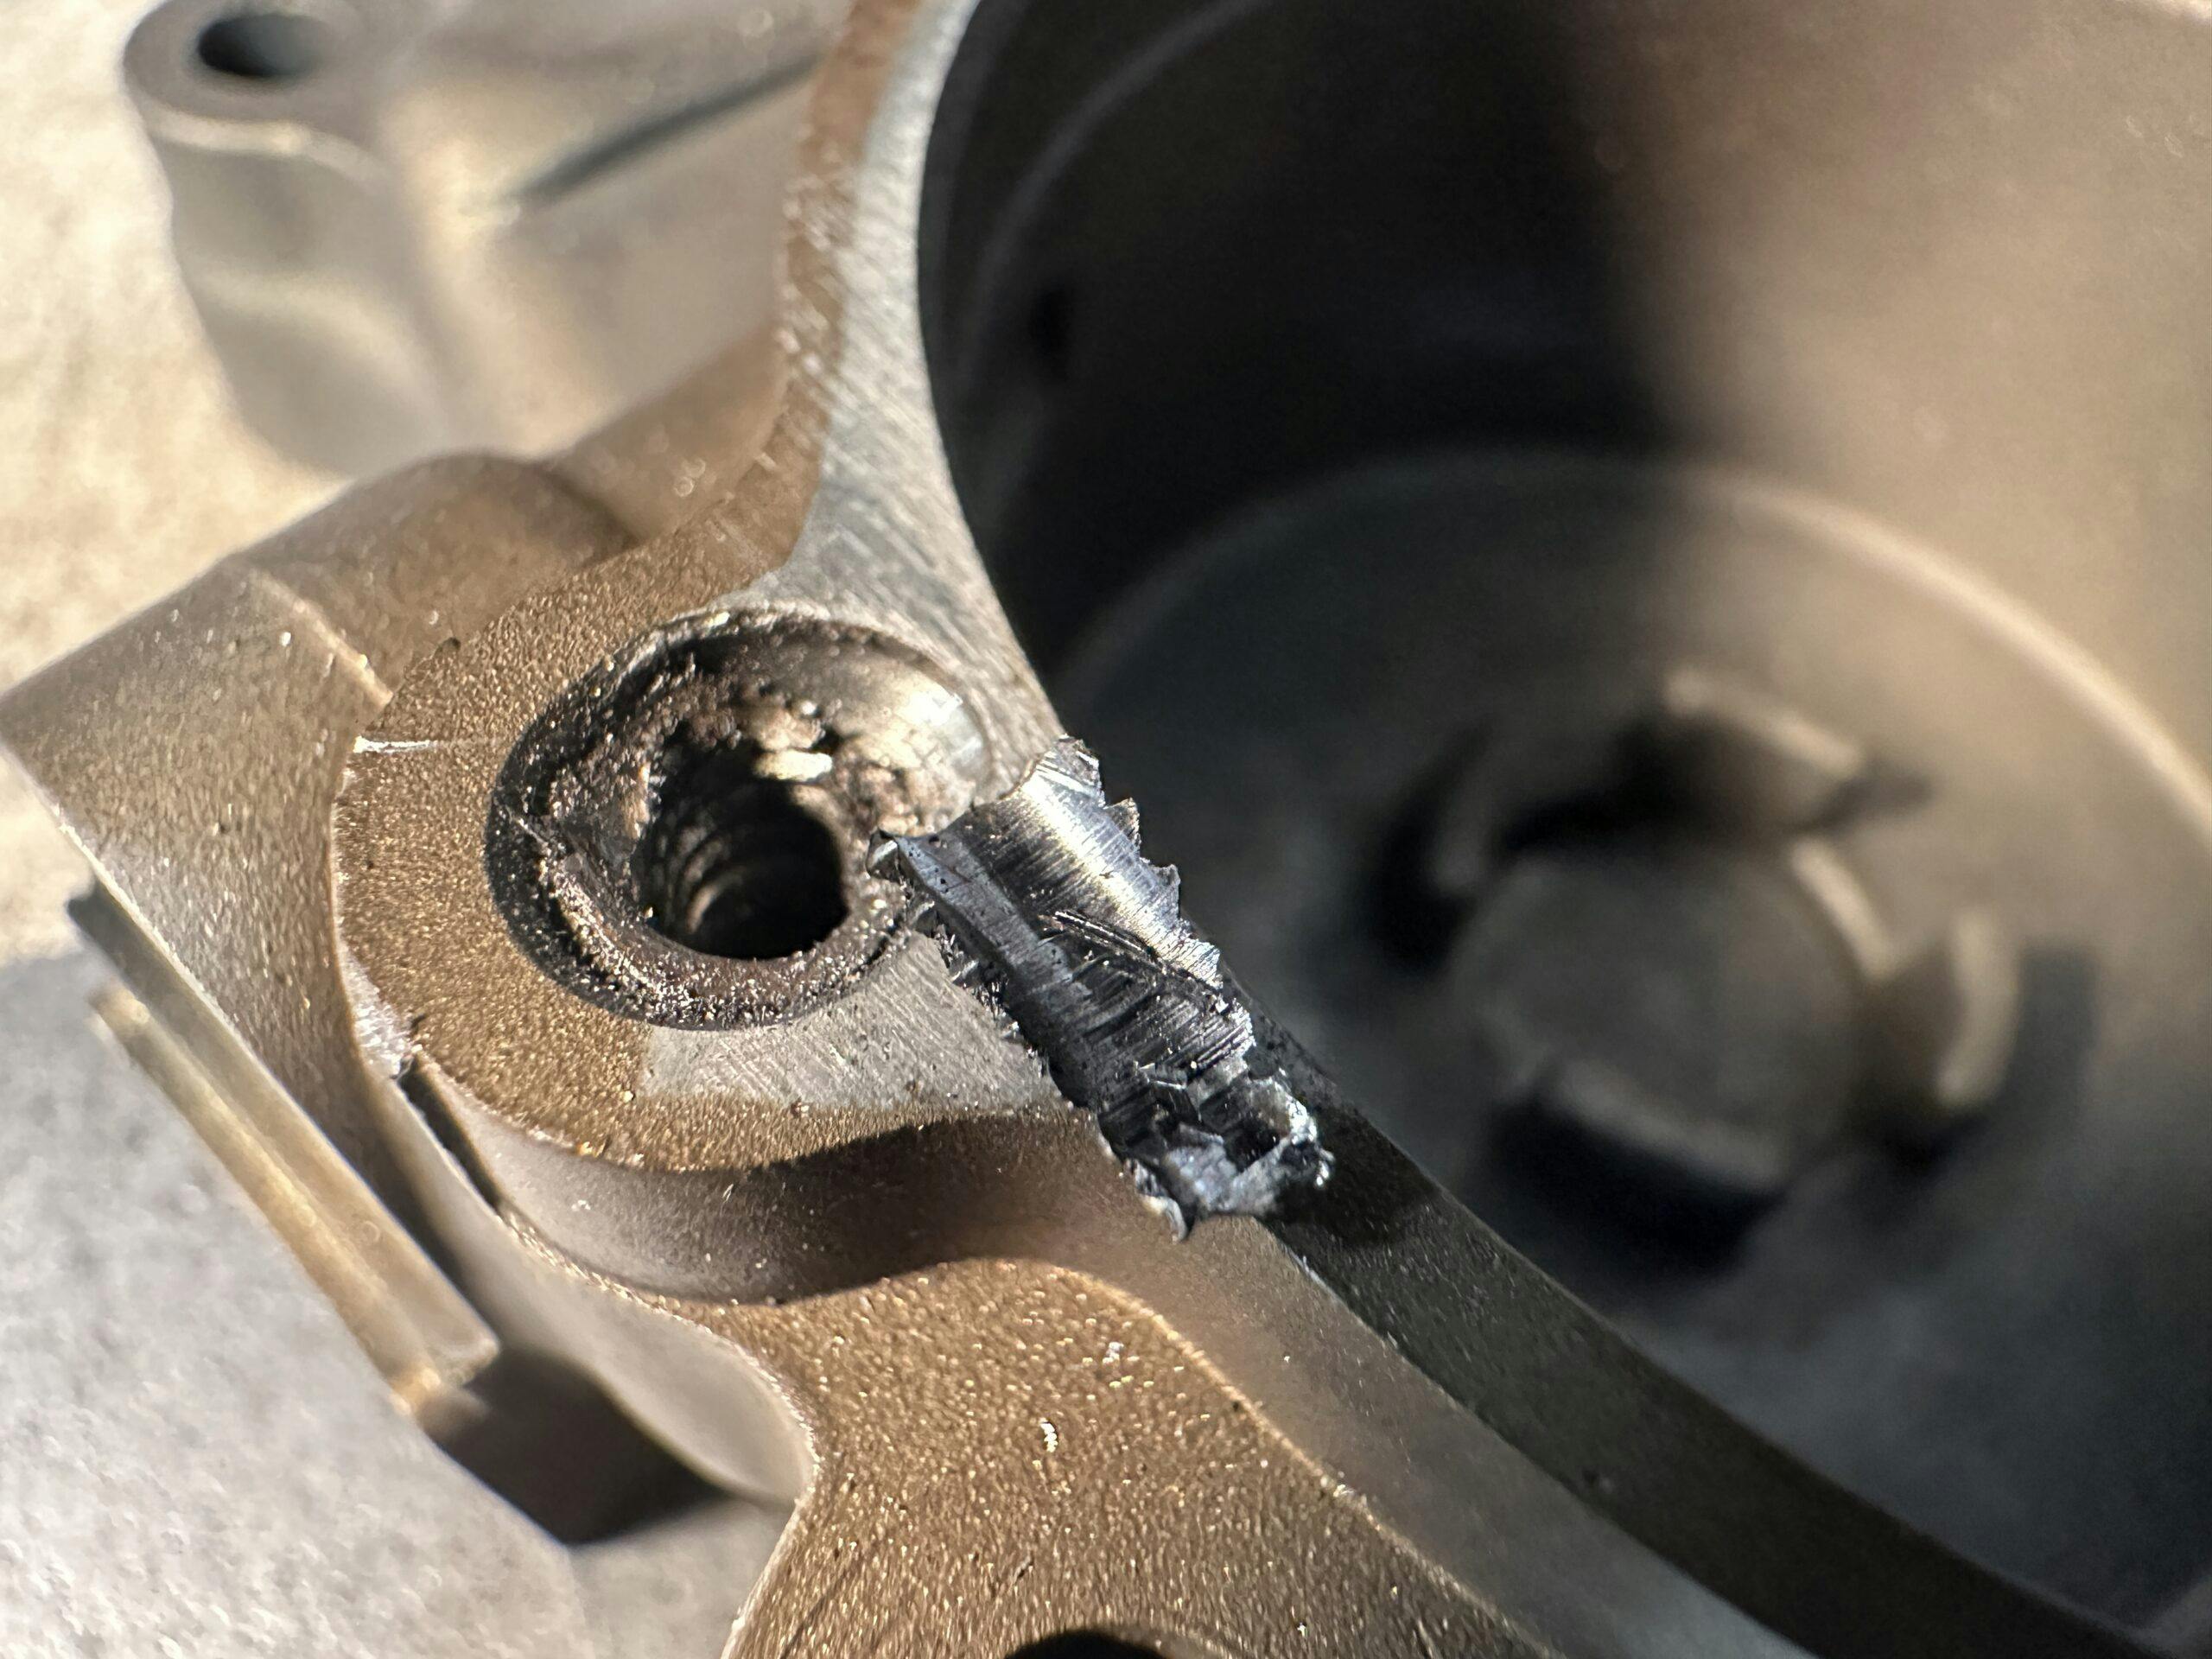
My latest adventure was self-inflicted: I broke the head off a stuck bolt, a rite of passage for DIY enthusiasts. Some of you are even familiar with the second level of that situation, dealing with the broken “easy-out” screw extractor.
Some people take the easy way out (I will not apologize for that pun) and pay to replace the whole part. At first, it may have made sense to fix the broken bolt; when that little chunk of unobtanium easy-out became embedded in the bolt, the purse strings suddenly got a little looser.
An easy-out is not formed of unobtanium, though, but of high-carbon steel. Badass stuff in the metal world. It is hard, enabling it to bite into and grab a mutilated bolt—a problem we never admit to creating but always boast about fixing. On the Rockwell hardness scale, high-carbon steel falls in the middle of the chart. Even so, the material is very brittle—and not in the delicious way, like the peanut brittle Nana used to make. If you introduce a fraction of a side load while using an extractor, you will snap it off—often flush with your workpiece—leaving you defeated.
At least partially defeated. Now comes the escalation of force, the switch from rigid to flexible. Solving the problem of a broken extractor requires understanding the materials you are dealing with. If you rush ahead, you will end up with a mangled part and a pile of dull drill bits.
The last time I broke an easy-out, I immediately picked up the phone instead of the tools. This time, I couldn’t bring myself to call for more experienced assistance. I needed to deal with this myself.
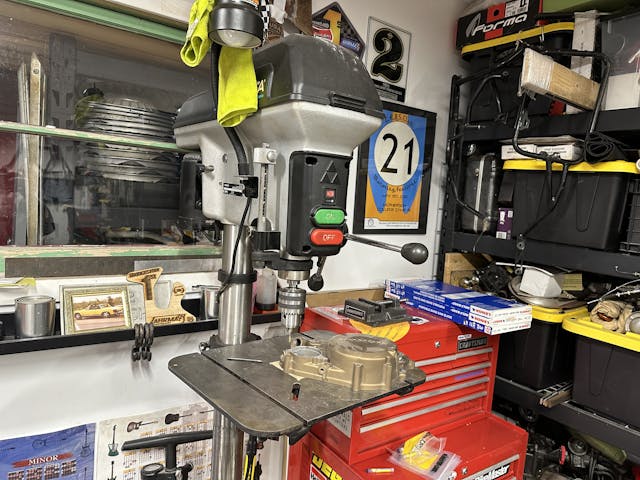
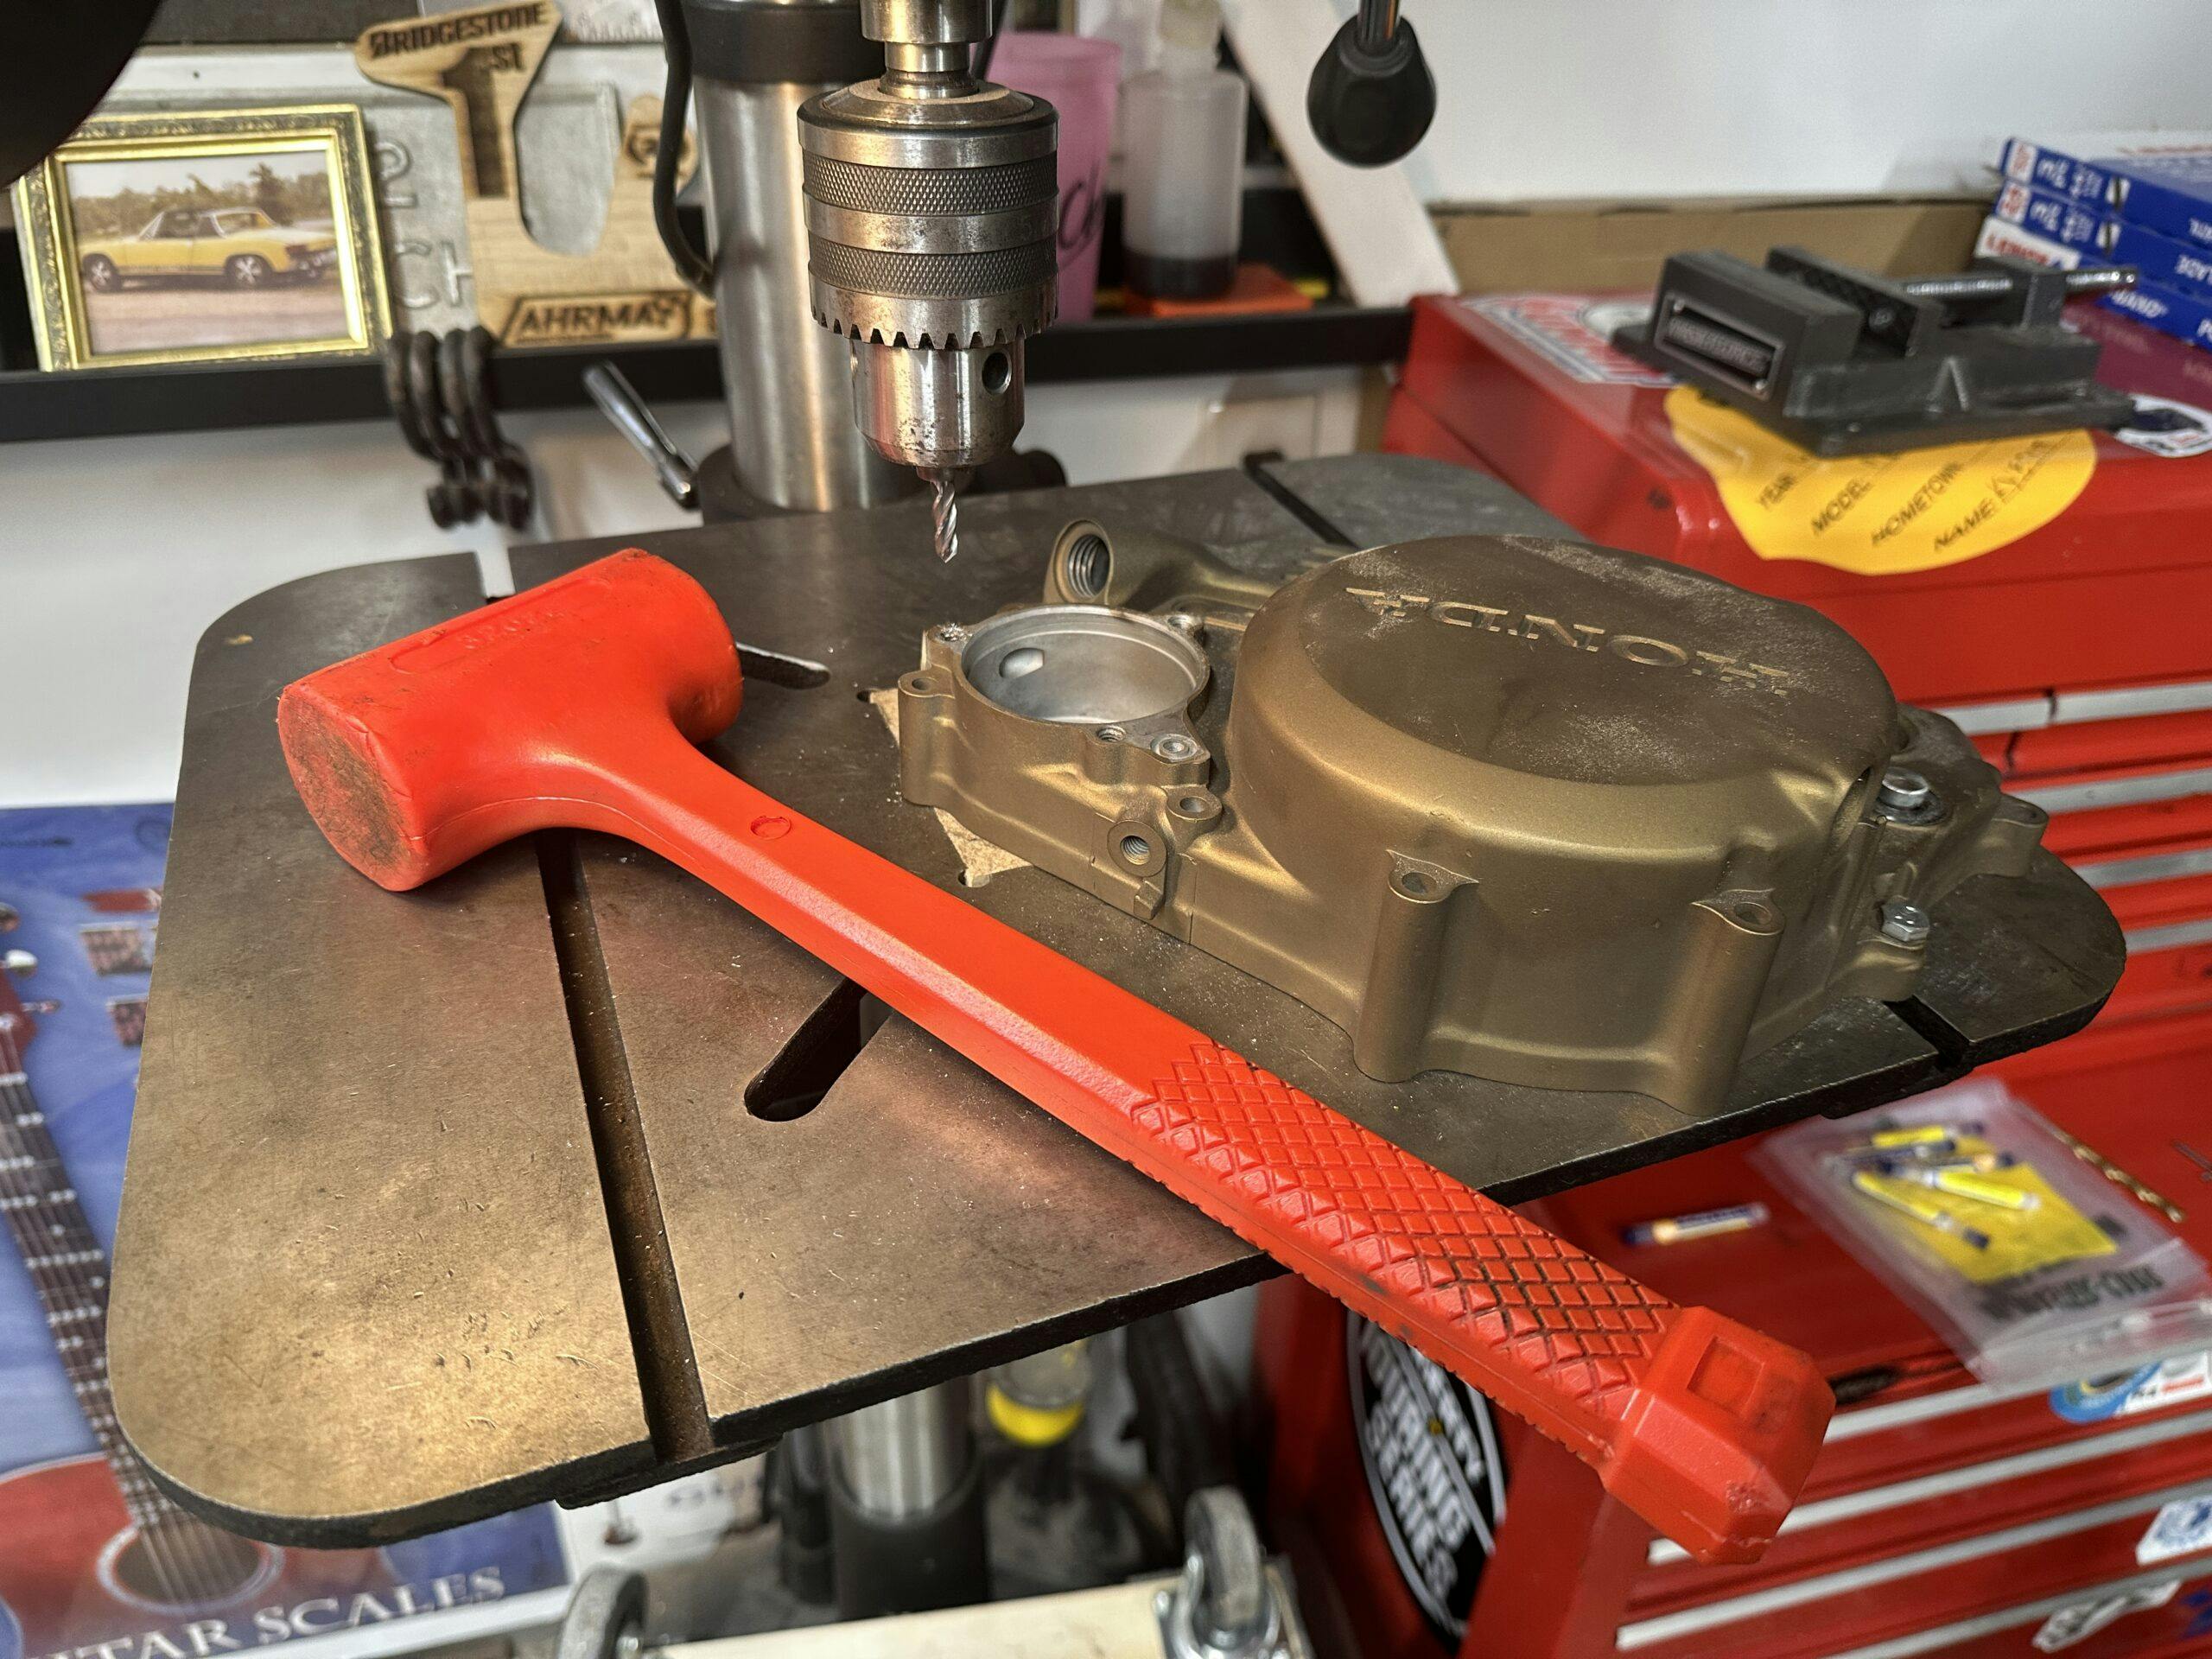
I have a drill press sitting on my shop floor. It’s not the Bridgeport of my dreams, but it’s decent, and the more I looked at it, the more I realized this drill press had the capability I needed. With a little effort, I could build a good, rigid setup—enough to drill a right-angle hole, at least. If I could figure out how to fix this broken extractor myself, the process would likely bestow upon me the knowledge and experience to avoid this whole song and dance again. The catastrophe you are prepared for rarely strikes, right? Off to McMaster-Carr to buy some carbide.
Carbide is the next step up from high-carbon steel on the Rockwell hardness scale, which means it can pierce high-carbon steel without losing its edge. I selected two sizes of end mills made of carbide. With 90-degree tips designed specifically for plunge cutting, they should be able to remove not only the easy-out but also the bolt—and, likely, a decent amount of the aluminum of my workpiece, a case cover.
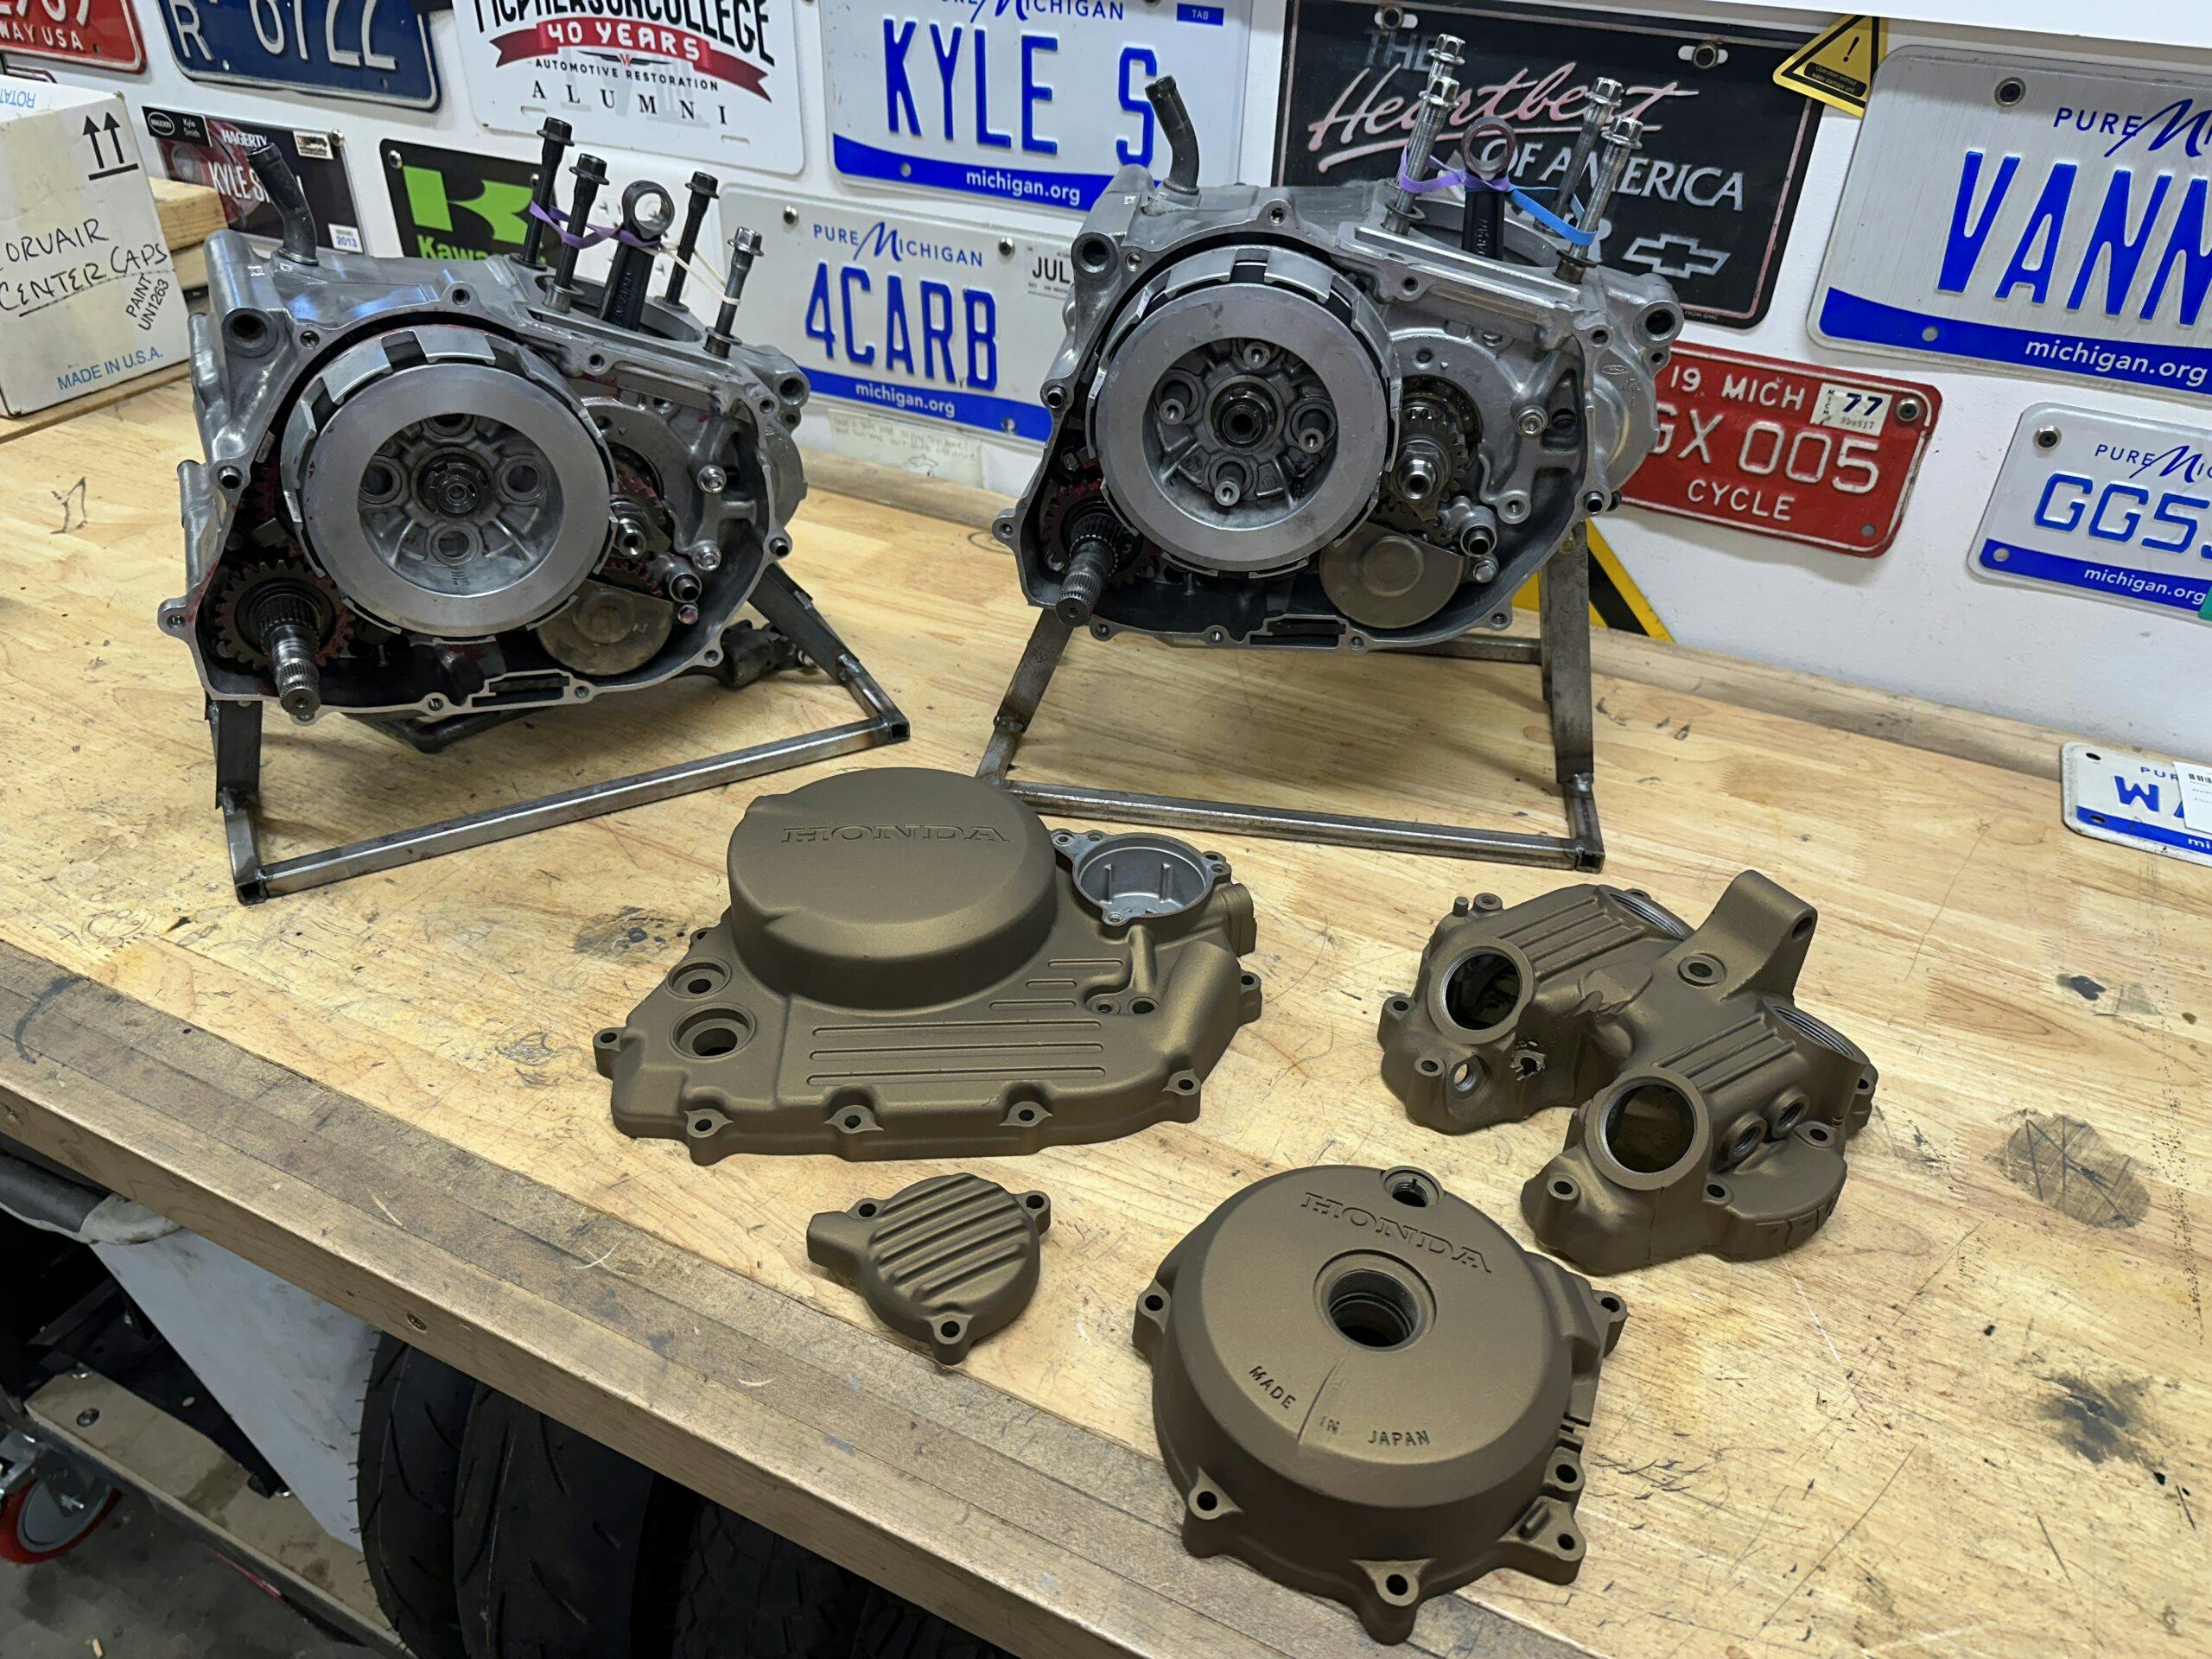
That last part was unfortunate but acceptable. Installing new threads or repairing those that remained would be easier than trying to save the delicate M6 threads. Not only were they formed decades ago, but, since they were on the oil-filter cover, they had also suffered hundreds of hamfisted tightenings and overtorques. Thread forms distort with multiple uses, especially when they are made of aluminum, so the thought of new threads in this piece was almost a little comforting. Doing the thread repair with the case cover off the motorcycle and on the bench was an obvious plus.
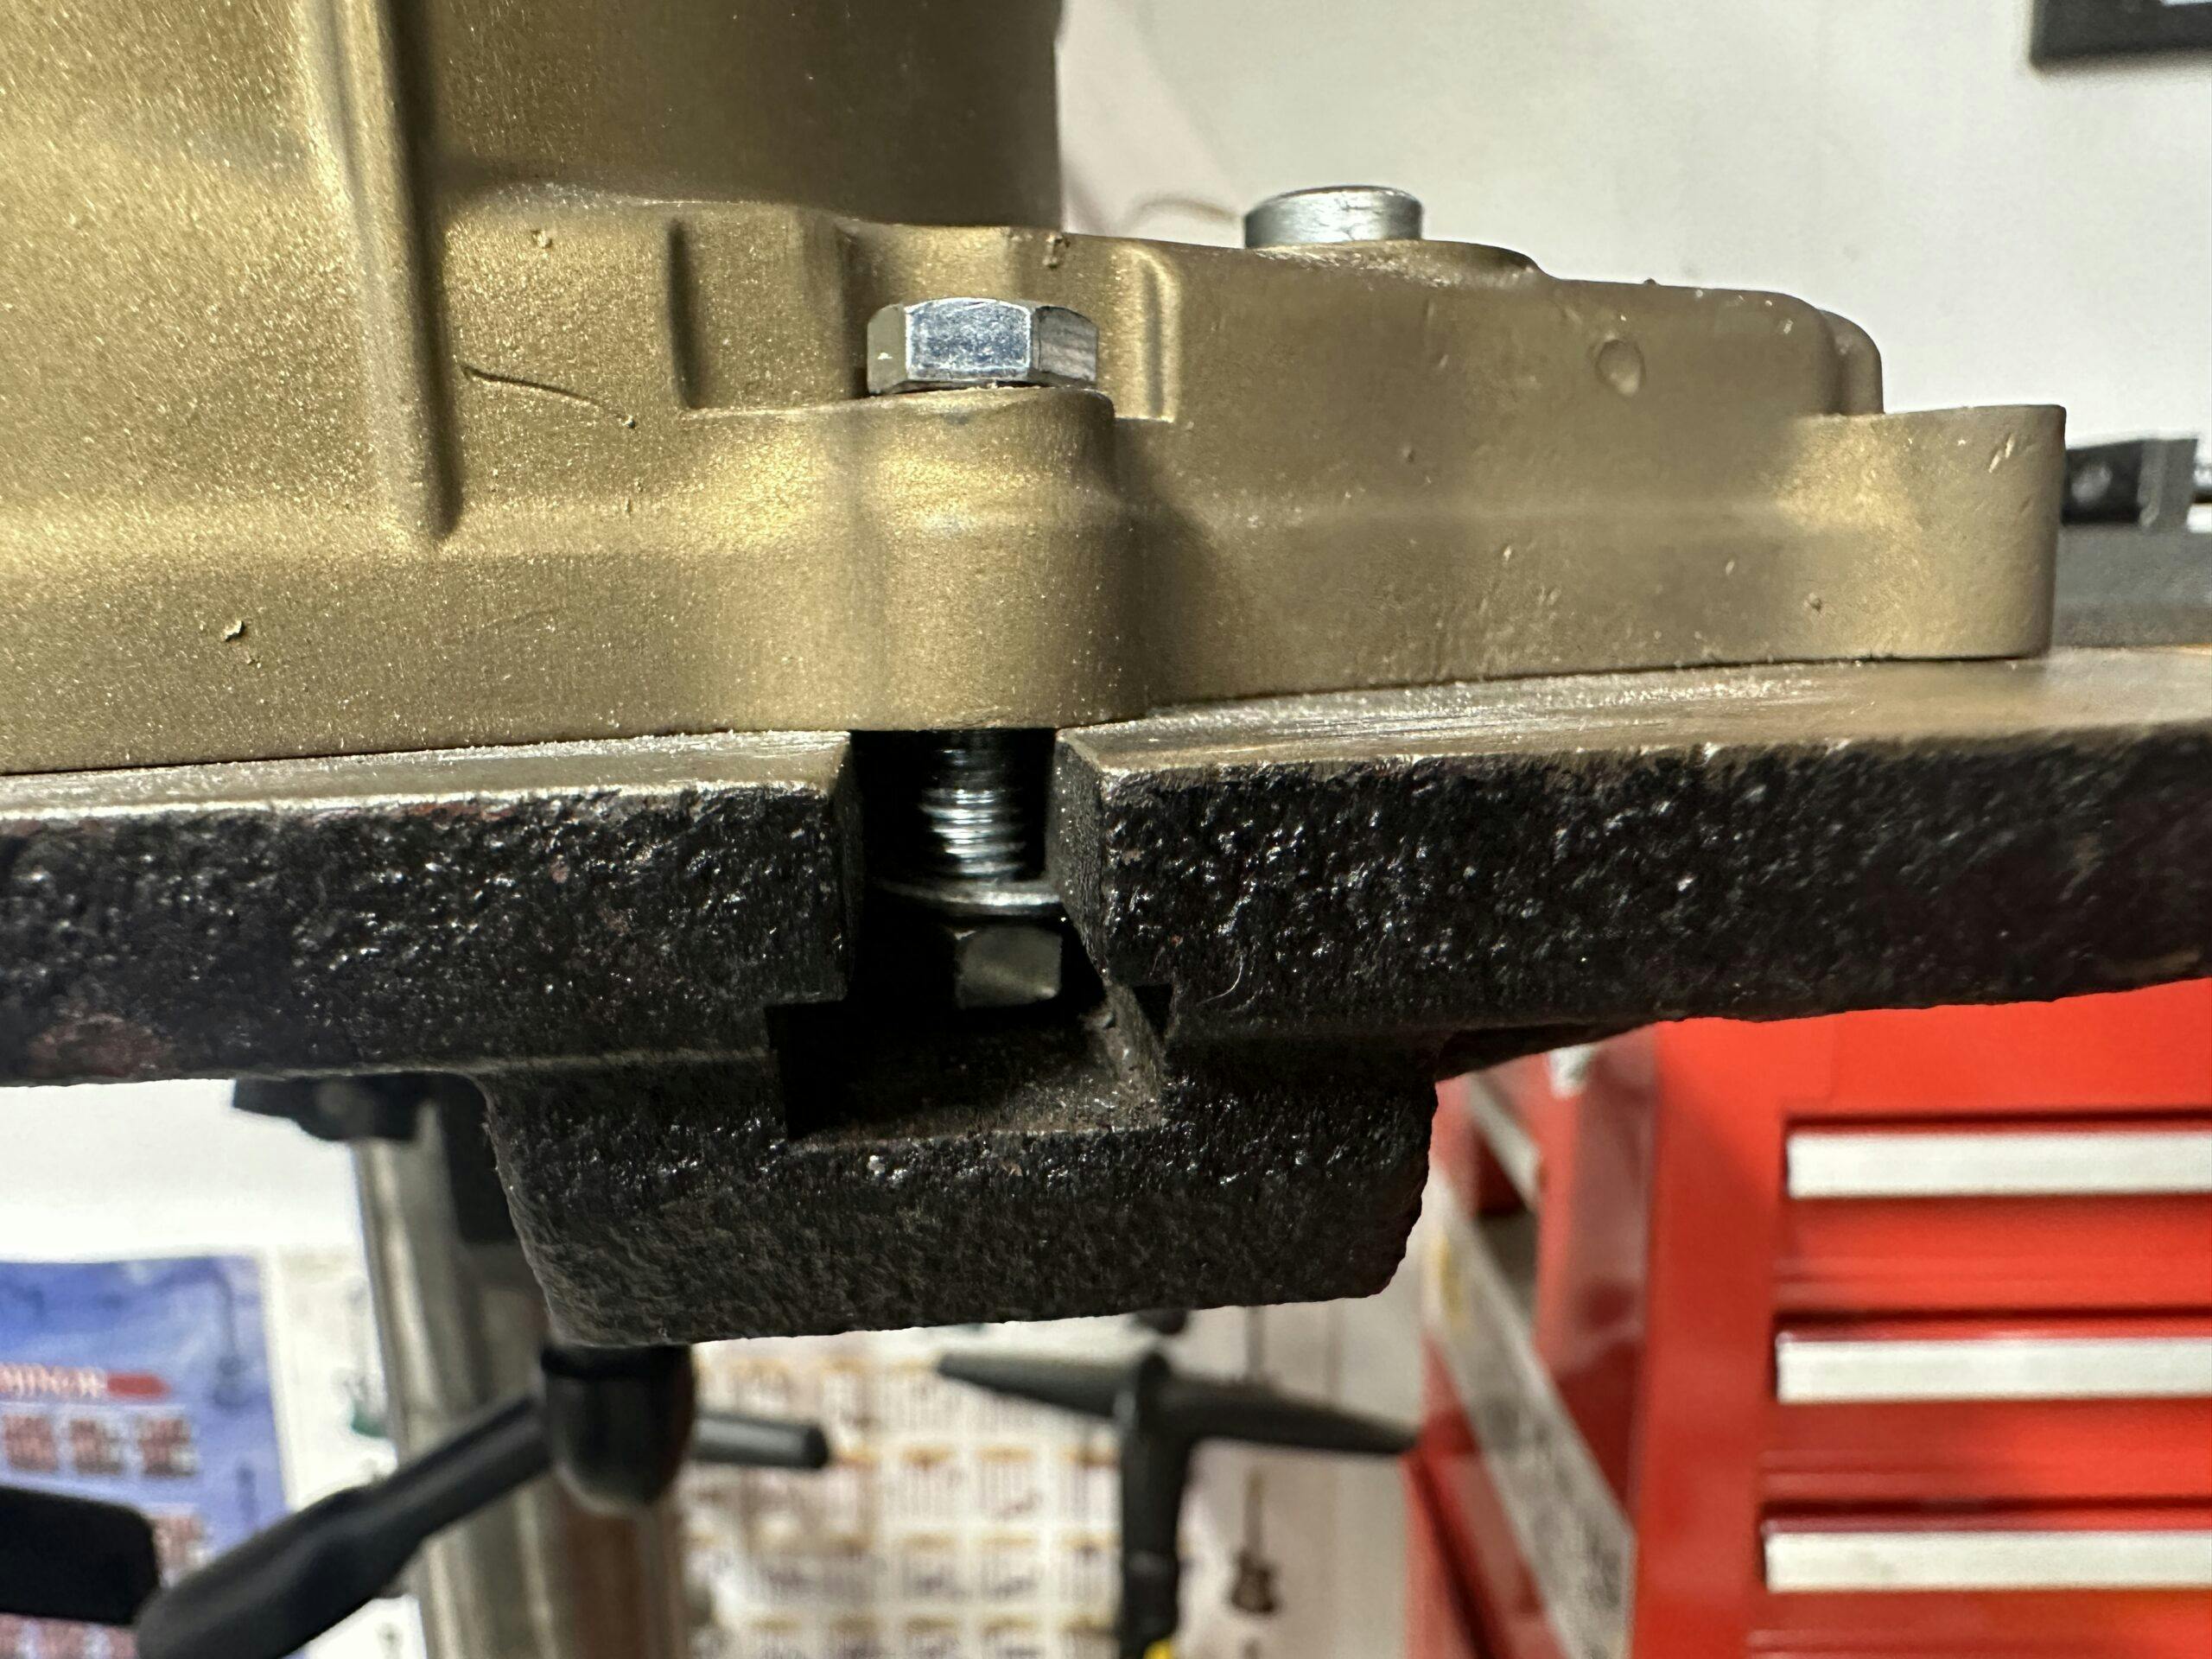
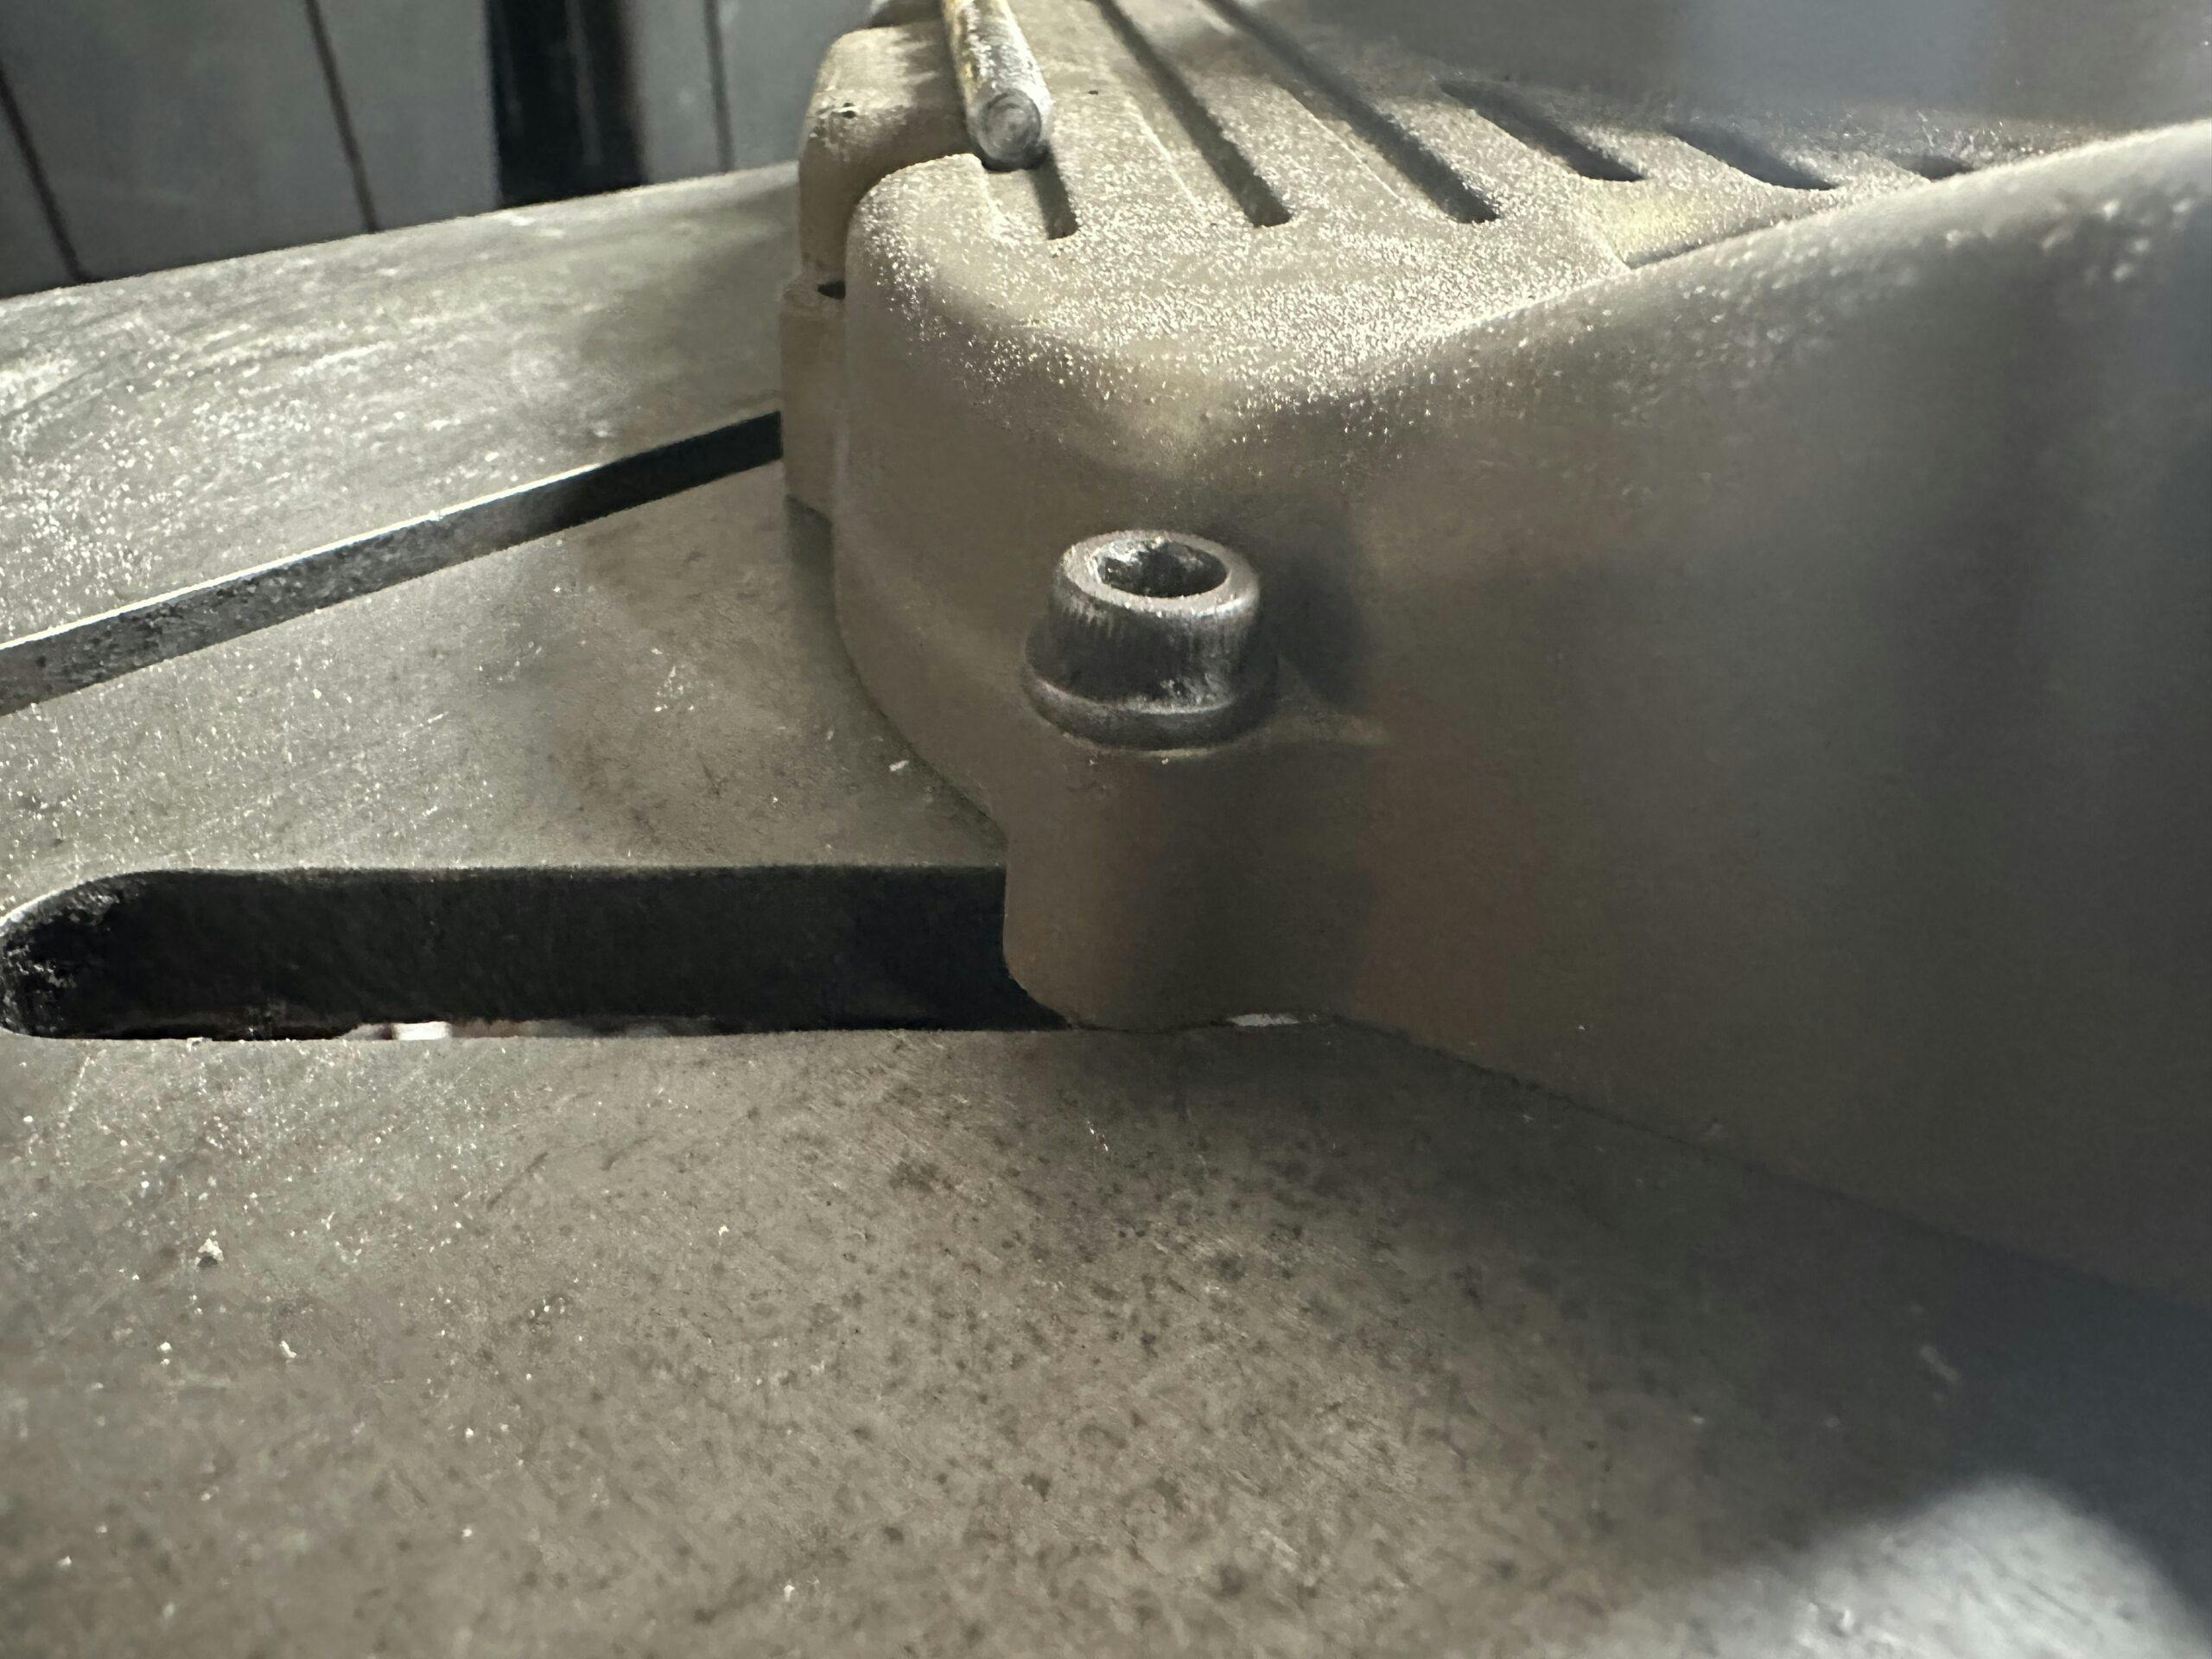
Carbide in hand, I had to think about setup. Luckily, the table of my drill press has T-slots in it to help the user create a more rigid setup. However, I could only do so much—especially after realizing there was no place locally to source T-nuts. My plan switched to going through my drawer of random hardware until I found the right combination of bolts and nuts. Finally, I had fastened the side cover to the table at three points. I then wound the table as high as I could to keep the quill as high and stiff as possible. The name of the game was rigidity. (This is not to be attempted with a cordless drill.)

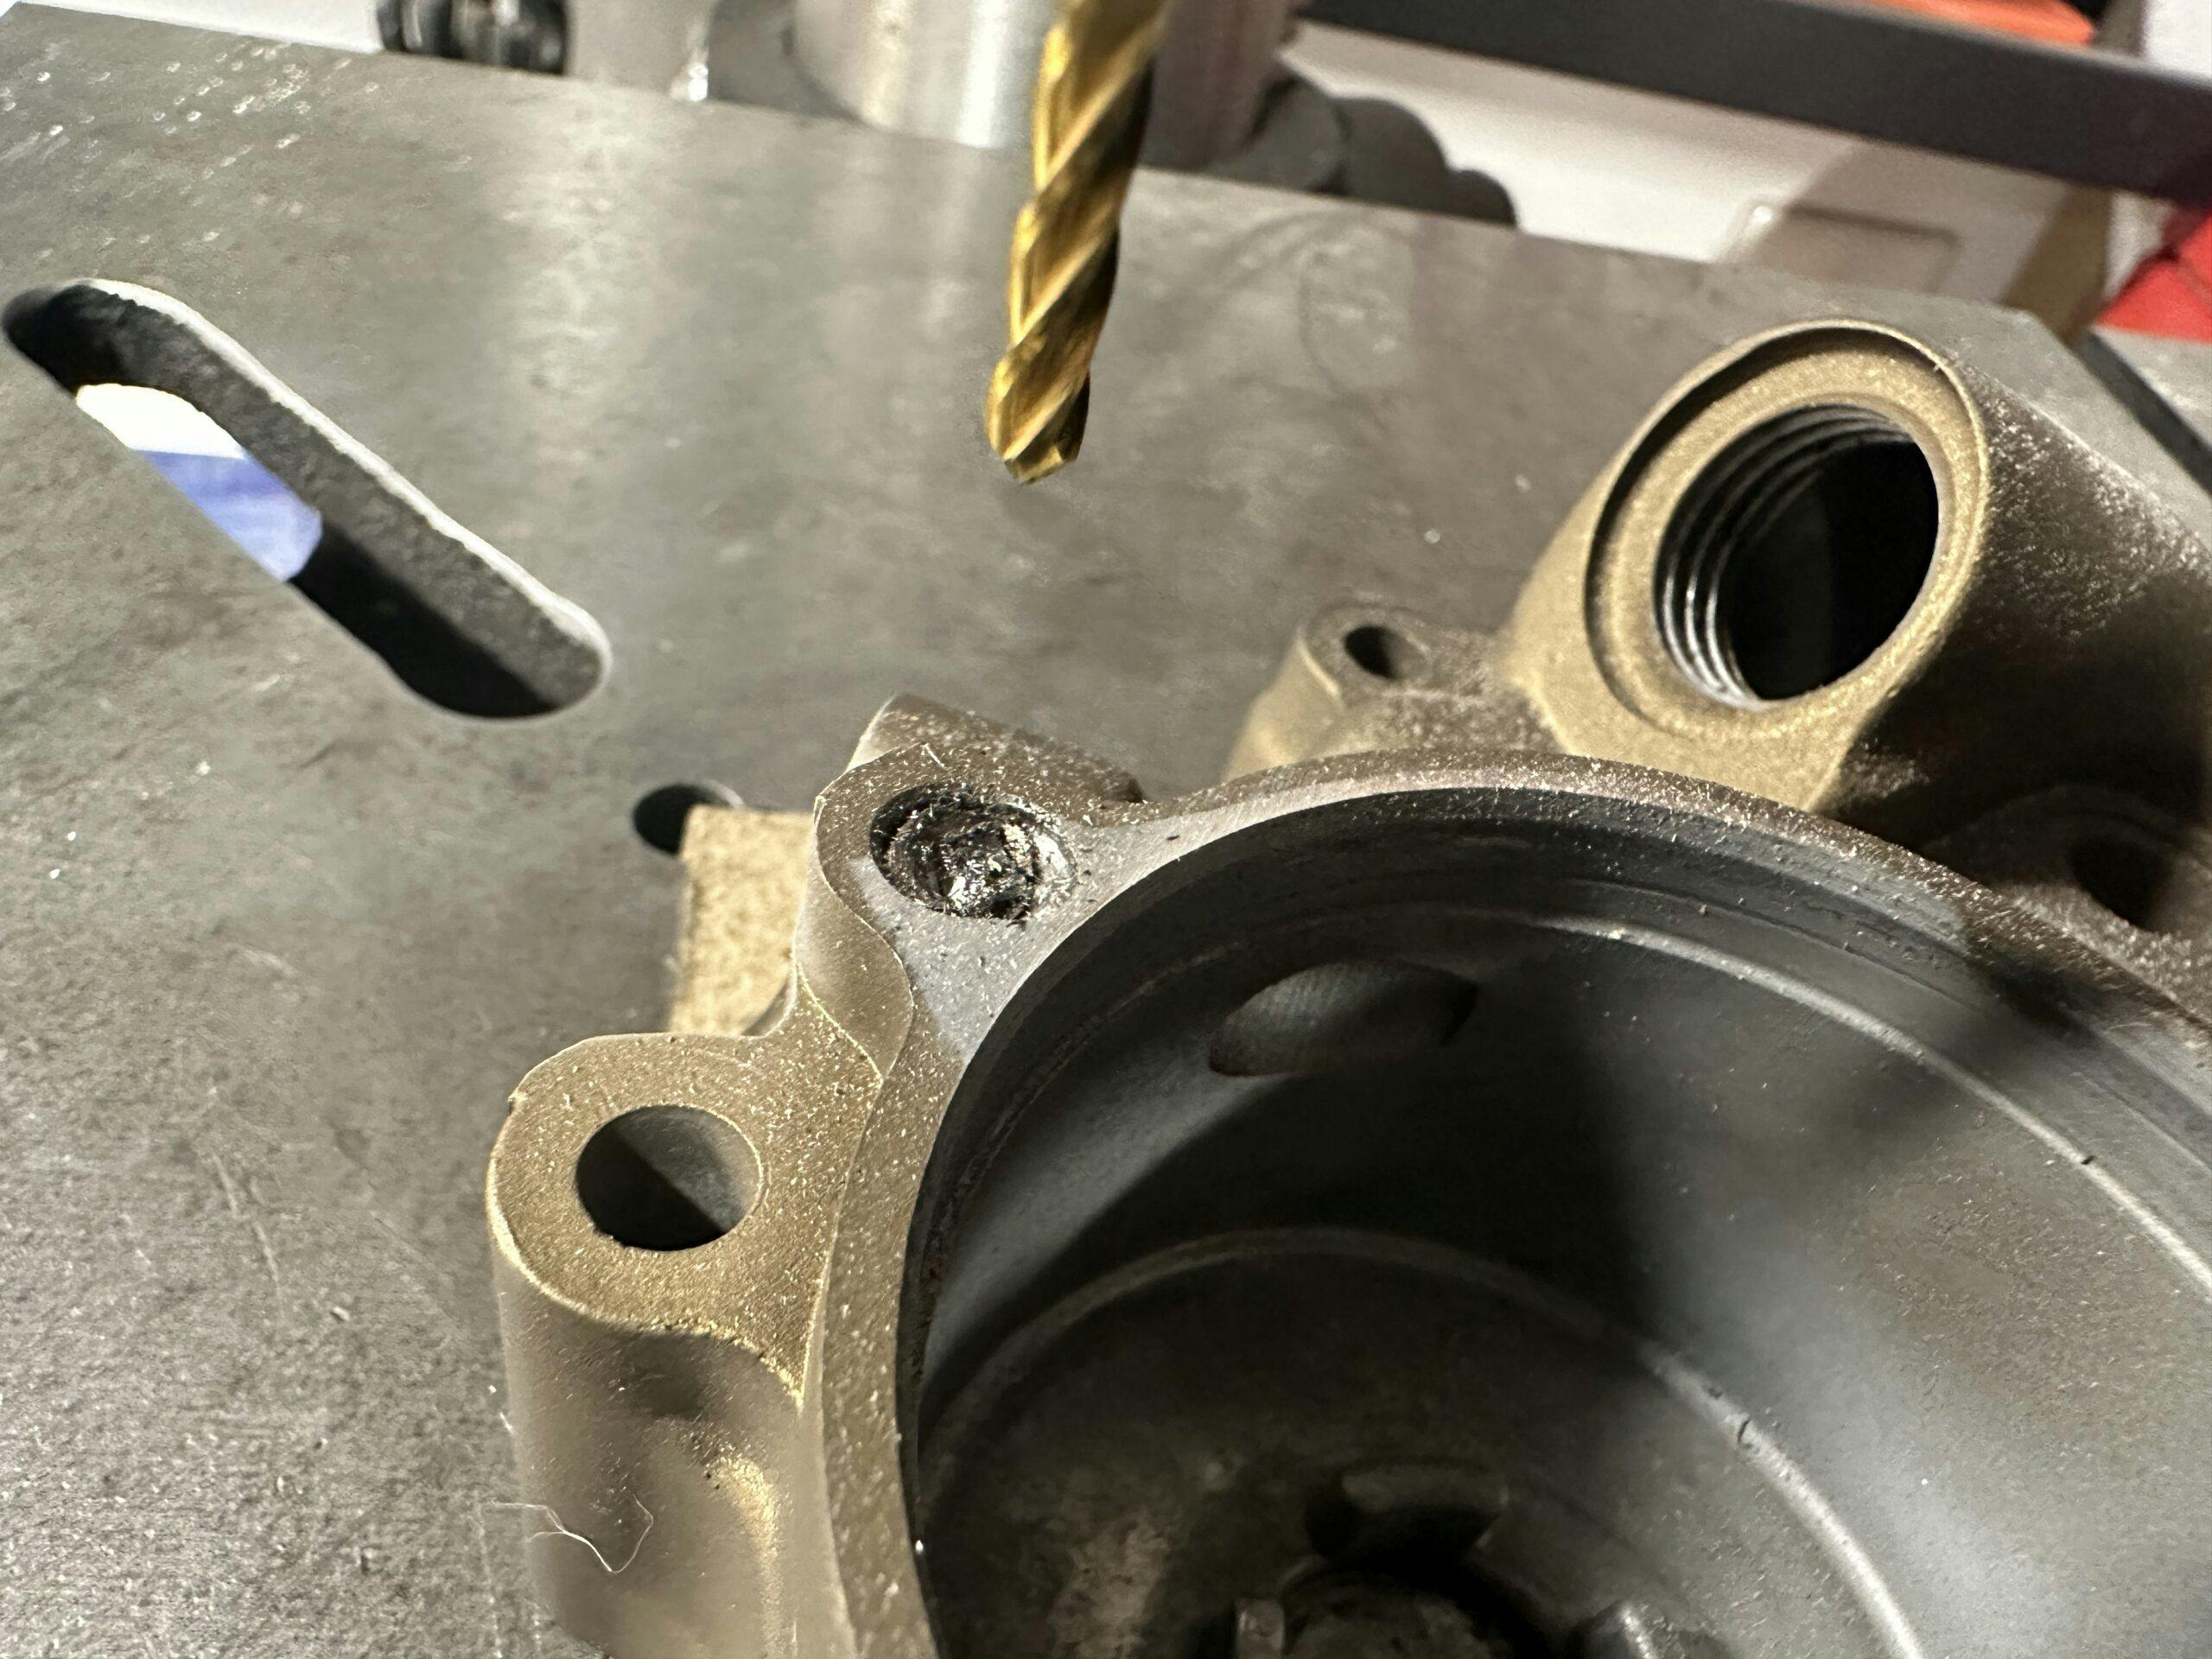
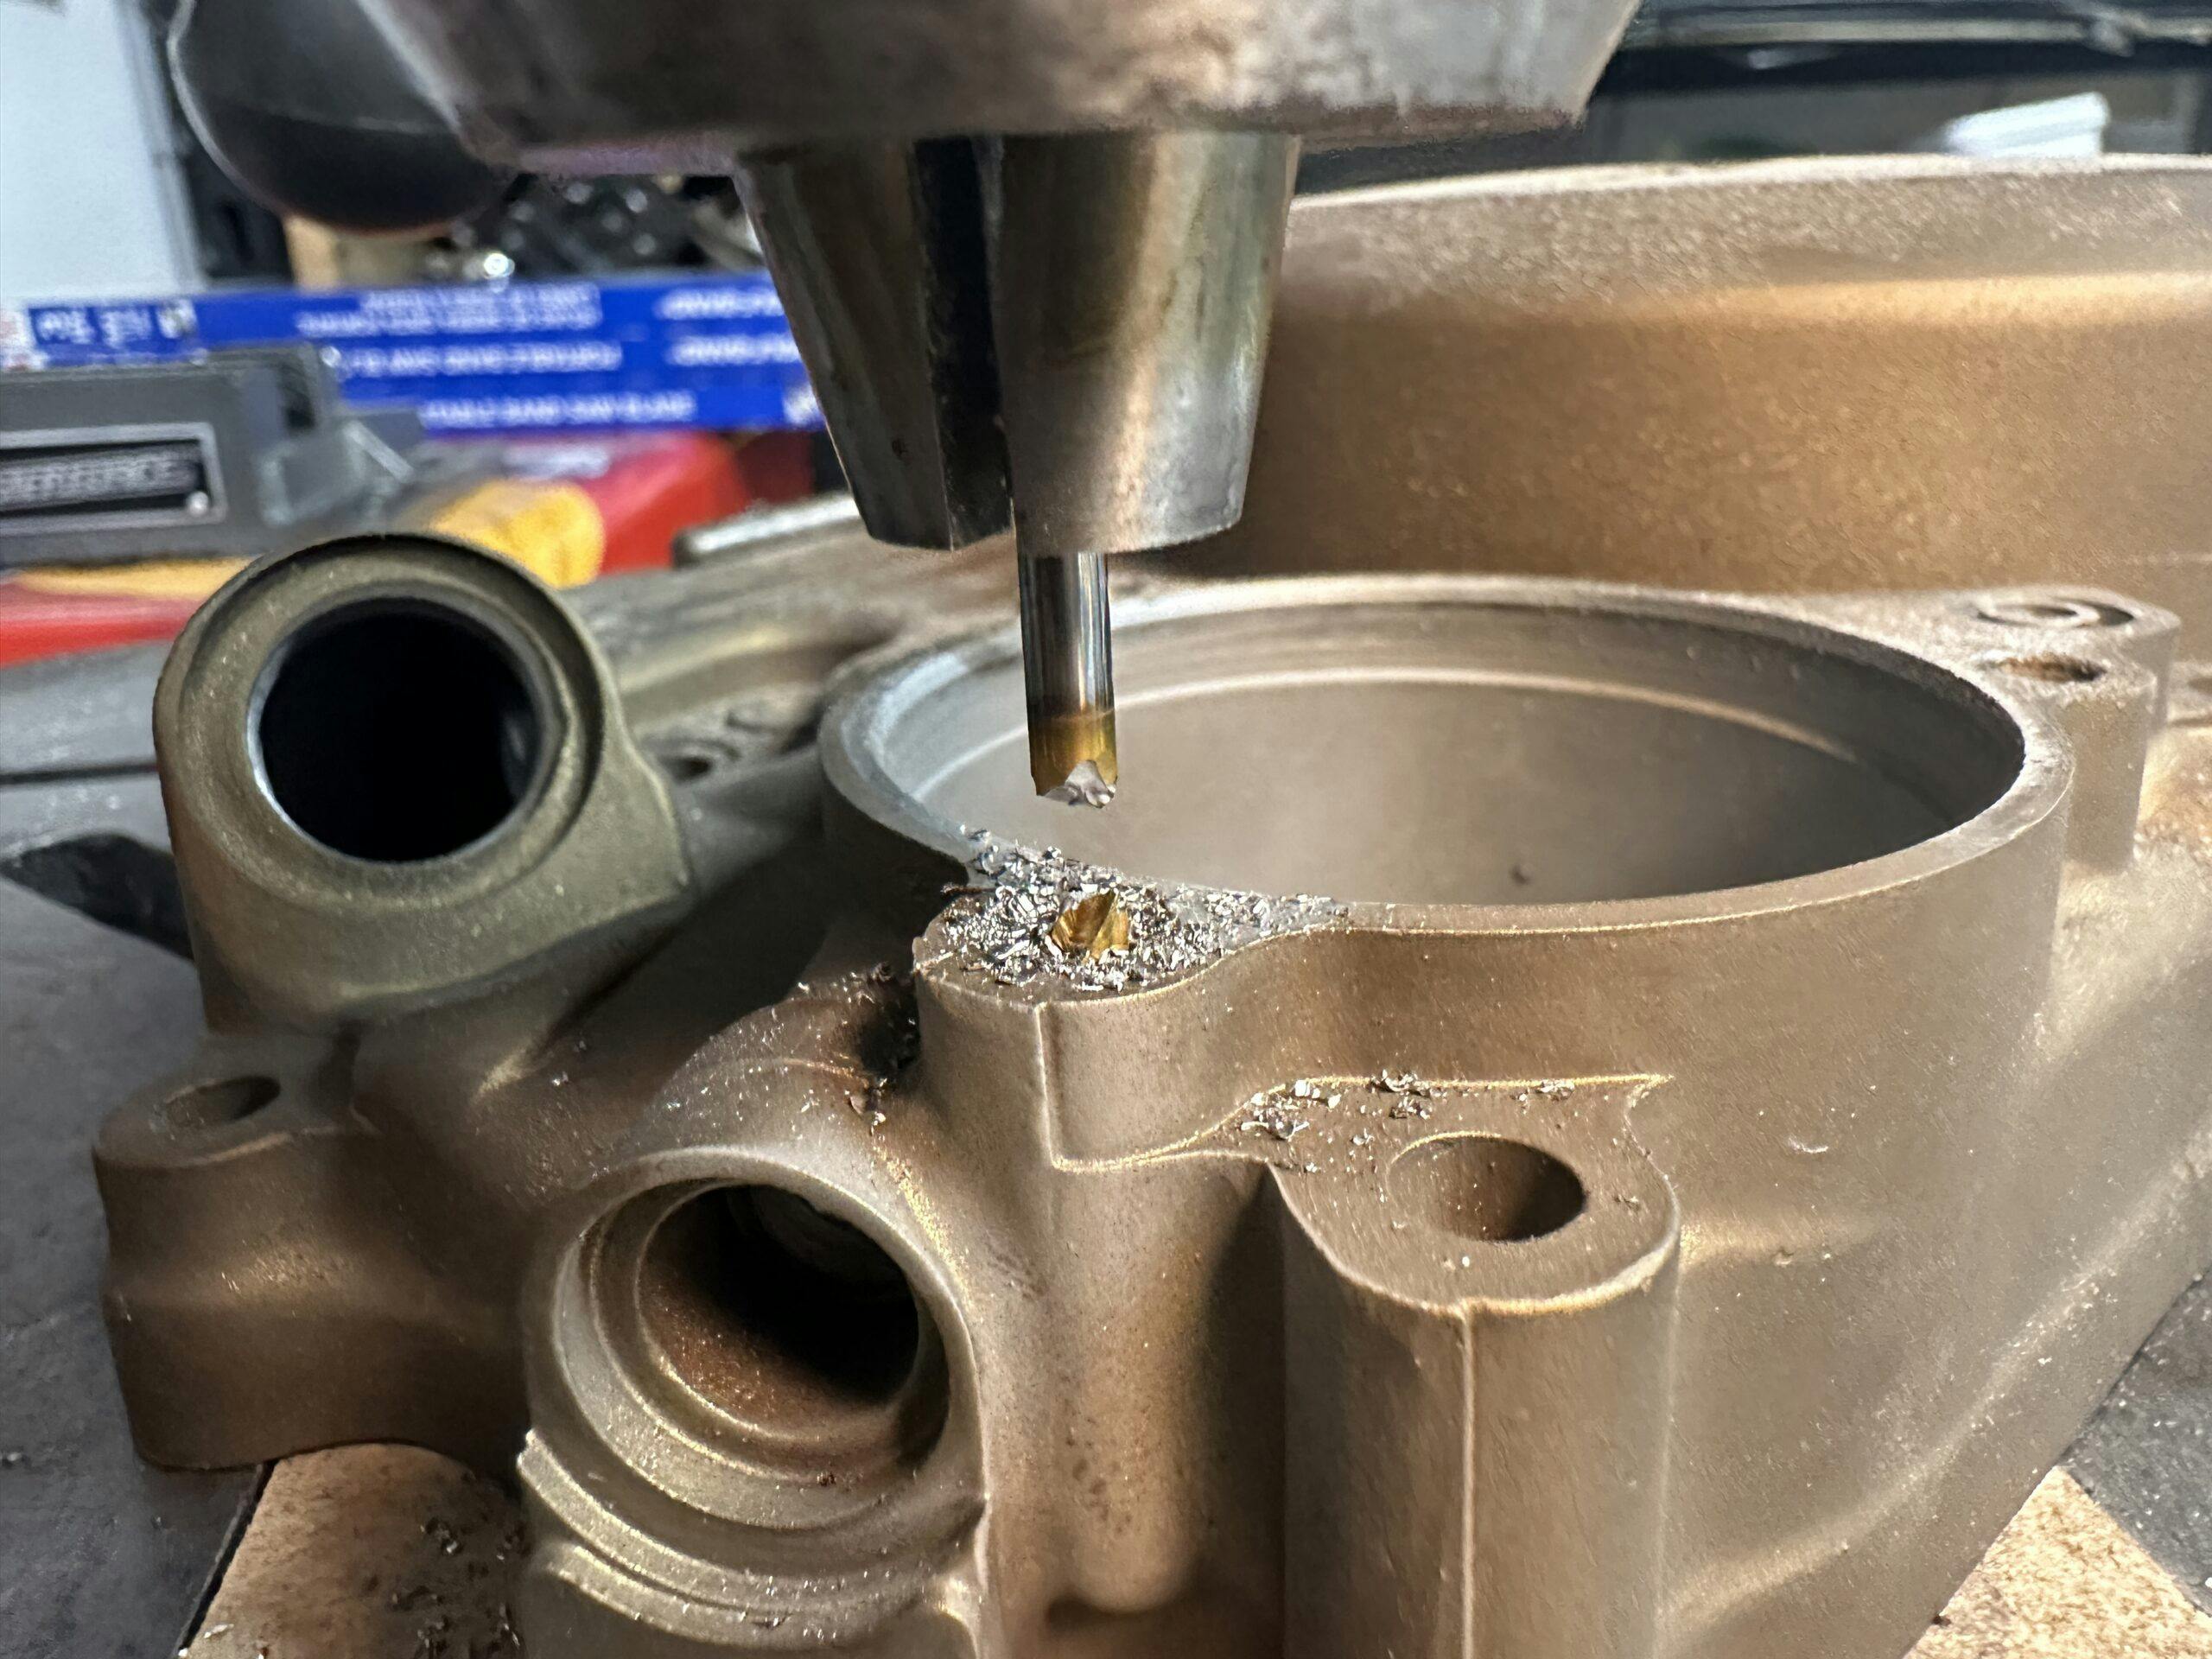
With a little cutting oil to keep things cool, I started pecking at the cover with the lever that controlled the quill of the press. The 90-degree tip of the end mill enabled me to carefully locate the actual center—not the poorly drilled hole now filled with easy-out—and begin to remove material. It was a delicate game of managing speeds and feeds by hand: I had to put enough downward pressure on the end mill to prevent chatter—the cutting faces skipping along the surface of the material rather than biting into it—but not so much pressure that I began to generate heat.
Applying cutting oil and taking breaks every few minutes made the whole process feel like it took forever, but it was really maybe 10 minutes of actual work stretched across an hour, me stressing the whole time about breaking the end mill. That would all but require me to call for help, and I would not be real proud to carry this mess into someone else’s workspace.
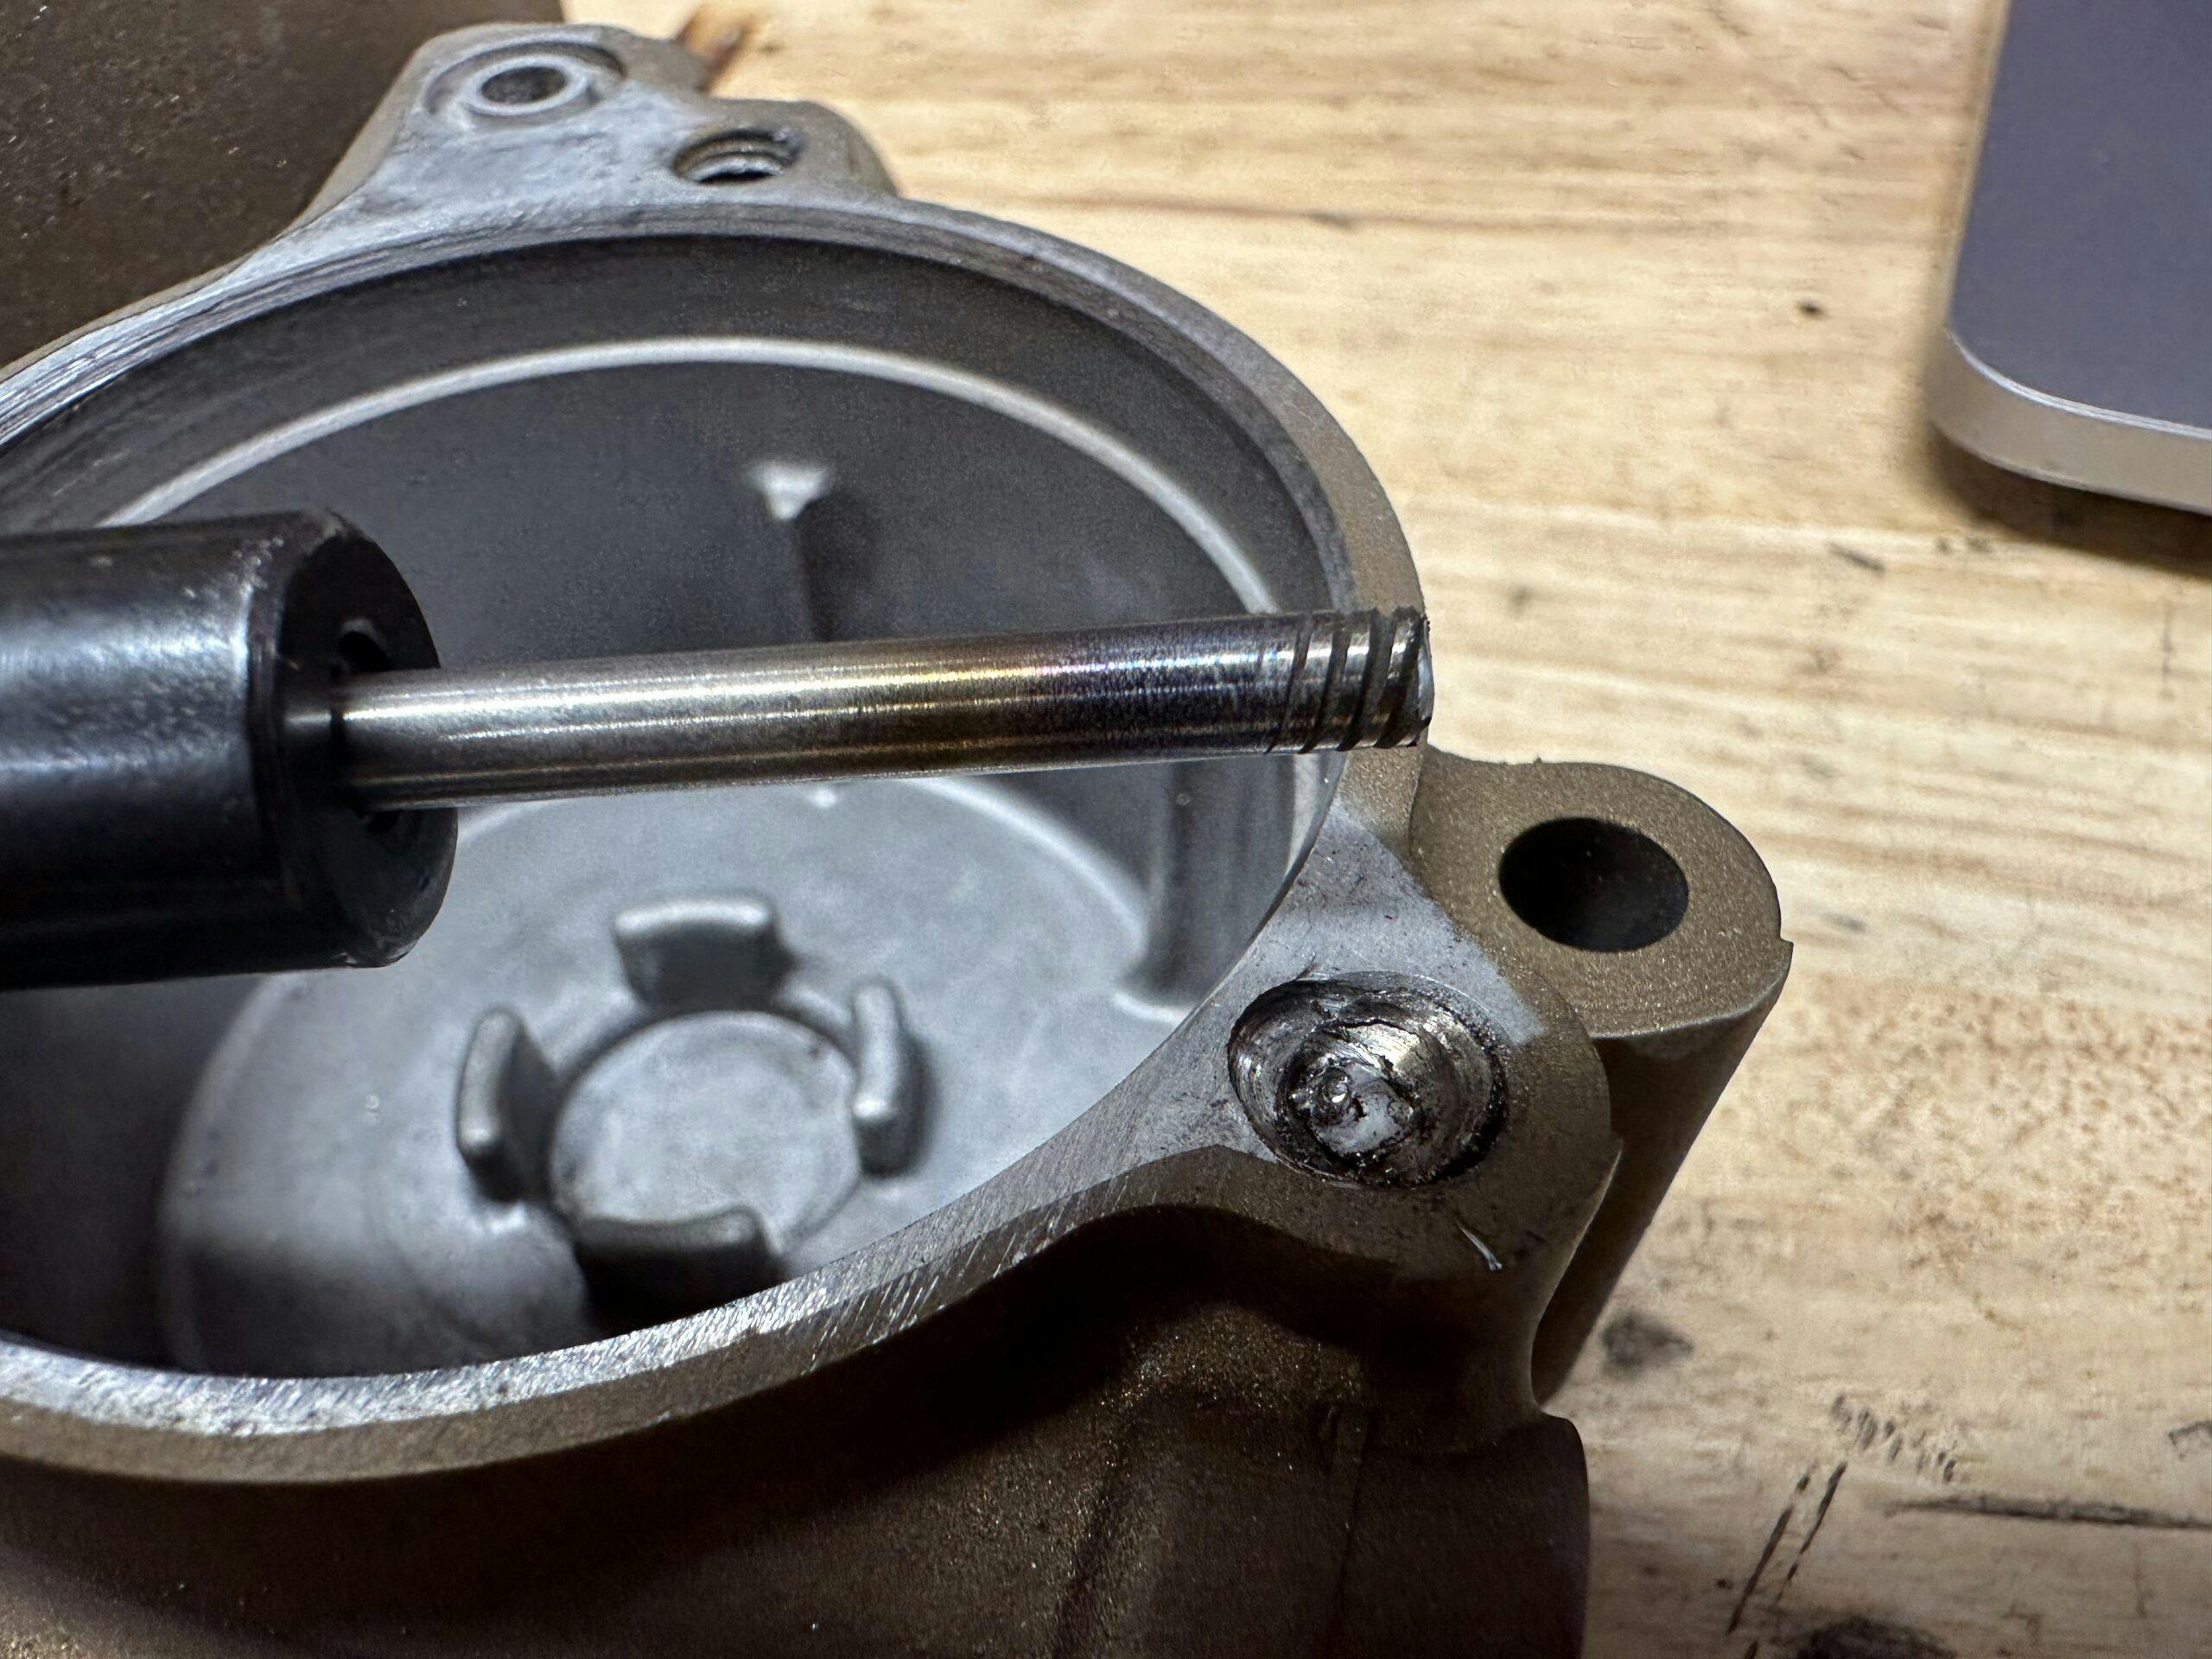
Of course, the end mill broke. Luckily, there was plenty sticking up, so I grabbed what remained and yanked out the end-mill. With a small punch, I knocked the leftover easy-out onto the bench, which allowed me to step up to the 6.4mm bit to cut the final diameter of the hole. I used a tap to form threads and the repair was complete.
There were a number of ways to go about solving that last piece of the problem, but mine was the most final. The re-formed threads would fail at the same rate as the OE production ones—good enough, considering that the other two bolts for this oil filter cover are original threads.

In the garage, there are some rigid concepts that define the ways we can do things. High-speed steel will not drill out a carbide end mill; that is fact. How you use this knowledge, however, is highly variable. Once you understand the facts that constrain a project, your brain can switch fully to creative thinking and problem-solving. The materials I use demand to be used a certain way; knowing that enables me to choose the right tool for the job or, when doing something off-piste, to stack the deck in my favor. The combination of the flexible and inflexible will set your project free. It is the workbench yin and yang.
***
Check out the Hagerty Media homepage so you don’t miss a single story, or better yet, bookmark it. To get our best stories delivered right to your inbox, subscribe to our newsletters.


Very interesting as this is always an adventure. I’m not overly experienced in the space as yet but have seen loads of folks doing things mentioned above in the comments. My best success so far has been a tool called rescuebit. Kind of pricey but has chewed through just about anything I’ve dealt with as yet. The only challenge is you need some room to ‘woggle’ it a bit as you go, but works great. Most times I’m able to save the threads and just clean them up a bit.
The further into things the more I learn and deal with headaches. I’ve not had the ‘opportunity’ to deal with much of what you folks mention, but wanted to toss this in.
Great save Kyle! And let me add a few suggestions: invest in an assortment of carbide centerdrills instead of endmills. They’re stubby therefore more rigid, come with two cutting ends, and are more robust in dealing with interrupted cuts as is usually the case with broken hardware. Also, consider coming at it from the opposite side. Even if it was originally a blind hole, a clever guy (or gal) can often locate, fixture and drill from the back end. Personally I have a dismal record with easy outs, I believe they exert just as much force expanding the broken piece (which was already tight enough to break off) as turning it but I have a superb success rate with every other method.
I have a handful of center drills, but now I need to check and see if they are carbide…
You have an interesting theory on easy-outs regarding the expansion of the broken bolt. Maybe I can rig up a way to test that.
I have removed a lot of broken bolts over the years and have had the most success with the method described by TMS
Kyle, since you have McMaster Carr access (as do I, 17 minute drive away) buy from them carbide drills rather than end mills. They sell straight flute, 135° drills that are extremely tough and aren’t as fragile as milling cutters. The drill press setup wasn’t too bad as your cover was held down securely. Center punching the bolt remains is crucial if you want that drill to go down the center but as there was already an EZ-Out stuck there you’d have to use a stone grinder tip in a Mototool or similar to make that central divot. Let’s go back to the very beginning of this situation – why wasn’t a form of penetrant oil applied to the bolt when the removal torque seemed excessive? Or was a powered impact driver used that masked the feel that could have provided a clue that the screw was galled in the threads?
Kyle, excellent “bit” (couldn’t resist) I had never thought of this, will make a mental note and see if I can do a “Step up” next time I am presented with this very real thing. Thanks
THE KEY IS NOT TO BREAK THE BOLT IN THE FIRST PLACE ,,before breaking figure out how to remove without breaking ,,, will result in breaking 90% less bolts
As a life long machinist I have removed a lot of broken bolts. It is really tough with a drill press because they simply do not have the rigidity needed to support using carbide end mills especially long shanked ones. And if you try to feed it with the drill press quill, you’re going to have problems. Fortunately, the trusty Bridgeport was my go to machine. Finding the center of the broken bolt after clamping the part to the table securely, I would simply center drill, then use a tap drill to remove the bold and then pull out the threads, if you do a good job, the come out like a spring. Next, it there was something hard broke off in the bolt like an extractor, Same procedure except I use a short shank carbide 4 flute cutter and instead of using the quill to feed the cutter, I lock it in place, use high rpms and crank the table up very slowly while blowing air in the hole. I realize most people do not have a Bridgeport style machine but if you are going to do these things, consider getting one. They can be found pretty cheap used. I am way retired and have one as well as a drill press. Each has their benefits. I have also extracted bolts using the welding a nut on the broken bolt method and have had success with that. Everything simply cannot be put in the milling machine so you have to do what you have to do, including an automatic center punch. By punching the bolt or screw in a counter clock direction close to the edge of the bolt, it may start to back out. Was I 100% successful? No, but I did become very good at it and it became routine. Don’t rush, take your time.
++there is a very easy way for broken bolts; the tool is called ‘left turner’, which is a conical shaped screw. One has to drill a small hole, maybe 3 mm, into the broken bolt. Then you insert the ‘left turner’. Due to the conical shape, the screw will lock itself in the hole, when you screw it in. Just turn left and the screw comes out like a dream.
That’s just an easy-out dude.
Unfortunately, I have to remove a LOT of stripped and broken bolts in my job. Left handed bits are your friend. I can’t even recall the last time I used an e-z out.
I’ll add another vote for EDM if it’s easily available. Years ago I had a broken off bolt in the flathead of my Jeep. Someone at work knew a guy nearby that ran an EDM shop. I stopped in with my head and he had it out in minutes and said, how does $20 sound? I couldn’t get a $20 bill out of my pocket fast enough!
This may sound arrogant, but after seeing so many people put themselves thru broken bolt misery, on an age old topic of broken bolt/tap removals. I just cannot help myself any longer. Plus, I’m out of coffee. Our 100% success rate on broken bolt extraction is becauseof the technique & tools. Whats best is that it couldn’t be more pain/anxiety free.
As a journeyman Racecar builder, you do several different trades rolled into 1. Welding is an integral part of building a tube chassis veh.
Our method of extraction is using a TIG welder. Its in every way better, & also does broken tap removals near flawlessly. I was taught this technique by another Journeyman racecar builder, bk ~1989, & have never used any other method since. Ues, you need access to a TIG Welding rig, & a reasonably competent operator of.
Whether the female threads involving the broken bolt/tap are inside of cast iron/steel, forged steel/aluminum, cast aluminum, as well as magnesium castings, is of no concern either. The only thing a first timer might think thst it didn’t/wont work, is because you will, on about a 1/3 of broken bolts, & 2/3’s of broken taps, need to do the shampoo technique of ‘Rinse & Repeat’. So it add can add a few minutes to your success. On very rare occasions, you must do the process 3x’s. Still taking less time than to clamp a part in a drill press or mill. Ever put a V8 block on a drill press? I don’t make youtube videos nor am I a teacher or ever wantedcto be one. Yet, I see things constantly in my auth enthusiast related world, that we conquered decades ago, yet nobody remembers history. So goes the saying, those who do not remember, are doomed to repeat it. If anyone cannot find a good YT bid that covers this, than I can explain it in detail. The details are important, & a good video would be better than just a written instruction process. Hint: use stainless steel welding rod when at all possible. After you build your “leaning Tower of Pisa”, atop the surface of the broken fastener, & then gripping the tower of cooled off welding rid with the vice grips, to then unscrew the bolt. The rapid heating (thus thermal expansion & thrn contraction, as the heat then flees broken bolt/stud, very much so aids in breaking the bond that held the fastener in place to much to begin with. I would even argue its the heat that removed the broken bolt, much more so than the ability to grasp onto it by dabbing welding rod upwards in a long enough shape, similar to stacking pancakes on top 1 another. Just 1 thing. Do not weld the fastener to the material the bolt is stuck into. Sometimes the welded tower column of stainless rod breaks off where ut meets the broken bolt surface, as the surface of the broken fastener usually has fractured material still on the surface, requiring you to repeat the process of building, from welding rod, by being dabbed in small lumps, 1 ontop another, till its tall enough to grip with pliers or preferably vice grips. Yes, an experienced individual will be better at this than a rookie. & knowing simple things like how to properly sharpen your Tungsten electrode, so that the arc doesn’t wander over to the casting or forging is important as well. Thats a Tig welding skill, & is more in the hands of the person running the Tig torch. Gotta be a YT video on this thou. So Im out.
Kyle, I give you a lot if credit. Anyone willing to go to those lengths has real patience. I on the other hand, am lazy, so I am always looking for the easy way out. Breaking off end mills is something I do very well, so I shy away from this type of work. Im sure this post sounds arrogant, but I cannot believe in the age of cheap TIG welders from places like Harbor Freight, that every motorsports enthusiasts doesn’t own 1.
I’m convinced no more worthless tool has ever been created than easy-outs. I have never had one actually do anything other than break. I just recently went to change out the thermostat in my ’84 Z28 that has an aluminum intake instead of the standard cast ones. Of course anti-seize wasn’t used and one of the bolts snapped. After sacrificing about a dozen nuts to the welder and heat to try and get it out, I had to by a tool steel drill bit to drill through the extractor. Drilled through it all until the tip was just left and spinning. Couldn’t get it out with a magnet and my shop vac couldn’t get enough of a seal on it to suck it out. I have to take a toothpick with superglue on the end to grab the extractor tip and get it out of the way. Then I was able to redrill and tap the hole. Yes I did it with a cordless drill while the intake was still on the car. Fun times…
As I was removing the oil pan from the engine of my MGB, I discovered the previous owner had broken off one of the pan bolts. With the engine dangling precariously from the engine crane, I attempted to remove the bolt with a counter clockwise easy out bit which off course broke off leaving a pea sized piece embedded in the bolt. After trying every type of bit I had I then went out and purchased a carbide tile bit and laying on my back underneath the engine drilled out the bolt with a hand drill. I was not too optimistic but to my surprise the tile bit ate away at the offending material until the easy out remnant popped out. I then proceeded to drill out the rest of the bolt, ran a tap into the hole and hoped for the best. To my surprise the threads held and a new bolt was installed even though the top of the hole was a bit mangled. Perseverance, patience and a bit of luck are essential on a job like that which will inevitably creep up on all of us at one time or another.