7 tips for cleaning car parts
Of all the unsexy projects and tasks that comprise the step-by-step of any project or restoration, cleaning the parts and pieces while everything is apart tops the list of most un-fun. It’s a necessary evil though and a little attention to detail at this point goes a very long way in the final product. There is no sense in “saving time” by leaving everything dirty and dealing with grease and grime working its way back into places it shouldn’t be and causing you to do the task twice.
Cleaning can be simple as wiping off some schmutz and as involved as soaking a bunch of little parts in a solution overnight before a thorough scrubbing. Regardless of how deep you need to clean, here are seven tips that will make sure your final product is one to be proud of.
Start soft
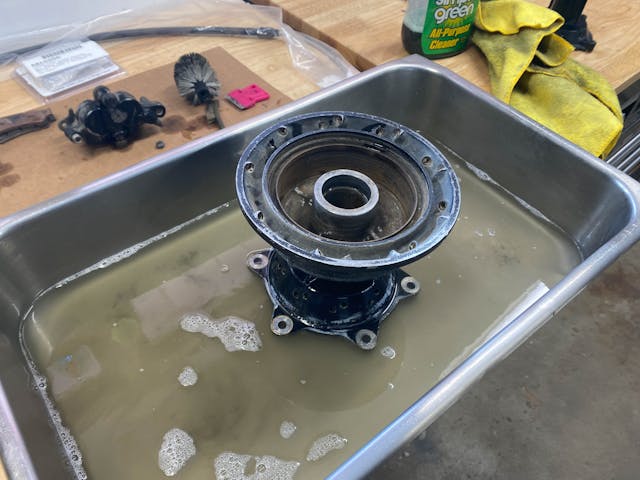
Start with the easiest and safest form of cleaning first. This often means a wipe with a clean towel or rag to see just how bad the situation really is. Sometimes just a clean rag is a enough to remove everything that needs to go and leave the surface in acceptable condition. Otherwise it will tell you just how bad it is and what the right course of action might be.
Glove up
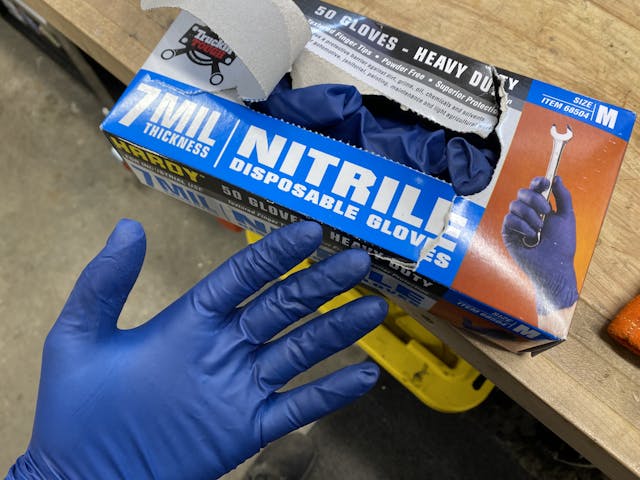
This isn’t an article about safety, but it bears a mention here. So many chemicals used in automotive processes are quite hazardous or damaging to the human body–and it might not be immediately evident. For example, brake cleaner is very common to use to remove oily residue, but it is also very rapidly absorbed by the skin and carried in the bloodstream to the liver where it sits, and sits, and sits. Our organs cannot process chemicals like carb or brake cleaner and therefore it just accumulates and can cause long-term health issues. Disposable nitrile gloves keep fluids and chemicals from being absorbed and while they can be inconvenient at times, but then again so is having to show up to dialysis on a regular basis.
Use the right stuff

There is a huge array of chemicals on the shelves of your local parts store or grocery market that claim to remove the nasty grime with a spray and rinse process. Sometimes those work easily, other times it causes chaos. One such example is a product like Simple Green, which is very useful to cut grease, but can leave residue on aluminum surfaces and cause corrosion if not rinsed thoroughly.
The same goes for rubber pieces. Warm water and a light detergent is often the best solution to prevent rubber from distorting, discoloring, or getting eaten up by aggressive solvents. On the other side oven cleaner can work miracles on cast iron pieces that have tons of baked-on grease and can only be chipped away with aggressive wire brushes before a water rinse. Match the product and process to your material for best results.
Be careful with your finish
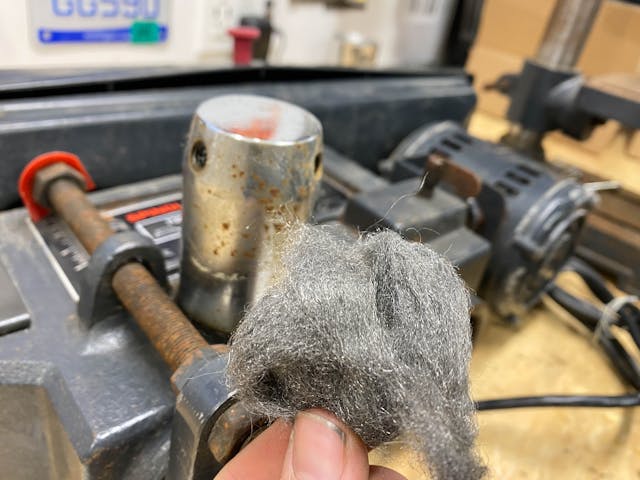
A key thing to remember when cleaning is what the final surface finish will be. If you are painting or otherwise covering the part it might not be a big deal that there are some scrub marks or a less than perfect surface finish. If you are painting or polishing the piece though, suddenly you want to exercise a lot of caution while cleaning so that any marks that happen during cleaning don’t pop through or create more work to remove later.
A steel wire brush on soft aluminum is a prime example of something that can wreak havoc quickly. Plastic or brass bristles are much softer and will prevent scoring or damaging the finish and save you work in the end despite taking a little longer to actually remove grease and grime. Even a green Scotch-Brite pad can be too much for some rubber pieces, so be sure to check in an inconspicuous area to see if your plan will leave marks of damage before going to town scrubbing.
Hide the evidence
Dry or wet blasting are easier than ever with home kits available and cheap enough that its not out of the ordinary for someone doing enough restoration work to make the investment to having a cabinet. The key to remember if you are so lucky is to make sure to blow out or rinse out all the blasting media from the nooks and crannies of whatever gets cleaned up. Having that sand, walnut shell, aluminum oxide, or glass bead pop out while painting or assembling is frustrating at best and downright damaging at worst.
Careful with the tags
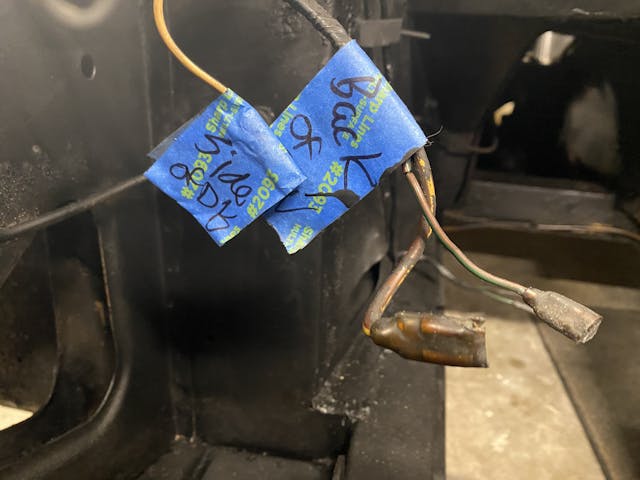
It’s important to not ruin the proper bagging and tagging of all the parts and pieces you did during disassembly when you go to clean everything up. If you have tags be sure they stay legible or be sure to transfer them after the cleaning is completed doing it piece by piece. If there are adjustments that you have to remove to fully get something clean–think carburetor adjustment screws or adjustable suspension components–be sure to document the adjustment so you can use it as a ballpark during reassembly.
Under pressure leads to failure

It’s really tempting to toss that working transmission or rear axle in the truck and take it to a car wash and use the high pressure nozzle to blast away the grease and grime quarter-by-quarter. Be careful though. Many of the gaskets are not made to withstand the high pressure pinpointed in one little area and can quickly fail and allow water and soap to flood inside and cause rust, corrosion, or leaks from the damaged gasket.
If a soap-and-water wash is required often times the best course of action is to use nothing more than household hose water pressure. That pressure is low enough that it is safe for gaskets and seals while still getting things clean. It does mean you will spend more time scrubbing, but would you rather scrub or replace gaskets due to damage?
While tedious and oft annoying, cleaning your project will make for a much more satisfying assembly. Take the time to make every project something worth showing off and being proud of and it will elevate your DIY confidence far more than you might realize. Have a tip not on this list? Leave it in a comment below.
Check out the Hagerty Media homepage so you don’t miss a single story, or better yet, bookmark it.


Thank you, Kyle, for discouraging a stop at the local self-serve car wash. As the owner of such a facility, I dread when people stop on their way home from the scrap yard, blasting a transmission or engine block and leaving gobs of grease and nasty grime all over the floor and walls. It ruins the experience for the next customer, with his nice car and expensive shoes, who often drives off in disgust and never returns.
Similar offenders are the mud-buggy trucks, dirt bikes and ATVs, and deer hunters. C’mon people, it’s a car wash, not a dumping ground.
DAVID S.
Reading your comment doesn’t surprise me one bit in our ME, ME, ME society. Many people these days don’t give a crap about others. They do what is best and easiest for THEM and the hell with anyone else! Very sad and don’t see it changing any day soon when our own government officials have spent years making our society very divisive despite spewing crap about creating “UNITY” when they are doing the exact opposite!
David, maybe installing cameras in your car wash can help you catch these inconsiderate people and make them pay for the cleanup as long as you have appropriate signs posting what is NOT allowed in the car wash. Good luck.
Anyone use brake cleaner for other parts than brakes ? Or is that taboo ?
One of the most valuable things about cleaning parts well is the opportunity to examine them for failure points. Once had a healey engine “freshened up” and found two cracks in the crank that would have made an appearance sooner than later.
Don’t forget about sonic cleaners with soap & water. I’ve even used one for filthy seat belts. You don’t need to do the whole part at once- its quite possible to do long things (like belts) in sections.
I use a 3m pad,a brush and heavy-duty hand cleaner like fast orange. Works on metal, plastic and rubber. When I’m done my hands are clean too.
I bought a large ultrasound sonic cleaner it works great on carbs and other parts. I usually add a small amount of dish liquid or simple green.
I’ve used a blast cabinet for 45 years, starting at age 13 cleaning brass tanks in my Dad’s radiator shop. I’ve always used glass beads, a carryover from the shop. It is not the fastest stripping difficult materials or rust, but the finish is fantastic. One happy, sunny day I was refinishing an oil pan (probably my 8th or 9th by then) and the neighbor, who had a small consumer blast cabinet, convinced me to speed things up and use aluminum oxide. It’s so much faster he said… and it was. But 50 miles later, I started having bizarre oil pressure issues. Long story short, I drained the oil, it was copper colored, and every bearing in the motor was ruined.
What I learned (after) from blasting professionals is aluminum oxide’s microscopic ‘tips’ break off. This is how it stays sharp over many blasting sessions. Those tips tend to embed in the material and when the metal heats up, they become “free”. Even though I had thoroughly cleaned the pan afterward, apparently there were enough “tips” left behind to destroy the engine.
Summary:
I saved 20 minutes cleaning an oil pan & for the cost of a newly rebuilt engine ($4,000 ) and a lost weekend installing it, I learned not to use Aluminum Oxide on internal engine surfaces.
So, please, do your research first.
When I soak an item with small parts involved (needle valves etc.) I put them in a metal “tea bag” or a metal 35mm film can that has a few small holes drilled in it. This saves a lot of time and grief searching for them at the bottom of a murky parts bath.
There’s one thing in your list, Kyle, that should be printed in ALL CAPS and in a flashing red font – the suggestion to always glove up. I’ve been wrenching and restoring for 60 years, and I wish I’d followed that advice back when, instead of dealing with cancer now. Those chemicals, especially the solvents like brake cleaner and carb cleaner, are LETHAL, and go through the skin like it wasn’t even there.
Don’t forget the old stand-by; SOS pads.
I’ve used them for years on shiny parts on driver-quality cars.
It doesn’t make anything worse, just shinier.
“…cleaning the parts and pieces while everything is apart tops the list of most un-fun.”
In general, if find cleaning parts to be quite satisfying. Taking something greasy and grimy and washing them results in something so much easier to work with.
To me, the worst part of restoration is crawling under a car and trying to remove a (very very tight fitting) bellhousing dowel pins in tight space.
I “restored” my car 40 years ago and swore I’d never want to craw under a car again. Well, here I am 40 years later, doing a transmission swap on the same car, in my garage with only the front end jacked up on a jack stand. I’m having the most miserable experience, but the thought of obtaining a lower first-gear and the overdrive that will allow me to drive 60mph without going over 3k rpm is keeping me motivated.
Having only the front jacked up is for my safety. We’ve been having earthquakes lately, so just the front with a cross-beam floor jack for extra safety.
Bokeoyaji,
I have a stack of cinder blocks and get them out if I’m doing a transmission or other ‘under car’ job that takes more than a day or two. I just set the tires down on them so there is no fear of anything falling off a jack / jack stand. Just make sure to put the cinder blocks in the proper orientation (as they would be used in a wall) and put a piece of wood on top to set the tire on… No more worries about earthquakes knocking the car off – unless the ‘big one’ hits.
I use mineral spirits to clean and de-gunk nuts and bolts. You can air dry them to a non-oily finish. On plastic, vinyl and anything else I want squeaky clean in prep for paint, I use POR Marine Clean. It’s biodegradable super concentrated, and will clean the spots off a leopard.
For final cleaning, I like alcohol……not the drinking kind. Once something is good, a wipe down with alcohol usually removes finger prints and any residue with the alcohol evaporating real quickly
Manually scrape off as much as possible first onto newspapers then use the LEAST dangerous solvent, repeat process. It will take several times for really dirty stuff. As the carwash owner said, don’t dirty up a stall with your filthy, greasy crap.
I saw avideo a few days ago where a man bought an old firetruck and the transmission was ful of water and had been setting for several years and was rusted really bad. He drained the water and then filled the tranny with muric acid, let it set for a few days and it came out great. With a littl nudging and fresh oil the thing shifted like new. Any thoughts on using muratic acid to clean rust
Be very careful with muriatic acid as it is very corrosive and can easily damage some parts. It is more commonly used in a very dilute form as a pool acidifier or concrete etch. A much better solution is to use a 10% solution of phosphoric acid and water (10% acid, 90% water). Soak the rusted part until all the rust is removed. The acid reacts with the iron oxide (rust) to form iron phosphate, a black looking substance on the metal that also will act as light rust preventative. Phosphoric acid is readily available at hardware stores or commercial food supply stores since it used widely in the food industry among others to provide the fizz in soda.
I love that stuff for painting parts not having a critical finish surface. Get rid of as much rust as possible and simply brush it on, give it a few minutes and wipe it dry. Once its dry, paints up nicely. Never had any issues with that approach
I want to comment on polished stainless steel trim that is commonplace. I had all of my glass surrounds professionally brought back to a better-than-factory finish. The old timer warned me not to ever clean this metal with anything ‘dry’ even if was just light dust. The mirror finish easily develops spider scratches. He demostrated on a piece of scrap that gently running a finger tip over this material leaves marks. All true … just saying.