6 Adjustments You Forgot About on Your Vintage Car

Cars, especially vintage ones, were built with a certain amount of regular maintenance in mind. As our daily drivers slip further and further into the black hole that is things like “lifetime transmission fluid” and items that require more calibration than actual maintaining, it gets easier to forget all the items that should be kept up on our fun-to-drive cars. Always on the look out for you, we took a moment to make a quick reminder list of items worth checking … especially if you can’t remember the last time.
Door Strikers

Look, we aren’t going to get into a long-winded discussion about how gravity seems to get stronger as we age, instead we are just pointing out that the same forces are applied to our cars, too. Doors can sag a bit with use even with perfect, well-adjusted hinges. Taking a minute to properly align the striker and latch on your doors will pay back tenfold every time you get in and out. If the striker and latch just won’t line up like they should, be sure to check the condition of the hinges and pins prior to modifying the striker or latch to make it work; the latch can only compensate for so much sag from the hinges.
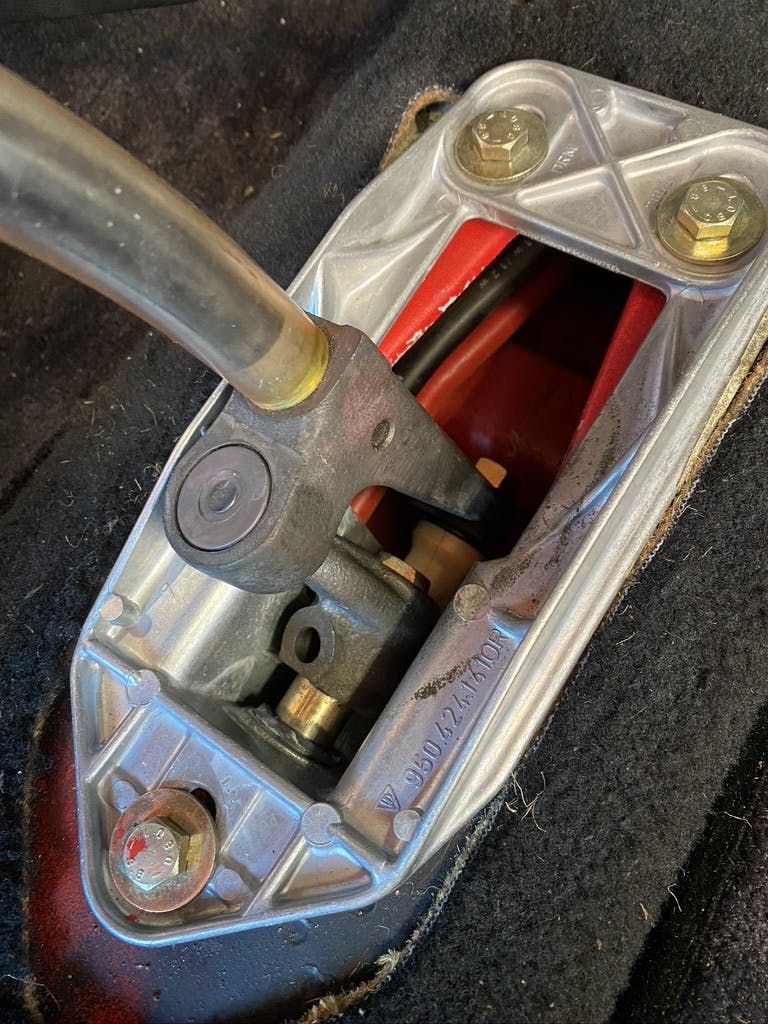
Clutch Pedal

There are several methods of transferring and multiplying the driver’s left-leg force to connect and disconnect the engine from the transmission. Whether cable, hydraulic, or rod linkage, there is likely an adjustment that can be done to ensure that the clutch is being operated as designed. In addition to helping ensure those parts have long lives, this will also allow the pedal to do its job by putting the engagement point in a nice place and making the car easier to drive. Take a moment to grease or lubricate any pivots, and don’t be surprised if you have to re-learn how to drive your own car.
Shift Linkage
Driving a manual transmission can be so rewarding and fun, but those feelings rarely come from shifters that have all the tactility of a knife in a jar of peanut butter. Is that third? Fifth? I didn’t even think this car had a fifth gear?
Shifter adjustment and maintenance is often a little finicky due to having to deal with the center console, but it’s worth the effort. New bushings go a long way for most shifters, but an old rod-actuated transmission might need nothing more than just double checking the rods are the correct length, clean, and not binding. You might not think your shifter is so bad, but this is one of those circumstances where the parts wear slowly and we often don’t notice it fading over time. Also worth noting: Check forums or clubs for potential shifter upgrades. There always seems to be someone re-engineering a shifter and selling kits to improve the feel or durability.
Steering Box


Keeping a bias-ply-shod car between the lines can be tough enough at times, and slop in the steering box can only make things worse. The steering gearbox is a relatively simple part of a car, but like every other piece there is wear that adds up over time. Often the resulting “slop” in the steering feel is just chalked up to “old car feel” rather than dealt with appropriately.
There are a lot of types of steering boxes and arrangements, so unfortunately we can’t give a short how-to here. Refer to your favorite service manual or marque expert for the process and potential common pitfalls before attempting a DIY adjustment. Steering boxes are precision and are often adjusted as such. If in doubt, take it to a pro.
Headlights
For fear of late-night animal crossings, or just the numbers of bugs that accumulate across a delicate chrome grill, it seems most vintage rides rarely stay out past dusk. Even if you plan to stick to a curfew for your old car’s entire life, being prepared to brake it is still a good practice and that means you need to be able to see. Well-aimed headlights can make a huge difference in overall effectiveness and visibility—both the good and the bad kind: Your light should be showing you the road rather than potentially blinding oncoming traffic. We want to been seen while driving, but a headlight pointed right at other drivers isn’t the best way to go about it.
Hood Latch
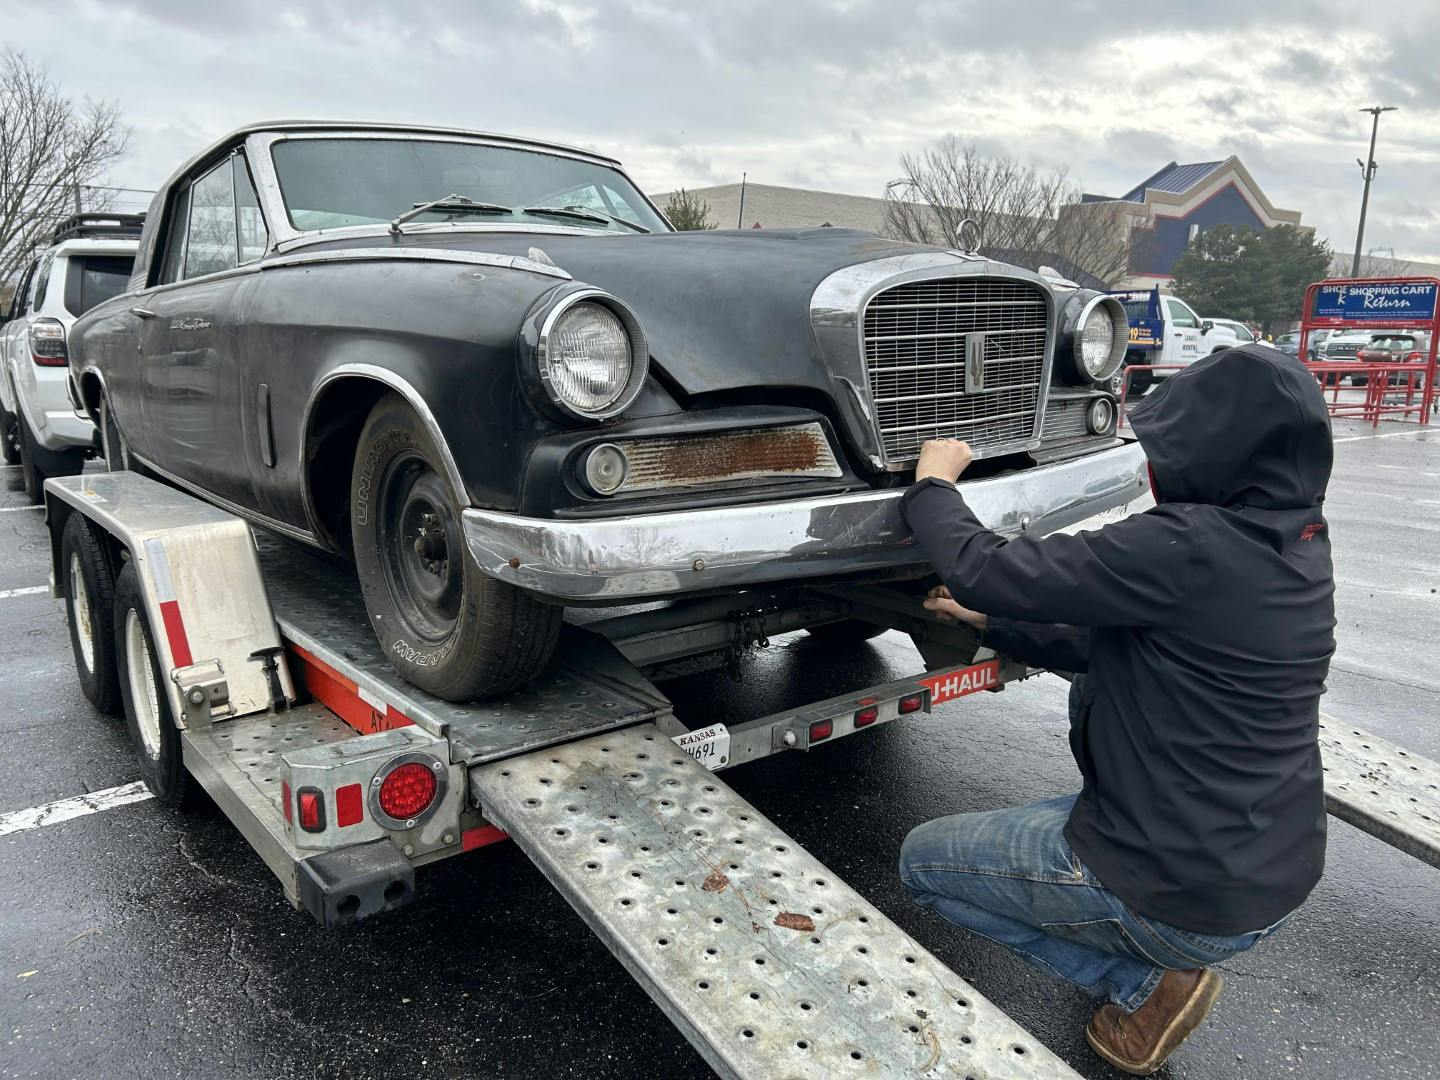
While you’re up by the front taking care of those headlights, be sure to take a moment and pop the hood to check the latch is in good shape and holds properly. A hood flying up and over is not a situation that anyone wants to be in while driving, especially not in their vintage car. And that’s before we talk about repairs.
Instead, double check that the mechanism moves freely, and that the latch attached to the hood is both secure and hitting the appropriate place when closing. Use lubrication appropriate for the situation and drive a little easier knowing your hood will be staying right where you put it.
***
Check out the Hagerty Media homepage so you don’t miss a single story, or better yet, bookmark it. To get our best stories delivered right to your inbox, subscribe to our newsletters.


Never forgot. Done them all
The problem with adjusting steering boxes is the majority of the wear tends to occur in the center position. When you take the slack out of the center, it tends to get tight at the ends, which can damage the box. Any time I’ve had to resort to adjusting the box, a replacement was on the horizon
Agreed.
I agree. Once there’s a need to adjust the steering gear box, it’s usually too late. I’ve adjusted many of them and if your lucky, you might see a tinge of improvement. Most often its replacement time.
What I learned about adjusting them is you don’t want to take all the play out, because that will make it tend to stay in an off-center position when trying to track straight. What I’ve been able to do is count the turns in, then back it out by half that amount. It will tighten it up to be more drivable, but not be too tight.
I agree. I learned this one in high school. It sounds like many people did not. You never, ever take up all of the slack.
Replacing the box on a ’61 Econoline with anything better can be a problem.
You are 100% right. Don’t fuck with the steering box adjustment!!!!!
Impressive selective post management.
ya did this on my 72 dart in a year i had to replace
Ditto on the steering box. If you tighten up the center, you run the risk of binding at the ends. The best adjustments are to the tie rods and alignment. If you have a Hurst shifter, you can still buy bushing and clip kits to adjust the rod length. If you’ve forgotten, there are plenty of You Tube videos. Also, make sure to adjust the stops and check the mounting bolts, especially if you tend to shift hard.
Dont forget to Lube the hood hinges as well.
Especially if you have a 73 to 87 Chevrolet PU as those hoods are well known to buckle if the hinges are dry.
OH yes!
Yes, I have a 74 Grand Prix. The doors are long and heavy. I was having problems closing the doors without slamming. It’s not the striker plate it’s the worn hinge pins. I can adjust the door mechanisms so they close but the doors (especially the driver door) is out of line with the car body. Also since it is a hardtop the glass in the doors are crooked to the door seals. I have to pull the doors and see if I can replace the hinge pins. They have probably been opened and shut thousands of times. I’m gonna make a jig with carpet so I can remove the doors with a pallet jack and replace the pins without damaging my doors. 😥😥
Dribble some lube down the hood latch release cable if your car has one. Not as serious as the hood flying up at speed, but not being able to open it can tie up an afternoon. I’m qualified to rank them having experienced both.
Today the most over look adjustment is the emergency brake.
Due to the way many are set up they leave you with an E brake that fails yo work and a low brake pedal.
Most just need to be used as the ratchet up as they get used.
Good point. I make certain the park brake is not frozen and adjusted.
Parking brake . . . . . ever try to stop a car with that system in an emergency? . . . . .
Sounds like you have never driven a Little British Car from the 1950’s with single circuit hydraulic brakes.
I used to try to in my ’65 Beetle…just because
When I was in high school (and college) I loved doing “Bat Turns” in my 55 VW Bug in snowy parking lots. Great use of the e-brake and a rear engined car!
Just once, and thankful it worked!!!
The brakes don’t work on my 1942 Ford, but the e-brake at the back of the transmission works fine. (don’t worry, I haven’t driven it in years, and fixing the brakes will happen before I drive it again)
Rental RV dropped the driveshaft (parking brake is attached) in return lot. Now holding the foot brake to prevent it from rolling into 4 new units. Sitting on a hill in the unit trying to get employees attention with horn, flashing lights, waving, and yelling. Mechanic finally comes over and crawls under RV. I suggest blocking the wheels. He said “just put the parking brake on”. 🤦🏼♂️ Probably the same guy that put the driveshaft in.
Yeah, once in a ‘79 Olds 98. Not fun 🙁
Yep, had the brakes go out on my 66 Charger and hit the emergency brake. The car did stop but the rear felt like it was on ice.
My wife used the ebrake to stop the 1963 Riviera we had custody of, and were daily driving in Tucson in 1992. Single-circuit hydraulic brakes, and the master failed… as she approached a busy intersection, with a baby in the back… Good demonstration of why it is important that your ebrake works.
Has a single system 1963 Ford lose the master cylinder. Not only got me stopped but got me home.
Also today if you do not use it you may have a low brake pedal due to it not adjusting the rear pads.
Having to use the e brake to adjust the rear pads only applies to disc brakes. Cars with drum brakes adjust when you back up and apply the brakes
If the car is old enough, the brakes will require periodic manual adjustment, which can be a real pain (my 1940 Ford has four adjusters on each wheel). As late as 1960, the auto-adjusters were optional on some Fords.
I used to do e-brake slides all of the time. Learned to park like Clark Griswold.
YES!!!!!
Welp, a parking brake isn’t much good as an emergency brake if it isn’t operated by a handle with a release button so as to control engagement. The recent trend of electronic parking brakes seems counterintuitive doesn’t it?
If your handbrake isn’t adjusted properly, how are you going to do those fun handbrake turns?
Yep. Had to drive my Hummer H2 5 miles to a shop using the park brake when rear brake lines corroded and leaked. I really didn’t want to do that, but I was very careful and thankfully they were very well adjusted and worked. However, I would never suggest anyone else do that.
Unfortunately many ebrakes on collectors are disconnected. A fortune is spent on bodywork only to have it damaged by a slow roll into your other collector due to brake failure or someone took it out of gear.
the correct name, endorsed by the legal world, is ‘parking brake’. its specific use is to keep the vehicle from rolling when parked. putting an a/t equipped vehicle in ‘p’ is usually good enough, but not designed to do all the work. but then there’s the corvair – all years & models. no parking pawl in their a/t, but instead have a more robust parking brake.
also, if the parking brake handle works by applying the rear brakes, the rear brakes should be adjusted before adjusting the parking brake. in a lot of cases, adjusting the rear brakes will also tighten up/adjust the parking brake
What, nobody adjusts the blinker fluid levels anymore? Am I the last safe person on this planet?
I always check the blinker fluid! It’s basic maintenance that I do ever time I put the winter air in the tires 😉
Don’t forget to check your cross drilled stainless steel brake lines!
Muffler bearings are an assumed check at this point.
Muffler bearings are real. That’s a term used by Euro makes for exhaust hangers. I learned that the 3rd week I was working in an import auto parts store. A carer I had for 16 years….
yup, agreed, but with a different part. 2nd year turning wrenches at a datsun/nissan dealer, i was replacing under warranty the piping that connected the manifold and catalyst (the braided hose section was noisy). the p/n label also had the part’s name – ‘brg-muffler’. nobody believed me until i showed the label. made me think somebody probably made a tool and named it ‘sky hook’…
Get the brass muffler bearings and your problems are over!!
And those muffler bearings, gotta keep your ears tuned for the sound of ’em about to fail.
The blinker fluid I typically use is 80 proof
I’m still looking for chrome plated wood muffler bearings.
Year, make and model?
“being prepared to break”!!?? Homonyms strike again.
Good point. Popular among those who peddle clutches, too.
I’ll accept my lashings for that one. Updated and corrected now!
The problem with most old manual steering boxes is that no one checks and maintains the oil in them, Most of them took either a semifluid grease or 90 gear oil. I have also used SAE 250 gear oil in boxes that the seals tend to leak. I check the oil in all of my manual steering boxes once a year.
Yes! One of my pet peeves. Most of the classic cars I’ve purchased had dry steering boxes. Seems like nobody knows how to lubricate things anymore. I even lube the hinges (doors, hood, trunk, etc.) on modern cars. I prefer to use WD40. Penetrates well and displaces water.
Another problem with the steering boxes is that nobody really knows HOW to adjust them, or which lubricant to use. And then, if it even has lubricant.
I had a Rolls Royce Silver Ghost recently that was extremely hard to steer, as the “cam and gear” steering box was filled with grease. Once the top was removed, we scooped it out (with our hands, as the box was HUGE, then refilled with the appropriate gear oil, and the effort was reduced substantially. My Morgan has a similar design steering box, which was greatly improved with a simple addition of oil, and an adjustment that required using a “high spot” on center (steering linkage removed) and 1 lb.ft. of effort at the steering wheel to overcome. With the correct lubricant and the correct adjustment, the steering was much better… but not as good as the hard to find LHD Gemmer recurculating ball steering box, my holy grail… Sometimes, steering boxes just require some adjustment, and not total replacement. I have adjusted many, and replaced none, as they didn’t need replacement.
Most of the older cars that I work on get new shifter hardware and a clutch adjustment if it is mechanical, and not hydraulic. Some, with plastic bushings, get new heim jointed shift linkage.
Does anyone know how to adjust their chrome go faster?
Also Always add more accent lighting to gofaster.
Have barely scratched the surface. My small collection requires:
Valve adjustments, drum brake adjustment, hand brake adjustment, brake fluid flush at regular intervals (especially if it isn’t driven much), packing wheel bearings, lube the generator, chassis lubrication, replenish steering box lube if leaking, check SU carb dashpot damper fluid level and much shorter oil change intervals.
Interesting that you would use the picture of a Studebaker when mentioning the hood latch. Since acquiring my 1956 Studebaker Skyhawk, I have been told that faulty latches on the Studebakers have been the cause of hoods flying up while under way. Good choice of images!
Yeah, I been there with my ’53 and ’55 Studebakers. Driver error was the proximate cause but the ’53 perhaps was misaligned a bit. I added a Golden Hawk safety latch on my Sky Hawk and breathed easier.
The Citroen D model had a cable operated latch and a backup click-in-place latch on each front corner. Unfortunately the backup didn’t work that well as I found out “at speed”. The aluminum hood wrapped itself over the roof, but the safety minded French had anticipated that event and the hinges worked in such a way that the bottom of the hood went high enough that the (bozo) driver could still see the road ahead. I got a crappy replacement from a junk yard but always made sure that the cable operated latches were engaged after that mild disaster.
My dad never bought a pickup made by Dodge. The one time he test drove one, the hood flew up and wrapped over the cab. The dealer later told him there had been too much grease put on the hood latch. But it was too late to change dad’s mind…
Yea-that “Explanation” is Crap-
The general consensus is that tires should be replaced at 6 years, regardless of mileage (especially if exposed to sun). Rotating and closely inspecting tires is a must! Also, remember that tires have 2 sides, we tend to just walk around the car and look at what we can see….
I finally replaced my tires three years ago, the second replacement in 58 years of ownership. I got away with it but I don’t recommend it. There is something to be said for slow driving; the fun lasts longer and you save the adrenaline for other adventures.
Good point. Felt a wobble in a 1979 Dodge D100 when driving at 40 mph. Thought balance weight fell off. Just happened to feel backside of older tires and one had a bubble about to burst. Caught it just in time!
I have heard that tires should be replaced every 7-10 years. I pushed my last set to 10 years. Driving on the highway and started to wonder why the car was drifting from lane to lane. Checked the trees to see if the wind had picked up. (Old Beetle owner) Then the left rear tire blew. Two guys in a GTI were behind and saw what was happening. They immediately straddled the lanes and slowed everyone down to let me gain control and and get to the right shoulder. They set up my lawn chair for this pre- boomer. Had me sit in it and changed the tire. I still had to show them where the jack was and how to use it. I was soon on my way again. The point being that pushing tires to 10 years is probably to late. They may appear fine, however, looks don’t count in tire life.
If your door is sagging enough to need a door striker adjustment, then it is also no longer aligned with the rest of the body panels. Adjusting the striker is not the proper course of action. Rather, at the very least, the hinges should be adjusted instead so that the striker is aligned again. More drastic measures may involve rebuilding the hinges. I look at this way; if the door was aligned properly at the factory and the striker adjusted accordingly, there should be no need to ever adjust the striker. Adjusting the striker just makes a bad situation worse.
I agree. Why adjust it out of place, when it’s a good indicator for where the door should come back to after you fix or adjust the hinges?
A hydraulic jack can fix door sag.
B^)
4RENT IS A SMART GUY, TRY IT
We used to fix doors on worn out customers cars with a jack and 2×4. They loved it as we did not charge and the cars were not worth new hinges.
We hated fighting the doors working in the car.
I agree too. The hinges may need adjusting moreso than the striker.
Running out of things to write about?
For years I saved a classified advert (remember those?) from the SFO Chroniclein 1963 that someone dumped a good deal of cash to spoof the Bay Area:
Automobiles For Sale: “1956 Chevy Super-Sports; dual-louvered oil pans, chrome reversed dip-stick, four on the column,heavy-duty valve covers, full race wiper motor, etc. Best time: 13.99 and 78-mph at Freemont. Call xxx-xxxx” Didn’t seem worth the long-distance charges, but who knows… ?
If it was for an older Mercedes or Peugeot the four on the column might have applied!
Had a 1953 Rover 75 with a 4 on the tree – wish I still had it
Early ’60s Econoline vans had a four-on-the-tree option.
My 52 Dodge has a 4 on the column