Welding on a nut to remove a broken stud
About a year and a half ago, I wrote a series of articles describing techniques for removing stuck fasteners (part 1, part 2, part 3). In the reader comment section, a few people expressed surprise that I didn’t mention the technique of welding a nut onto a broken stud to give a regular surface for a wrench or a socket to bite when unscrewing it.
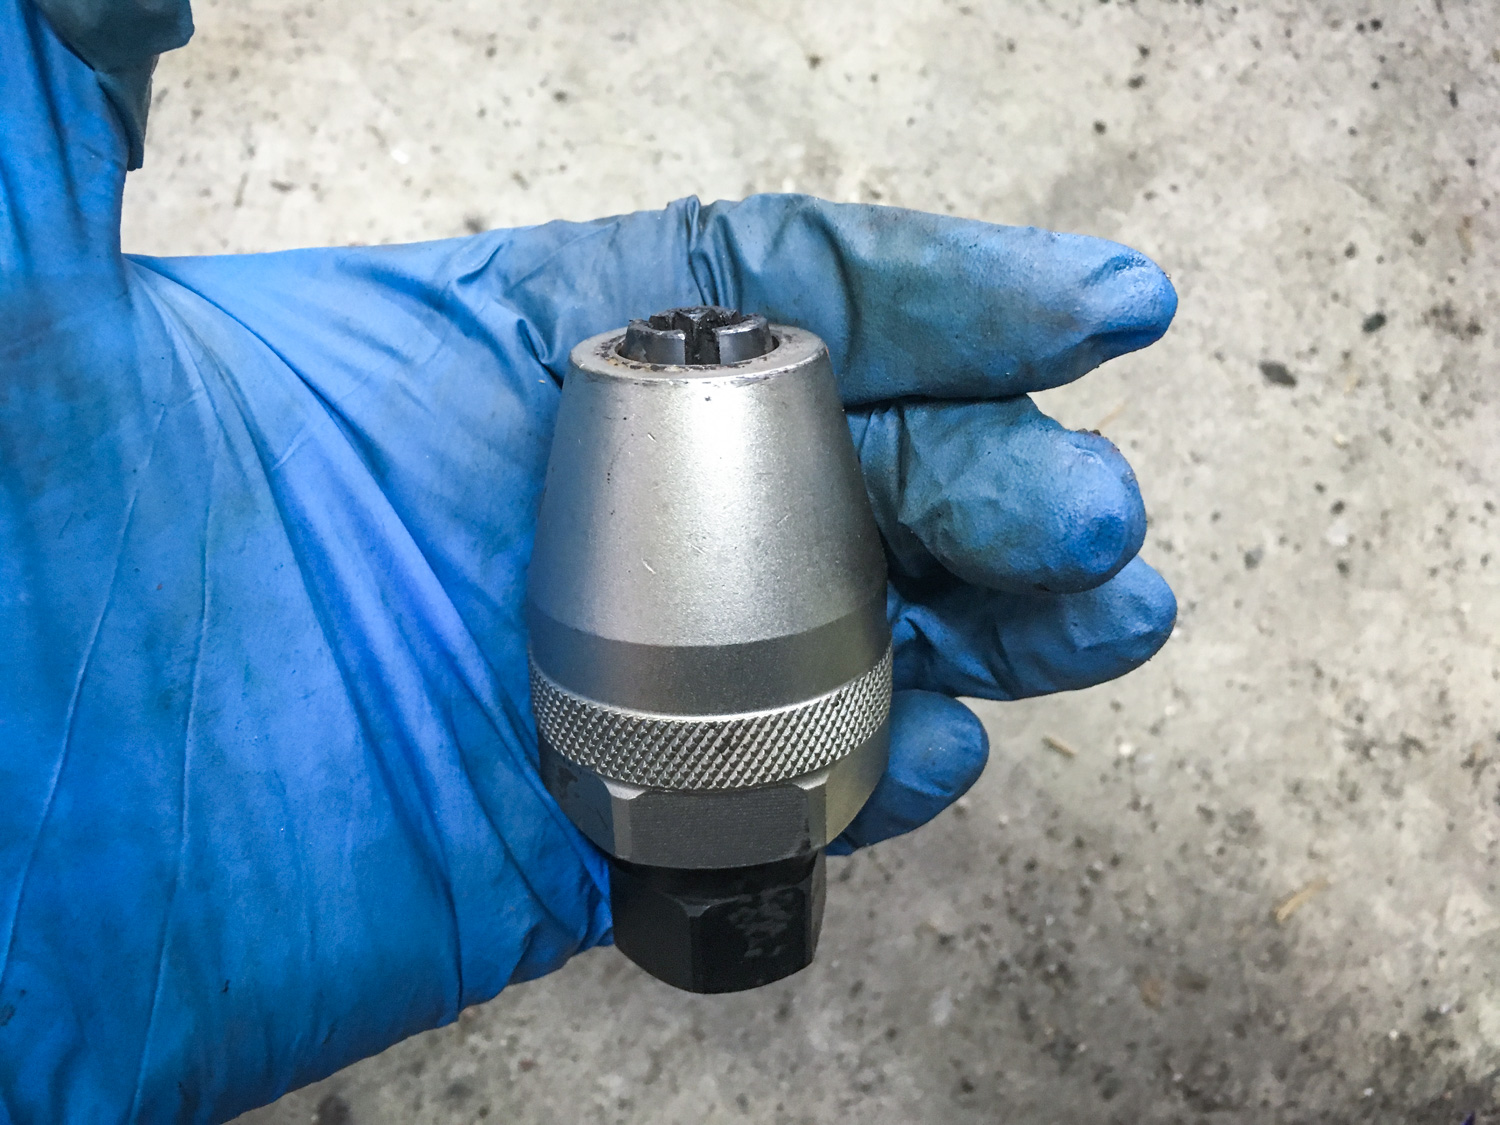
There were two reasons I excluded this. The first was that, if a long-enough piece of a stud was proud of the surface, I was always able to use my stud extractor, a device that uses jaws—sort of like a drill chuck—to tighten around the stud. A combination of the extractor, heat, and wax applied to the threads always did the trick. The other reason was that I didn’t own a welder.

Well, my welder-less existence finally came to an end last summer. I found a lightly-used Millermatic 141 wire-feed mig welder in Maine for a very good price. By good fortune, the seller was only about 20 miles from where my wife and I were about to spend our vacation. Even more coincidentally, the night before we left someone called me and agreed to buy a guitar amp I’d been trying to sell for months, but he said, “The only problem is that I’m up in New Hampshire. You aren’t heading up to New Hampshire anytime soon, are you?” Yahtzee! So I bundled up the amp and put it into the car, met the buyer on the way to Maine, sold him the amp for only $20 less than the purchase price of the Millermatic, and came home with the welder. If only all Craigslist adventures panned out this smoothly. But I digress.

When I bought the welder last August, I thought I’d immediately set upon the task of patching some of the rust areas on my three BMW 2002s, which range from trivial “yeah I know that when I grind this bubble it’s going to perforate” areas on the best car, to a hole in the floor of the worst car nearly big enough to stick my head through. I ordered the welding-related odds and ends that I needed, which included the cart, the auto-darkening welding helmet, and the gloves. And I bought a used cylinder and had it filled with gas. But decent welding requires knowledge and practice. I don’t have the first and I’ve never made the time for the second. So the Millermatic just sat in the garage, glowering at me. I literally hadn’t ever even turned it on. Until last week.
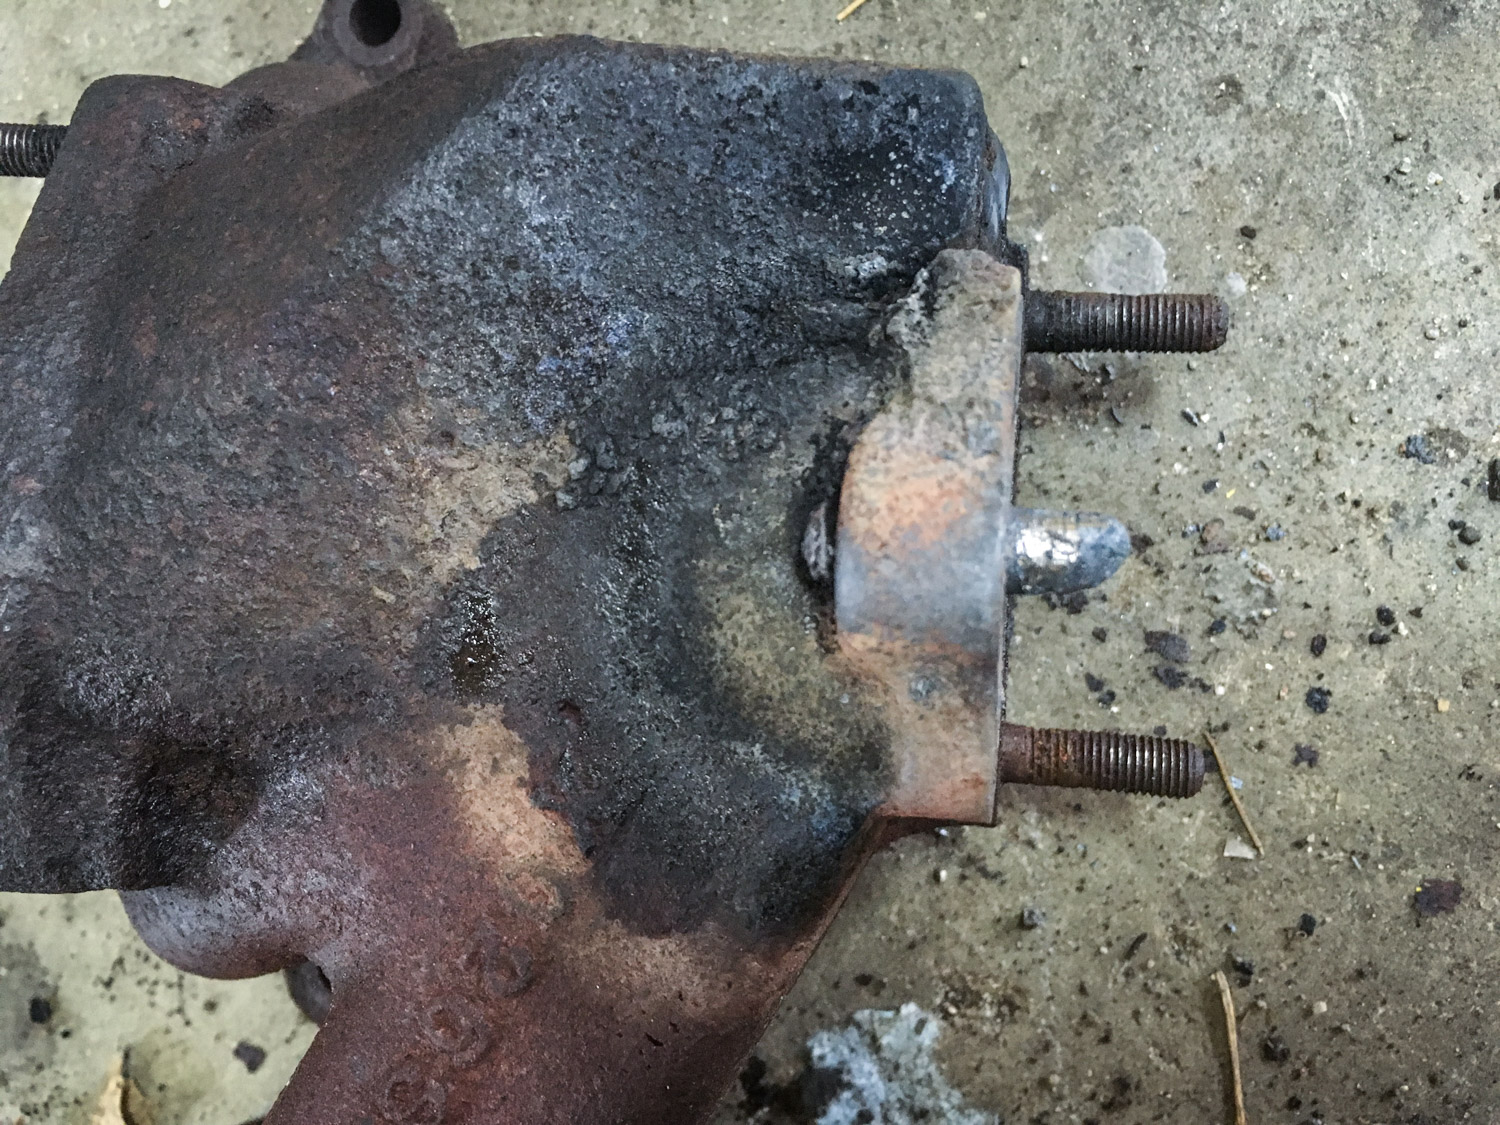
I was doing some odds and ends in preparation to button up the assembly of the engine for my Lotus Europa. As I began cleaning the exhaust manifold, I noticed that one of the three studs where it attaches to the downpipe had broken off when I removed it 5½ years ago. Fortunately, there was about a half an inch of the stud that was proud of the flange, so I didn’t expect to have any problem removing it.
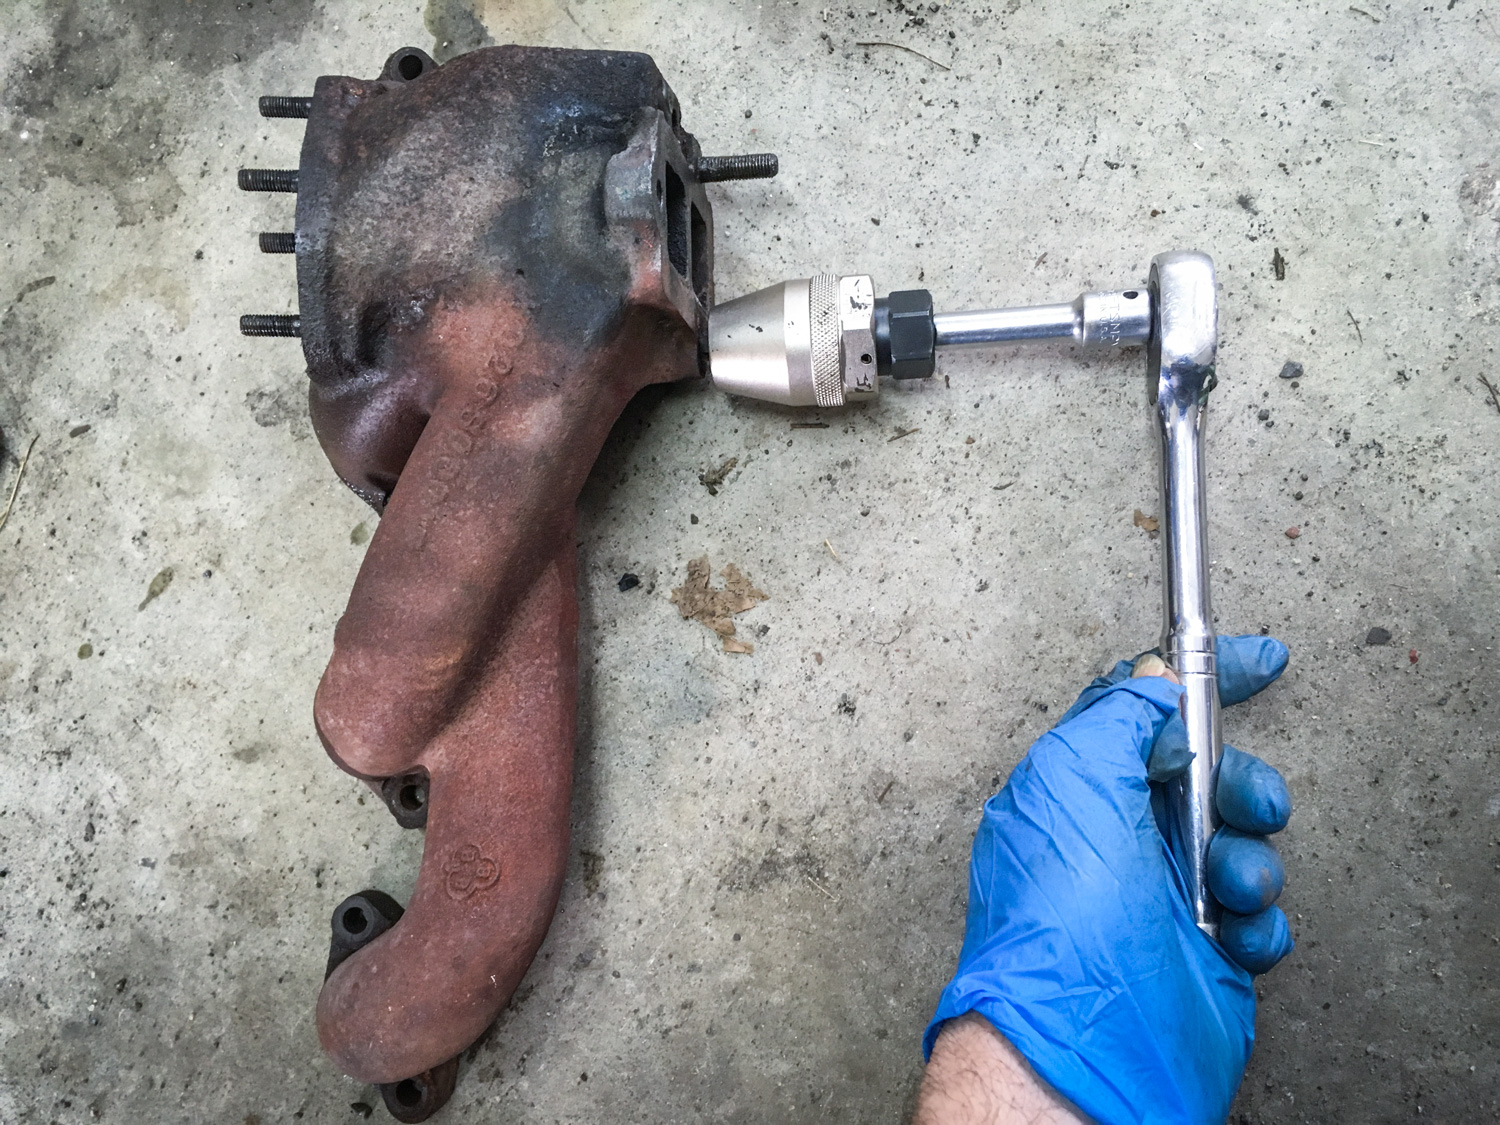
I heated up the stud with my MAPP gas torch, wicked some wax into the threads, put the stud extractor on the protruding part, and cranked down on it with a ratchet handle. Unfortunately, once the extractor tightened, it began rotating on the stud, shaving what remained of the threads off it.

I broke out the oxy-acetylene torch, heated up the area of the cast-iron manifold around the stud, used more wax, and again tried the extractor. And again I found that the stud was tighter than the extractor could bite into and turn. I then tried using the best Vise Grips that I have on the stubby stud, again employing heat and wax. After six attempts, all I succeeded in doing was making the protruding part of the stud smaller and smaller.

I thought I was going to need to employ the nuclear option—cutting the stud off flush with the manifold surface and drilling it out—which, without question, is one of my least-favorite automotive past times.
But then I began to hear the Millermatic welder in the corner talking trash. It said, “Yo, Lotus Boy, I got yer stuck stud right here.” (It actually said it in a down-east Maine accent, but New Jersey works better in print). I thought, “Hell, yes.” It isn’t a body panel where a bad weld by a neophyte could distort the metal. It’s a virtually indestructible cast-iron exhaust manifold with a broken stud on which my next level of attack would be to cut it off and drill it out. It was a perfect way for me to get my feet wet (or my hair on fire) with the welder.
So I plugged in the Millermatic for the first time. I verified that the wire feed mechanism worked. I opened the pressure regulator on the gas bottle to about 20 psi. I wire-brushed a section of the exhaust manifold so the ground clamp could make good electrical contact. The stud was already good and clean from where the extractor and the Vise Grips had slipped off. I found a new half-inch nut that was about the size of the stud, force-threaded it temporarily in place, cranked the amperage up on the welder, donned the welder’s mask, aimed the wire where the nut interfaced to the stud, and made my first shower of sparks. I let it cool, then put a half-inch wrench on the newly-welded nut to test its strength.

The nut immediately twisted right off the end of the stud. I adjusted both the amperage and wire feed rate up slightly, and then tried it again. The result was the same.
I tried a third time, this time also trying to weld the back of the nut onto the stud while being careful not to accidently weld the stud to the manifold. This time the nut held until I began applying the kind of torque needed to free the stud, but then it twisted off. I thought, “Well, so much for welding being easy.”
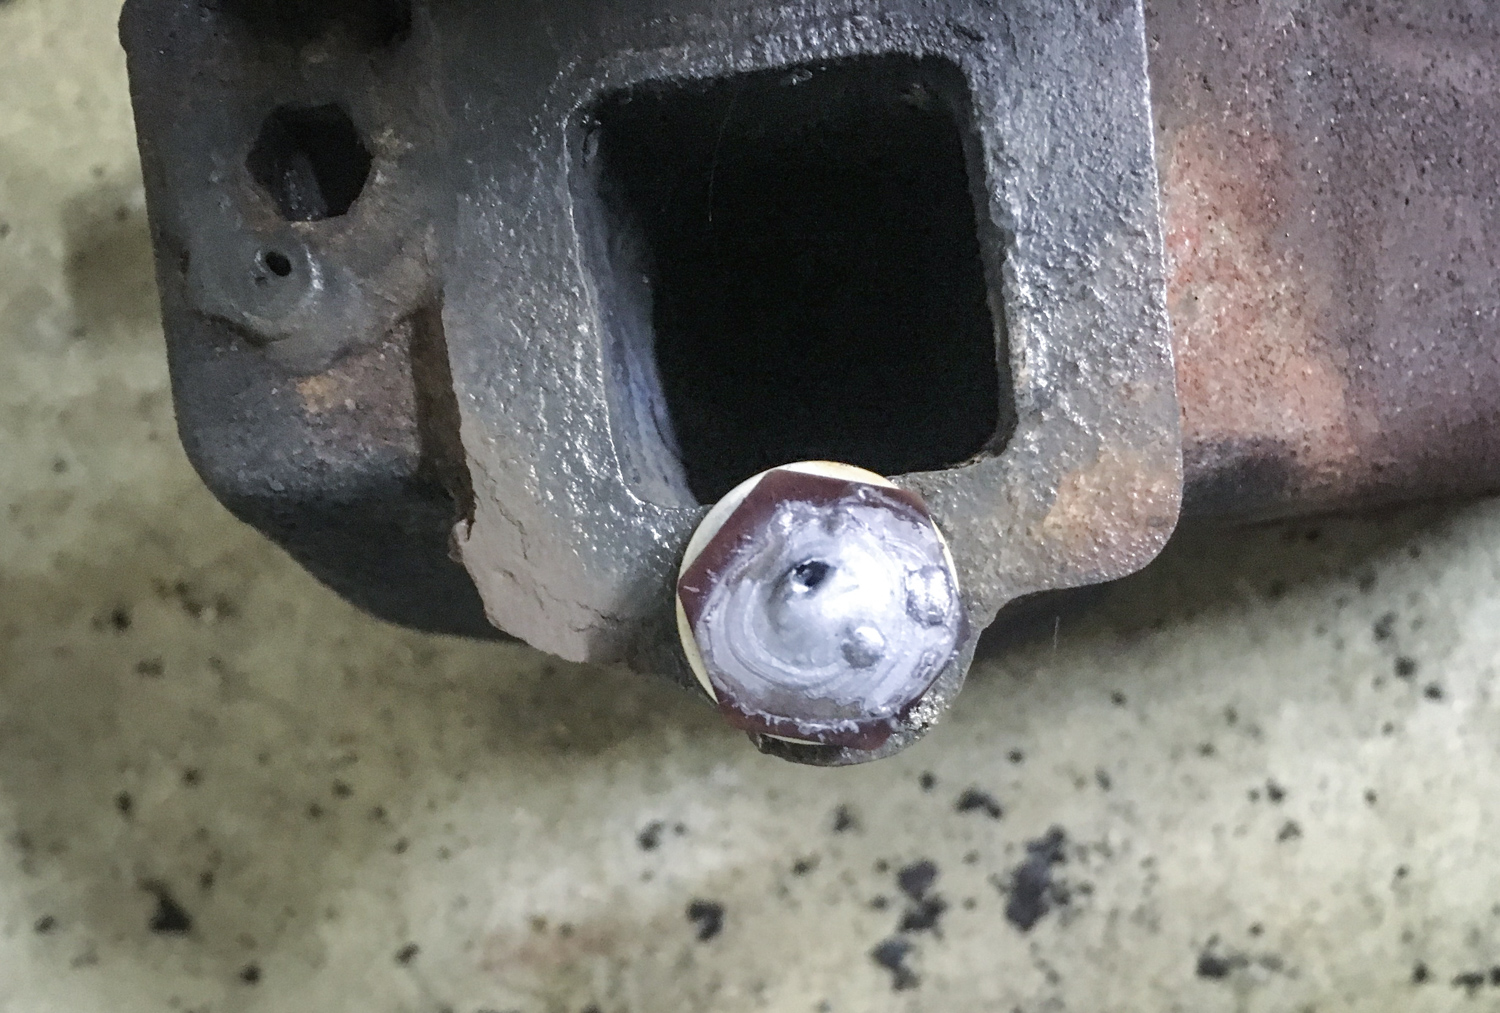
I called my friend Paul, who welds professionally, described what I had done, and asked him for advice. “Stop trying to use the welding wire like solder to fill in small gaps with a small nut,” he said. “Use a bigger nut and use the welding wire to fill the space between the nut and the stud. That’ll get more new metal welded around the stud, make a stronger bond between it and the nut, and give you a bigger nut to crank on.” It made perfect sense.
I first slid a washer over the stud to make sure I wasn’t accidentally welding the stud to the manifold. I then used a bigger nut, centered it as best I could over the stud, and welded away. The result was a thing of beauty, at least for newbie welder me.

It was pretty, but would it hold? For good measure, I again heated the area of the exhaust manifold around the stud with the torch. I put a wrench on the nut, held my breath, and leaned into it.
Out came the stud. I didn’t even need to put a dying strain on the wrench. The video can be seen here.
To reiterate some things that I said in the earlier pieces, there are several schools of thought about how heat loosens stuck fasteners. One is that metal expands when it’s heated, or more accurately, that the thing you’re directly heating expands at a different rate than the surrounding metal. This school of thought has you heating nuts on studs because they expand relative to the stud and thus loosen their death grip, and you heat metal surrounding a stud if the goal is to get the stud out. Other things I’ve read say that the differential expansion is minimal, and the important thing is that the heat, along with wax or penetrating oil, is breaking the bond of corrosion in the threads. Lastly, there’s a meme going around showing a stuck nut, a blowtorch, and the caption, “Can’t be tight if it’s liquid.” When I’ve had press-fit-in studs snap off, getting them so red hot that they’re just on this side of melting is advantageous because you can just tap them with a punch and out they come. However, if the goal is unthreading a threaded part, melting it will likely damage the surrounding threads.
I’ve also read that one of the advantages of the weld-on-the-nut technique is that the act of welding passes an electric current through the bolt that’s high enough to melt metal, and all that current helps break the bond of corrosion. Whether that was the case here, or whether it was the cumulative effect of multiple heat cycles, wax, the current from the welder, the big nut, and the wrench, I don’t know. Sometimes you never do. But it’s cool to finally have this arrow in my “stuckness” quiver.
Lastly, I’ve read (and others have commented on my original posts) that if the stud is broken off below the surface of the hole and there’s nothing to grab onto, the trick is to put a washer over the end of the hole, wire-feed-weld into it, fill up the little cup with melted welding wire, weld a nut onto the little mound, and then unscrew it. I wouldn’t want to tempt The Automotive Powers That Be by saying that I look forward to the opportunity to do this, but I feel prepared.
Thanks for your patience, Millermatic. I’m sure you saw the Lotus and knew I’d ask for your help eventually.
***
Rob Siegel has been writing the column The Hack Mechanic™ for BMW CCA Roundel magazine for 30 years. His most recent book, Just Needs a Recharge: The Hack Mechanic™ Guide to Vintage Air Conditioning, is available on Amazon (as are his previous books). You can also order personally inscribed copies here.


Welding on a nut to remove a broken stud can be done by using a welder to attach a nut to the stud. The heat from the welding will cause the stud to expand and break the bond between the stud and the nut. The nut can then be removed by unscrewing it. If you want to remove welding and see more Cutter by Lincoln plasma cutter. https://gruporogu.com.mx/cortadoras-de-plasma-lincoln/